Growing Medlar Trees: A Gardener's Guide to Success
Growing Medlar
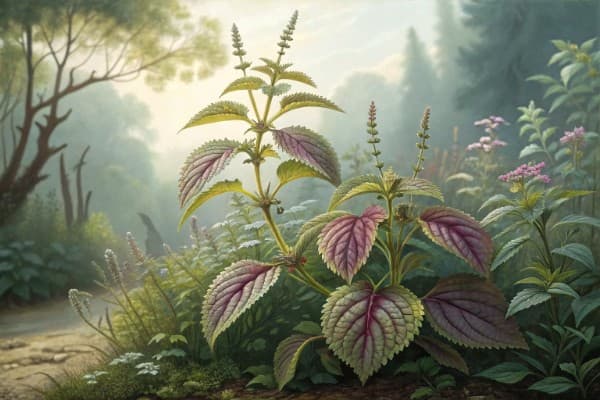
Growing medlar puts an ancient, quirky fruit tree in your own backyard, producing unusual fruits that thrive without fuss. Growing medlar requires full sun, well-drained loamy soil, and patience—fruit ripens after a touch of frost. Read on, plant confidently, and savor a medieval treat revived for modern gardeners.
Table of Contents
- Growing Medlar for flavor, history, and low-maintenance elegance
- Climate, chill, and site
- Rootstocks that make sense
- Buying guide: bare-root vs container
- Planting method I trust
- Training and pruning that actually works
- Water and nutrition
- Flowering, pollination, and fruit set
- Harvest and the art of bletting
- Pests and diseases I actually see
Cheatsheet: Medlar Tree Growing for Abundant Yields
🌱 Site & Soil
Sunny, sheltered spot. Well-drained, fertile loam. pH 6.0–7.5. Avoid soggy or shallow soils.
🌡️ Planting & Spacing
- Plant bare-root November–March, or potted anytime
- Space 12–16 ft (3.5–5 m) apart
- Plant crown at soil level
💧 Water & Feed
- Water young trees weekly, taper as established
- Mulch yearly; apply balanced fertilizer in spring
✂️ Pruning & Care
- Prune in late winter to open center & remove crossing branches
- Remove suckers at base
- Thin heavy fruit sets to reduce branch breakage
🐝 Pollination & Yield
Self-fertile. Expect up to 80 lbs (36 kg) fruit/tree yearly by year 5.
🍎 Harvest & Storage
- Harvest hard fruit October–November, after first frost (32°F/0°C) boosts flavor
- Blet (ripen) indoors at 50–60°F (10–16°C) 2–4 weeks—fruit softens, becomes edible
- Use in desserts, preserves, or fresh for Vitamin C & fiber
🛠️ Tools and Products You'll Need
- Spade, fork
- Secateurs, pruning saw
- Mulch, compost, fertilizer
- Watering can or hose
- Gloves
🌟 Benefits
Rich in antioxidants & vitamin C. Fruit stores 2+ months. Drought-tolerant once established. Minimal pests/diseases.
Medlar sapling, mulch, compost, fertilizer, gloves
Spade, fork, secateurs, watering can
- Choose sunny, wind-protected spot with well-drained soil (pH 6–7.5)
- Dig hole 2x width of root ball. Amend soil with compost
- Plant tree at original soil level. Firm soil, water deeply
- Mulch around base, leaving trunk clear
- Water weekly for first year
- Prune annually in late winter to shape and remove dead wood
- Harvest when fruit hard but brown. Blet indoors until soft
Growing Medlar for flavor, history, and low-maintenance elegance
I plant medlars for the taste and the stories. The fruit ripens into spiced apple-date velvet, and the tree asks for less fuss than most pomes.
Mespilus germanica carries deep roots in European orchards. Shakespeare ribbed it, monks preserved it, and modern cooks rediscover it every winter.
"Fruit is edible only after bletting." Source: Royal Horticultural Society
"A small, slow-growing tree, long cultivated across Europe." Source: Kew Science, Plants of the World Online
Climate, chill, and site
Medlar thrives in USDA Zones 5 to 8 and handles cold snaps better than pear or quince in my plots. Late blossom sidesteps spring frost more often than not.
I give it full sun and a wind-tolerant spot. Cold air drains away, so no frost pockets if I can help it.
I track chill hours around 300 to 500 as a comfortable band. Trees flower and set reliably in that range in my temperate sites.
Soil, texture, and pH
Loose loam with sharp drainage grows the best wood and clean fruit. I aim for pH 6.0 to 7.5, though the species tolerates a light chalky tilt.
Heavy clay still works if I raise the bed 8 inches 20 cm and mulch. Water must not pond in winter.
Spacing and size
Mature spread runs 10 to 20 feet 3 to 6 m depending on rootstock and pruning. I plant at 12 to 15 feet 3.5 to 4.5 m for airflow.
"Height and spread to 20 feet with a rounded crown." Source: NC State Extension Plant Database
Rootstocks that make sense
I buy grafted trees and match the rootstock to the space and soil. It pays off for canopy control and fruit size.
- Quince A: semi-dwarf, dependable on loam, 10 to 13 ft 3 to 4 m, early bearing.
- Quince BA29: like Quince A with a shade more vigor, good in cooler sites.
- Hawthorn seedlings: tough on thin or limey soils, full vigor to 15 to 20 ft 4.5 to 6 m.
- Seedling medlar: very hardy, slower to bear, largest canopy.
Buying guide: bare-root vs container
Bare-root trees ship in late fall to early spring and establish fast. Container trees plant year-round if soil is workable.
I look for a straight scion, a clean graft union, and fibrous roots. A one to two year whip wakes up quickly and trains easily.
Planting method I trust
- Soak roots 30 minutes, then prune only torn ends.
- Dig a saucer-shaped hole twice as wide as the root mass, no deeper.
- Set the graft 2 inches 5 cm above final soil line.
- Backfill with native soil, water in, and top with 2 to 3 inches 5 to 8 cm of mulch, keeping the trunk clear.
- Stake on windy sites for one season with a soft tie.
Training and pruning that actually works
I train to an open center or a short central leader, depending on space. An open bowl ripens fruit evenly and makes picking easy.
Medlar fruits on short spurs on older wood. Winter I remove dead and crossing growth, summer I tip back watershoots to build spurs.
I keep scaffold angles wide using spreaders the first two summers. Clean cuts, no stubby nubs.
Water and nutrition
Year one, I deep soak weekly in dry spells, about 5 gallons 19 L per tree. After establishment, I water only through heat waves.
Feed lightly. I broadcast a balanced organic fertilizer at bud swell, 0.25 to 0.5 lb 110 to 225 g of N per mature tree per season, and top up compost under the dripline.
Mulch with ramial wood chips or leaf mold to steady moisture and feed the soil web. Keep mulch 3 inches 8 cm off the trunk to avoid collar rot.
Flowering, pollination, and fruit set
Medlar is self-fertile, though a second tree bumps the crop. I see the bees hit it hard in late spring once nights stay above 45 F 7 C.
Heavy fruit load benefits from thinning to one fruit per cluster. The remaining fruit grows larger and bletts more evenly.
"Self-fertile with late flowers that escape frost in many regions." Source: Royal Horticultural Society
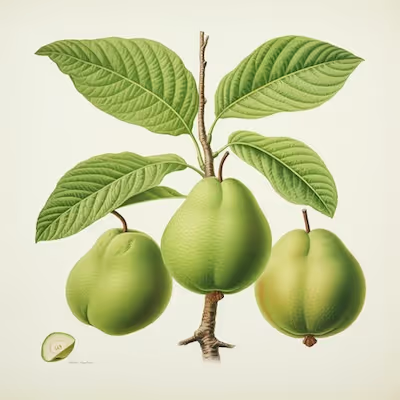
Harvest and the art of bletting
I pick in late autumn after a light frost, when the skin turns russet and the calyx loosens. The fruit feels rock-hard on the tree and that is perfect.
To blet, I lay fruit calyx-down in a single layer at 50 to 59 F 10 to 15 C with good airflow. In 1 to 3 weeks the flesh softens to a spoonable paste, color deepens, and flavors bloom.
Fridge slows the process to hold peak texture. I avoid stacked trays, which invite mold.
Pests and diseases I actually see
Medlar stays fairly clean for me compared to apples. Still, a few visitors show up.
- Fire blight: rare but possible in warm, wet bloom periods; prune out strikes 8 inches 20 cm below the canker, sterilizing between cuts.
- Woolly aphid: brush off with a stiff spray, encourage lacewings, and avoid high-nitrogen feeds.
- Pear leaf sawfly and caterpillars: hand-pick or use Bt when larvae are small.
- Scab and leaf spot: improve airflow, thin interior shoots, and avoid overhead irrigation.
- Canker: keep pruning cuts small and timed for dry weather.
Top medlar cultivars worth planting
- Nottingham: compact tree, reliable crop, rich dessert flavor. My go-to for small gardens.
- Royal: larger fruit, handsome form, great for jelly and cheese.
- Dutch: vigorous, sets well in cooler summers, slightly tarter profile.
- Breda Giant: big fruit, needs thinning, best for baking.
Container growing that succeeds
Use a 25 to 30 gallon 95 to 115 L container with drainage. Set on Quince rootstock to keep vigor in check.
Fill with a coarse, peat-free potting mix with 20 percent sharp grit. Water deeply, let the top 2 inches 5 cm dry, and feed with slow-release pellets in spring.
Companions and understory
I underplant with alpine strawberries, spring bulbs, and chives. They draw pollinators and take the shade under the canopy.
A living mulch of clover builds nitrogen quietly. It also softens the look around the trunk circle.
Yields and lifespan
A mature tree gives me 20 to 40 pounds 9 to 18 kg in a fair year. With thinning and a warm fall, flavor jumps.
Trees live decades with steady care. Structure early and they reward you every November.
Kitchen uses that shine
I spoon bletted pulp straight over yogurt or pancakes. For savory plates, I whisk it into pan sauces with cider and thyme.
- Medlar cheese: fruit butter set firm with sugar and lemon.
- Medlar jelly: crystal-clear, clove friendly, and a match for roast meats.
- Baked medlars: split, splash of port, low oven at 300 F 150 C for 25 minutes.
Medlar vs quince vs pear
Quince perfumes a room and stays firm when cooked, pear brings juice and snap, medlar brings spice and silk after bletting. Plant all three if you like diversity and pollinator traffic.
Tools and supplies I actually use
- Bypass pruners and a folding saw with a narrow kerf.
- Biodegradable tie tape and a single sturdy stake for year one.
- Coarse wood chip mulch and a soil knife for weeding under mulch.
- Sticky cards for monitoring aphids and sawfly activity.
Troubleshooting quick hits
- Fruit refuses to blet: pick later, or hold at slightly warmer room temp 64 to 68 F 18 to 20 C with airflow.
- Drop in midsummer: thin earlier and water deeply through dry spells.
- Small fruit: reduce crop load and feed modestly at bud swell.
- Dieback on tips: check for canker and adjust pruning to dry days.
- Poor set in a cool spring: add a second tree or graft a different cultivar onto a limb to improve cross-pollination.
Seasonal calendar
- Winter: structural pruning, mulch refresh, soil test.
- Early spring: plant bare-root, light feed, install pheromone traps if you monitor moths.
- Late spring: thin fruitlets, water in dry weeks, watch for blight after rains.
- Summer: tip back vigorous shoots and maintain mulches.
- Autumn: harvest after first frost near 32 F 0 C and start bletting; clean fallen leaves.
Field notes from my rows
A May cold snap at 28 F minus 2 C crisped pear blossom, yet medlar shrugged and set a full crop. The late bloom saved the season.
On Quince A I keep trees at shoulder height for easy picking. My oldest tree still throws consistent fruit at year fifteen with minimal spray.
Credible references I trust for medlar
- Royal Horticultural Society: cultivation, self-fertility, and harvest advice.
- Kew Science, Plants of the World Online: taxonomy and history.
- NC State Extension Plant Database: size, habit, and cultural notes.
- Oxford Companion to Food: culinary heritage and classic preparations.
Why Growing Medlar fits modern gardens
It is small, handsome, and productive with little spray or fuss. The fruit tastes like winter in a spoon.
Plant one, learn the quiet patience of bletting, and you get a crop that feels both ancient and fresh. That is a good trade for a few square meters of sun.
Frequently Asked Questions about Growing Medlar Trees
What's the ideal soil condition for medlar trees?
Medlars relish soil that drains freely yet holds onto enough moisture to keep them content. They'll tolerate most soil types, but loamy earth with plenty of organic matter keeps them thriving beautifully. Keep your medlar's roots comfortable and it's bound to produce generously.
Where should I plant my medlar tree for best results?
Opt for a sunny, sheltered spot in your garden. These curious fruit trees appreciate full sun and protection from harsh winds. Give them space to spread out and soak up rays—your medlar's fruits ripen deliciously under ample sunlight.
How often should a medlar tree be watered?
Younger medlar trees demand consistent watering during their initial seasons in the ground. Once mature, these hardy trees need supplemental watering only during prolonged dry spells. Keep the soil evenly moist without saturating—it'll reward you with flavorful fruit.
Do medlars need pruning, and if so, when?
Indeed, light pruning maintains vigor and encourages fruitful bounty. Perform annual pruning in late winter or early spring, cutting away dead or tangled branches. Keeping them open and airy ensures that sunlight reaches every fruit-bearing branch.
Are medlar trees susceptible to pests or diseases?
While medlar trees prove fairly resilient, watchful eyes stay alert for occasional foes like apple scab and leaf spot. Swiftly removing infected foliage and practicing diligent garden hygiene usually staves off serious trouble.
How can I tell when medlar fruits are ready to harvest?
Medlar fruits require bletting—a natural ripening stage after the initial frost—to become deliciously edible. Wait until the fruit softens slightly and takes on a darker hue, signaling that the sugars have sweetly mellowed. Patience pays off here; ripe medlars are utterly delightful.
Growing Medlar rewards both patience and curiosity. These trees thrive on a bit of neglect, asking mainly for well-drained soil, sunlight, and the occasional pruning.
Give them space and time, and they’ll pay you back with unusual, honeyed fruit that ripen long after the harvest rush is done. Don’t be surprised if their twisted branches and late-season bounty spark neighborhood curiosity.
You don’t need expensive gear—just a willingness to wait and taste something different. If you’re interested in adding more rare fruit to your garden, consider planting a loquat alongside your medlar for a truly unique home orchard.
In the world of fruit, growing medlar is for those who appreciate slow food, deep flavor, and a sense of history rooted right in your backyard. Give it a try. The rewards are old-fashioned—and unforgettable.