Growing Dragon Tongue Bush Beans: A Gardener's Simple Guide
Growing Dragon Tongue Bush Beans
Growing Dragon Tongue Bush Beans delivers crisp, strikingly patterned pods that elevate garden plots from ordinary to extraordinary. With full sun, well-draining soil, and consistent watering, you'll harvest tender beans in about 55 days. Plant seeds directly outdoors after frost danger passes—then savor harvesting beans with flavor as enticing as their exotic appearance. Read on to cultivate your own impressive crop.
Cheatsheet: Dragon Tongue Bean Simple Grow Guide
🌱 Best Planting Window
Sow after frost, soil 65–85°F (18–29°C). Plant mid-spring through midsummer. 60–75 days to harvest.
🛠️ Tools and Products You'll Need
- Dragon Tongue bean seeds
- Compost or aged manure
- Hand trowel
- Watering can or hose
- Mulch (straw, leaf, or compost)
🌞 Location & Soil
Full sun (6+ hrs). Loose, well-drained soil, pH 6.0–7.0. Avoid waterlogged beds. Enrich with compost.
🌾 Sowing Steps
- Sow seeds 1" (2.5 cm) deep, 3–4" (8–10 cm) apart, rows 18–24" (45–60 cm) apart.
- Gently water. Keep moist until sprouted (7–10 days).
- Thin to strongest seedling per spot.
- Mulch to hold moisture and block weeds.
💧 Water & Care
Deep water 1x weekly. No overhead watering. Avoid wetting leaves to prevent disease. Add compost midseason.
🍃 Harvest & Yield
Pick pods when 5–6" (13–15 cm), streaked, and firm. Harvest every 2–3 days for max yield (20–30 pods/plant).
🥗 Nutrition & Self-Sufficiency
High in fiber, vitamin C, and folate. Great for fresh eating, pickling, canning. Supports home food security.
🐞 Common Problems & Fixes
- Avoid overwatering—causes root rot.
- Pick often to prevent tough pods.
- Monitor aphids/bean beetles; remove by hand or use neem spray.
-
Growing Dragon Tongue Bush Beans: A Gardener’s Simple Guide
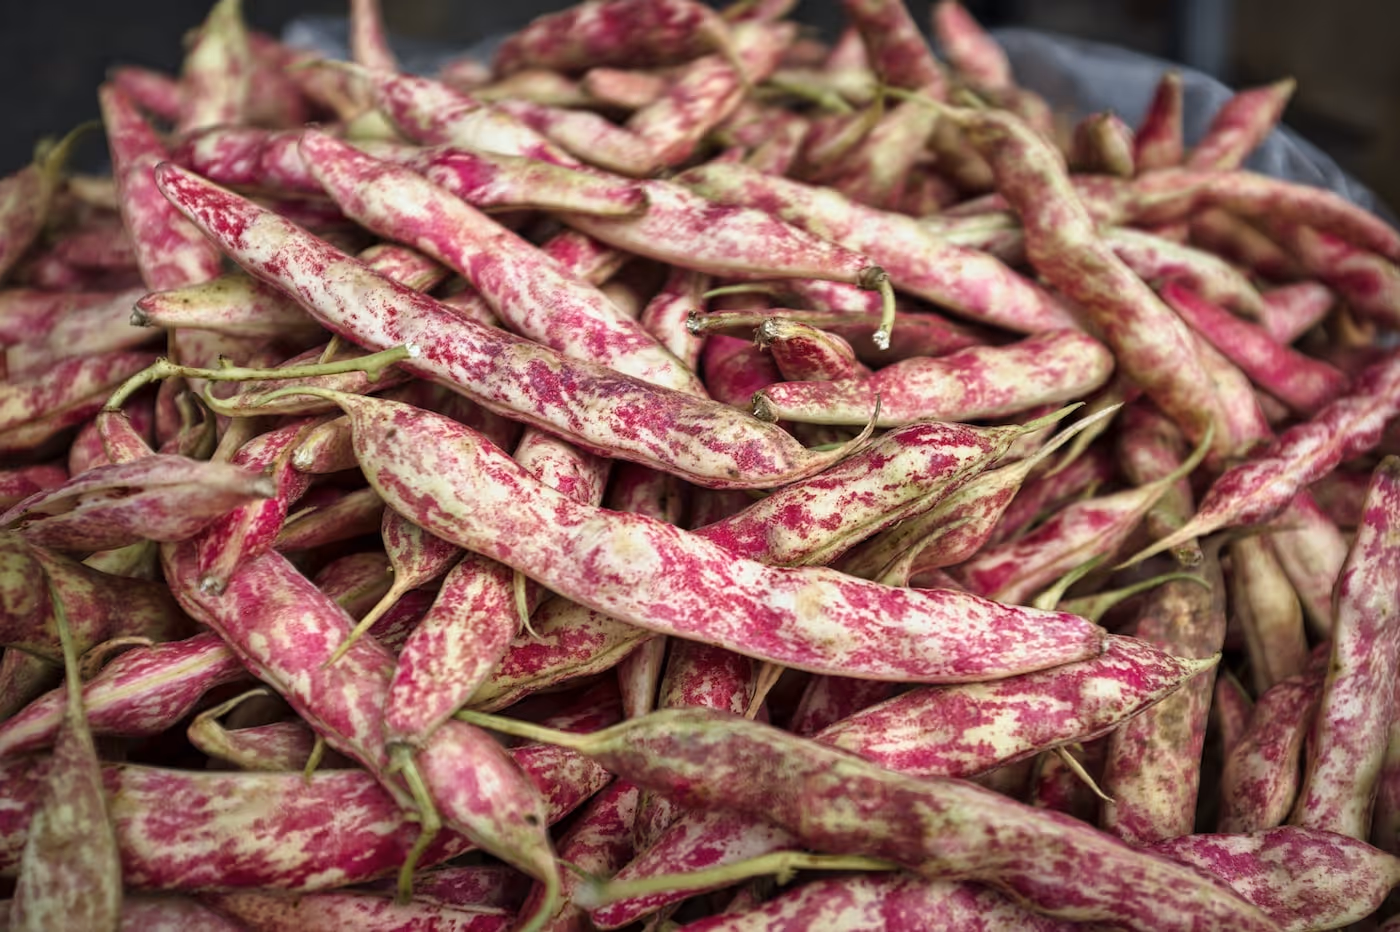
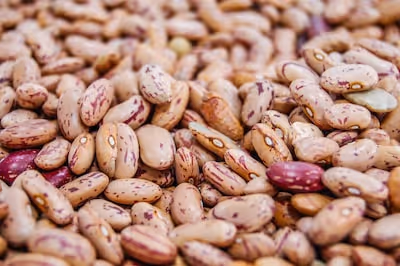
I grow Growing Dragon Tongue Bush Beans for the flavor first and the spectacle second. Yellow pods splashed with purple catch the eye, then snap tender and sweet right off the plant.
What makes Dragon Tongue different
Dragon Tongue is a Dutch heirloom bush bean that stays compact, about 18 to 24 inches tall, so it fits tight spaces and containers. It reaches snap stage in 55 to 60 days, with shelling and dry stage possible if you let pods mature longer.
Pick at 5 to 7 inches long, 12 to 18 cm, for peak texture and color. The purple streaks fade when cooked, so I eat a few raw while harvesting to get the full show.
Timing, climate, and soil temperature
Sow after the last frost once soil holds 60 F, 16 C, and steady warmth speeds germination to 7 to 10 days. Beans stall in cold soils, and they drop blossoms in extreme heat above 90 F, 32 C, so use shade cloth during heat waves if needed.
In short-season areas, sow successive plantings every 14 to 21 days until midsummer. In hot-summer zones, plant early spring and again for a late crop as nights cool.
Soil preparation and fertility
Target pH 6.2 to 6.8 with 3 to 5 percent organic matter for good tilth and drainage. Mix in finished compost at 0.5 to 1 inch deep, 1.2 to 2.5 cm, and avoid fresh manure to prevent lush foliage with weak pod set.
Beans fix nitrogen with Rhizobium bacteria, so I dust seed with inoculant if the bed has not grown legumes in a few years. Skip high nitrogen fertilizers and, if soil tests low, side-dress lightly with a balanced product at first bloom.
Planting layout that works
- Sow seeds 1 inch deep, 2.5 cm, and 3 to 4 inches apart, 7.5 to 10 cm, in rows 18 to 24 inches apart, 45 to 60 cm.
- For small beds, run double rows 8 inches apart, 20 cm, with drip tape centered between the two lines.
- Thin only to remove crowded seedlings and keep spacing even for airflow.
- Stagger sowings for a steady harvest window rather than a single glut.
Watering, mulch, and feeding
Keep moisture consistent at roughly 1 inch per week, 25 mm, from rain and irrigation. I mulch with clean straw or shredded leaves once seedlings hit 4 inches tall, 10 cm, to steady soil moisture and shade weed seeds.
In lean soils, side-dress at first bloom with a light hand using a low nitrogen fertilizer, for example 5-10-10 at 0.5 cup per 10 feet of row, then water it in. Overfeeding grows leaves at the expense of pods.
Support and cultivation
Bush plants usually stand on their own, yet heavy rain can flatten them. I string a low twine, 8 inches high, 20 cm, along the row to catch any leaners.
Weed early while roots are shallow. A sharp hoe on dry mornings saves time and keeps soil structure intact.
Pests and diseases I actually see
Mexican bean beetle will skeletonize leaves in midseason. I scout undersides for yellow egg clusters, crush them, and use floating row cover until bloom to block adults without sprays.
Watch for aphids and thrips during hot spells and rinse them off with a hard water jet. Rotate beds every 3 years to reduce anthracnose, rust, and bacterial blight, and avoid handling plants when foliage is wet.
Harvest rhythm and handling
Pick every 2 to 3 days as pods size up to keep plants producing. Use two hands, one to support the stem, and harvest into a shallow tray so pods do not bruise and sweat.
For shelling beans, wait until pods fill and color dulls. For dry beans, leave pods to rattle on the plant, then finish-dry indoors with airflow until seeds break clean under a fingernail.
Yields that pay back the bed space
Well-grown bush beans can yield about 0.5 to 1.0 pound per foot of row, 0.75 to 1.5 kg per 3 meters, under steady moisture and frequent picking. From a 10-foot bed, I average 6 to 8 pounds, 2.7 to 3.6 kg, across two sowings.
Consistent harvests come from consistent picking. Skip one round and plants shift energy into seed, which throttles new pods.
Flavor, kitchen use, and storage
I like them raw with flaky salt while I move down the row, then in the kitchen they shine lightly sautéed with garlic and lemon zest. For the freezer, blanch 2 minutes, chill, drain very dry, then pack in flat layers for fast thawing.
Refrigerate fresh pods unwashed in a perforated bag up to 5 days. Quality drops fast if pods get wet and crowded, so keep them dry and cool.
Troubleshooting quick list
- Seed rots: soil too cold or waterlogged, wait for 60 F soil, 16 C, and improve drainage.
- Flowers drop: heat stress above 90 F, 32 C, add afternoon shade and keep soil evenly moist.
- Curled, puckered leaves: likely aphids, blast with water and improve airflow.
- Rusty spots on pods: rust or blight, remove affected pods, rotate, and avoid overhead irrigation.
Comparisons and smart alternatives
- Dragon Tongue: heirloom, tender snap at 55 to 60 days, great fresh flavor, color fades with cooking.
- Provider: reliable early bush bean for cool soils at 50 to 55 days, strong yields, good for first sowing.
- Rocdor or Gold Rush: wax types with bright yellow pods that hold color better when cooked, balanced sweetness.
- Royal Burgundy: purple pods that stay visible in the foliage, turns green when cooked, handles cool spells well.
Buying guide and kit list
Choose fresh seed packed for the current season from reputable suppliers, and look for clear days-to-maturity and lot testing notes. If you have not grown legumes in that bed lately, add a packet of bean inoculant to improve nodulation.
- Essentials: quality seed, inoculant, light mulch, drip line or soaker hose, floating row cover for early protection.
- Nice to have: moisture meter, shade cloth for heat waves, handheld harvest tote with ventilation.
Succession plan I actually follow
Sowing 2 rows in late spring, then again 2 to 3 weeks later, gives steady harvests without a glut. I replant the first row as soon as yields dip and soil warms after a light compost top-up.
Pull spent plants and compost the residue if disease free. If disease showed up, send plants to the trash and cleanse tools with a 10 percent bleach dip.
Soil testing and numbers that matter
Before the season, I run a soil test and correct pH into the mid 6s for nutrient availability. Beans need good levels of calcium, boron, and potassium for strong pods, and compost typically covers those needs without heavy fertilizer.
Keep salt levels low in container mixes. Elevated EC burns bean roots faster than many crops.
Container growing notes
Use at least a 10 to 15 gallon pot, 38 to 57 liters, filled with a peat-free, compost-rich mix that drains well. Plant 6 to 8 seeds per container, thin to 4 or 5, and water deeply when the top inch, 2.5 cm, dries.
Feed lightly with a low nitrogen organic liquid every 14 days after bloom. Rotate containers to even out sun exposure and plant height.
Field notes from a hot, dry year
In a 100 F, 38 C, spell, shade from 2 to 5 p.m. kept flowers from aborting and pods stayed tender. Morning irrigation, not evening, reduced mildew on dense foliage.
A narrow double row with a white-on-black mulch strip delivered cleaner pods after storms. Clean pods save time in the kitchen and hold longer in the fridge.
Quick reference for Growing Dragon Tongue Bush Beans
- Soil temp to sow: 60 to 85 F, 16 to 29 C
- Depth: 1 inch, 2.5 cm
- Spacing: 3 to 4 inches in row, 7.5 to 10 cm, rows 18 to 24 inches, 45 to 60 cm
- Water: 1 inch per week, 25 mm, more in sand
- Pick: every 2 to 3 days at 5 to 7 inches, 12 to 18 cm
Credible sources I trust for beans
USDA Plant Hardiness Zone Map for timing by region, and general cultural guidance from land-grant universities. I cross-check with seed companies that publish trial data for snap beans.
- Cornell Cooperative Extension, Growing Guide for Beans
- University of Minnesota Extension, Vegetables: Beans
- Oregon State University Extension, Vegetable Gardening Series: Snap Beans
- Royal Horticultural Society, Beans advice and pest profiles
Frequently Asked Questions about Growing Dragon Tongue Bush Beans
What soil do Dragon Tongue beans prefer?
Dragon Tongue beans thrive in well-draining, fertile soil enriched with organic matter. Aim for a slightly acidic to neutral soil pH range between 6.0 and 7.0.
How much sunlight is best for healthy growth?
Provide these beans with a minimum of 6 to 8 hours of direct sunlight daily. Full sun exposure promotes abundant pod production and helps maintain plant vigor.
When and how should I plant these bean seeds?
Plant seeds directly into the soil once temperatures consistently reach at least 60°F (16°C). Sow seeds about 1 inch (2.5 cm) deep, spacing them approximately 4 inches (10 cm) apart, leaving rows about 18–24 inches (45–60 cm) between them.
How should I water Dragon Tongue beans?
Water plants consistently, aiming for about 1 inch (2.5 cm) of water per week. Focus on watering the soil around the plant rather than wetting the leaves to avoid disease development.
Do Dragon Tongue beans require fertilizers?
Apply a balanced organic fertilizer with equal parts nitrogen, phosphorus, and potassium (such as a 10-10-10 formula) at planting time. Avoid excess nitrogen during the growing season, as it encourages foliage growth at the expense of pods.
When are Dragon Tongue beans ready to harvest?
Pods reach harvest stage approximately 55–60 days after planting. Harvest when pods are about 6 inches (15 cm) long, displaying fully developed seeds inside while still being tender and crisp. Frequent harvesting encourages continuous pod production.
How can I protect these beans against common pests and diseases?
Implement crop rotation and avoid overhead watering to minimize disease risks like powdery mildew and bean rust. Regularly inspect plants for pests such as bean beetles and aphids, removing them by hand or using gentle insecticidal soap as needed.
Growing Dragon Tongue Bush Beans is proof that the best flavors and colors are often the simplest to cultivate. These beans thrive with sun, decent soil, and regular picking. Their tender pods and striped beauty make them a showstopper in both the garden and the kitchen. Give them space, keep them watered, and you'll be rewarded with crisp, sweet harvests that outshine most supermarket fare. If you’re exploring other unique edibles, you might find growing azuki beans or green beans just as satisfying. In the end, Dragon Tongue Bush Beans offer an easy win—no fuss, just great taste and color straight from your backyard.
Pro Tips for Maximizing Dragon Tongue Bush Bean Yields Naturally
Efficient Companion Planting
- Plant Dragon Tongue beans near marigolds or nasturtiums to naturally deter bean beetles and aphids.
- Include carrots or cucumbers nearby to optimize soil nutrients and enhance growth.
- Avoid planting with onion, garlic, or fennel to prevent stunted bean development.
Optimized Watering Strategy
- Provide consistent, deep watering approximately 1 inch (2.5 cm) per week, adjusting for rainfall; drip irrigation reduces foliage disease.
- Mulch with organic straw or shredded leaves to retain moisture and decrease weeding frequency.
Enhanced Nutrition and Fertility
- Add composted manure or worm castings before planting for vigorous, nutrient-rich beans.
- Side-dress mid-growth with diluted seaweed extract to encourage bean pod development and boost calcium content.
Bean Harvest and Preservation Techniques
- Harvest beans at around 6 inches (15 cm) for peak flavor, tenderness, and nutritional content—high in calcium, potassium, and dietary fiber.
- Freeze freshly harvested pods after blanching for year-round self-sufficient nutrition; store dried beans in airtight mason jars up to 2 years.
Pest Prevention and Natural Disease Control
- Regularly rotate bean-growing areas annually to prevent fungal infections; maintain good air circulation by proper spacing of 4 to 6 inches (10 to 15 cm).
- Employ neem oil spray bi-weekly as a preventative measure against common pests—safe and effective for organic gardening.

Find out which plants will thrive in your garden!
Answer a few fun questions and get custom plant recommendations perfect for your space. Let’s grow something amazing together!

start your season