Growing Garlic: How to Plant, Grow, and Harvest Successfully
Growing Garlic
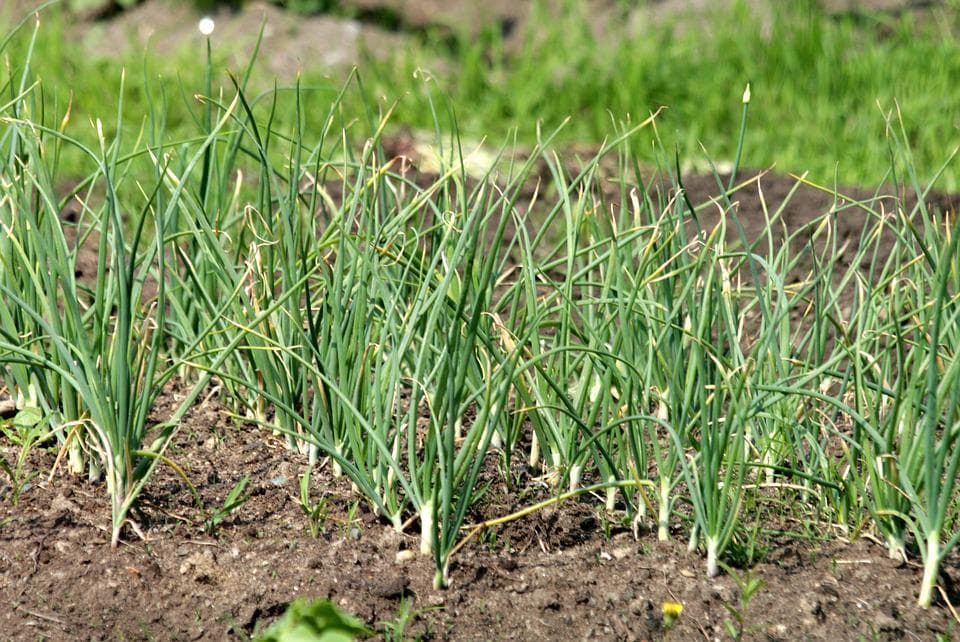
Growing garlic rewards patient gardeners with savory bulbs and fresh green scapes. Plant garlic cloves in the fall, 4 inches apart and 2 inches deep, in loose, fertile soil to encourage healthy bulb formation. Choose a sunny, well-drained spot—garlic hates wet feet. Follow these simple planting tips and reap pungent harvests all year long.
Table of Contents
- Know your types: hardneck vs softneck
- Soil prep that pays
- Planting calendar, by feel and by zone
- How to plant for consistent bulbs
- Water and feeding, without making soup
- Scapes: free flavor, bigger bulbs
- Weeds, heat, and timing
- Harvest cues that never lie
- Curing that actually stores
- Yields and economics, backyard scale
Cheatsheet: Grow Garlic Like a Pro
🌱 Choose Type & Prep
- Softneck: Best for mild climates; stores up to 9 months.
- Hardneck: Thrives in cold winters; stronger flavor.
- Use large, disease-free bulbs. Avoid grocery store garlic (may be sprayed).
- Certified seed garlic
🗓️ Planting Time
- Plant in fall (Sep-Nov) for biggest bulbs. Spring planting possible in cold zones.
- 30 min prep
- Mulch
🌍 Site & Soil
- Full sun (6+ hours).
- Loose, fertile soil; pH 6.0-7.0.
- Add compost or well-rotted manure.
🌾 Planting
- Break bulbs into cloves—do not peel.
- Plant pointy end up, 2 in (5 cm) deep, 6 in (15 cm) apart.
- Water well after planting.
💧 Care
- Keep soil moist, not soggy. Reduce water once tops yellow in summer.
- Feed with organic fertilizer in spring.
- 8 months total grow time
✂️ Harvest
- Harvest when 2/3 leaves yellow. Loosen bulbs gently—don’t pull.
- Cure in shade for 2-3 weeks until necks dry.
- Store at 60°F (15°C), dry, dark, ventilated.
- 1 garlic clove yields 1 full bulb. Average 10 bulbs per square foot (0.09 m²).
🧄 Uses & Benefits
- Rich in allicin: supports immune health.
- Self-sufficiency: 25–50 bulbs/person/year for the kitchen.
🧰 Tools and Products You'll Need
- Trowel or hand fork
- Seed garlic bulbs
- Watering can or hose
- Organic mulch (straw or leaves)
- Garden gloves
I plant garlic the way I plan a good meal, with timing, sharp tools, and clean ingredients. Growing Garlic rewards patience like few crops do.
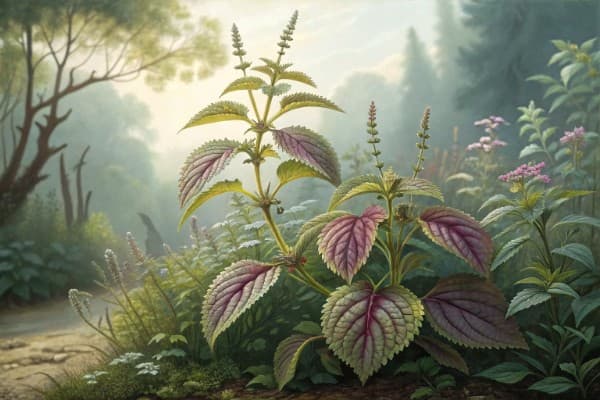
Know your types: hardneck vs softneck
Hardneck thrives in cold winters, throws a scape, and brings complex flavor that cooks chase. Softneck stores longer, braids beautifully, and suits mild climates.
- Hardneck standouts: Music, German Extra Hardy, Chesnok Red, Porcelain and Purple Stripe groups.
- Softneck favorites: Inchelium Red, California Early, Nootka Rose, Silverskin and Artichoke groups.
- Elephant garlic is a mild cousin, actually a leek, with colossal cloves and gentle bite.
Soil prep that pays
Garlic hates wet feet, so I use raised beds or light, well drained loam with plenty of compost. Aim for pH 6.2 to 7.0, and pull a soil test before you add nutrients.
- Work in 2 to 3 inches, 5 to 7.5 cm, of finished compost and a slow release nitrogen source like alfalfa or feather meal.
- Skip fresh manure, it fuels disease and gives split bulbs.
Planting calendar, by feel and by zone
Plant 2 to 4 weeks before the ground locks up, usually late September to November in zones 3 to 7. In zones 8 to 10, prechill cloves 6 to 8 weeks at 34 to 40°F, 1 to 4°C, then plant late fall to midwinter.
How to plant for consistent bulbs
Crack bulbs the day you plant, keep skins on, and pick the fattest cloves for the bed and the runts for the skillet. Set cloves point up at 2 to 3 inches deep, 5 to 7.5 cm, and 6 inches apart, 15 cm, with rows 8 to 12 inches, 20 to 30 cm.
- Mulch 2 to 4 inches, 5 to 10 cm, with clean straw or leaves right after planting.
- In heavy clay, plant a touch shallower and mulch a bit deeper.
Water and feeding, without making soup
Garlic wants about 1 inch, 25 mm, of water per week in spring, then less as bulbs size. I side dress light nitrogen when shoots hit 4 to 6 inches, 10 to 15 cm, and stop feeding once bulbing begins.
Scapes: free flavor, bigger bulbs
Hardnecks throw a curly flower stalk called a scape that tastes like spring thunder in pesto. I cut them when they make one full loop and eat the lot that night.
"Removing scapes can increase bulb size by 20 to 30 percent." University of Maine Cooperative Extension
Weeds, heat, and timing
Garlic has shallow roots, so I keep the first eight weeks weed free with a sharp hoe and a light hand. As heat builds and days hit 14 to 15 hours, bulbing triggers and leaves tell you how close you are.
Harvest cues that never lie
I harvest when the bottom three to five leaves have browned and the top leaves stay green, which gives tight wrappers. Use a fork to loosen, never yank, then lift and keep the skins intact.
Curing that actually stores
Park plants in a single layer on racks in shade with serious airflow for 10 to 21 days at roughly 80°F, 27°C. Once necks dry and skins rustle, clip tops to 1 inch, 2.5 cm, and trim roots.
- Store culinary bulbs at 50 to 60°F, 10 to 15°C, and 50 to 60 percent relative humidity.
- Seed bulbs prefer cooler, near 32 to 40°F, 0 to 4°C, kept dry to stay viable.
Yields and economics, backyard scale
One clove equals one bulb, so math matters. A pound of seed often plants 20 to 30 feet, 6 to 9 m, and yields 4 to 8 pounds of bulbs, reported by several state extensions and seed houses.
- Organic bulbs retail at 5 to 8 dollars per pound in many U.S. markets, so the patch pays for itself quickly.
- Bulb size tracks with clove size, spacing, timely scape removal, and steady moisture.
Buying seed garlic that performs
Use certified, disease free seed garlic from reputable growers, not grocery bulbs that may be treated to prevent sprouting. I order by July for fall shipping, since top cultivars sell out fast.
Quick list: my top picks by goal
- For storage: Nootka Rose, Silverskin types, 6 to 10 months if cured well.
- For flavor: Music and German Extra Hardy, rich and hot, big cloves for cooks.
- For braids: Inchelium Red and California Early, tidy heads and flexible necks.
- For spring scapes: Chesnok Red, produces generous, tender scapes.
- For warm climates: Artichoke and Silverskin softnecks after prechill.
Pests and diseases, and how I dodge them
Onion thrips stipple leaves and slow bulbs, so I use reflective mulch early and blast with water or neem on dusk cycles. Leek moth has hit my Northeast plots, and I cover spring growth with row cover until scapes show.
- White rot is the heartbreaker, its sclerotia can persist in soil for decades, so never import it on bulbs or soil.
- Rotate alliums for 4 years, keep irrigation off the necks late, and clean culls into the trash, not the compost.
"White rot sclerotia can remain viable in soil for up to 20 years." Washington State University Extension
Global and kitchen context that keeps me humble
Garlic is a world crop, and the scale dwarfs any backyard plan. FAOSTAT reports that China grows roughly 73 percent of global production, over 25 million metric tons in 2022.
"U.S. per capita garlic consumption hovers near 2 pounds per year." USDA ERS estimate
Raised beds and containers
Garlic thrives in 8 to 10 inch, 20 to 25 cm, deep raised beds with drip lines and straw mulch. In containers, use at least 12 inches, 30 cm, depth and a gritty mix, then feed lightly in spring.
Companion planting and rotation that actually helps
I tuck garlic at fruit tree drip lines to deter browsing and to use the sunny understory. Keep it away from last year’s onions, leeks, and chives to break disease cycles.
Feeding schedule, simple and reliable
- At planting: compost and a gentle organic fertilizer based on soil test results.
- Early spring: light nitrogen sidedress, then stop once you see scapes or swelling bulbs.
- Never overwater late, wet necks invite rot in storage.
Common mistakes I stopped making
- Planting grocery cloves, which brought in mites and disappointment.
- Letting scapes mature, which shrank my bulbs and cost me dinner.
- Overcrowding, which made wrappers loose and heads hard to cure.
- Watering late into July, which softened necks and cut shelf life in half.
Regional tweaks that matter
Cold climates favor hardnecks, deep mulch, and late spring feed, while hot climates lean on softnecks, prechilling, and tighter watering windows. Coastal fog belts need extra airflow during curing and slightly wider spacing.
Saving seed and maintaining vigor
I tag the biggest, healthiest bulbs at harvest and set them aside for planting stock. Over years this simple cull improved average head size and uniformity across the bed.
Scape cuisine and zero waste
Scape pesto, hot pan with olive oil, and a squeeze of lemon will convert any skeptic. The stems ferment well too, crisp, neon green, and gone by August.
Simple troubleshooting
- Yellow tips in spring: often low nitrogen or dry soil, feed lightly and water.
- Split bulbs: fed late or overwatered after bulbing began.
- Small heads: planted late, shaded, or used small cloves.
- Mushy necks in storage: harvested too late or cured poorly.
Techniques that scale
A broadfork in fall opens soil without flipping layers, which garlic loves. I use a dibber or old broom handle for fast, even planting holes at set depth.
Buying guide for gear and supplies
- Seed garlic: order from certified producers with variety trials and disease testing.
- Mulch: clean straw beats hay, fewer weed seeds and better airflow.
- Irrigation: simple drip lines with 8 to 12 inch, 20 to 30 cm, emitter spacing simplify watering.
- Drying: wire racks or mesh trays, plus a box fan, cure bulbs evenly without sun scorch.
Quick FAQ, straight answers
- How deep to plant? About 2 to 3 inches, 5 to 7.5 cm, point up.
- How far apart? 6 inches, 15 cm, between cloves in rows 8 to 12 inches, 20 to 30 cm.
- When to stop watering? Two to three weeks before harvest.
- How long does garlic store? Softnecks up to 10 months, hardnecks 3 to 6 months if cured and stored right.
- Can I grow from store bulbs? You can, but risk disease and poor performance.
Sourced notes for the curious
Cornell Cooperative Extension and University of Minnesota guide depth, spacing, and fertility that mirror what I see in the bed. Washington State University explains white rot longevity, and University of Maine documents scape removal boosting yield.
FAOSTAT and USDA ERS provide production and consumption figures that frame why Growing Garlic keeps expanding plots everywhere. The field knowledge comes from seasons spent lifting heavy forks and tasting my way through cultivars each summer.
Frequently Asked Questions About Growing Garlic
What is the ideal time of year to start planting garlic?
The optimal time to plant garlic cloves is in the fall, about 4 to 6 weeks before the ground freezes. Depending on location, this typically translates to September through November in the Northern Hemisphere. Fall planting allows garlic to establish roots before winter, ensuring vigorous growth in spring.
How deeply should garlic cloves be planted in the soil?
For healthy garlic growth, plant cloves approximately 2 inches (5 cm) deep with the pointed end facing up. Maintain spacing of about 4 to 6 inches (10 to 15 cm) between individual cloves and 12 inches (30 cm) between rows to promote adequate airflow and bulb development.
What soil conditions help garlic grow best?
Garlic flourishes in well-drained, fertile soil rich in organic matter. Aim for slightly acidic soil with an ideal pH between 6.0 and 7.0. Consider adding compost or aged manure several weeks before planting to enhance nutrient content and drainage, ensuring robust bulb formation.
How often does garlic need watering?
Garlic requires consistent yet moderate watering, particularly during bulb development in spring. Provide about 1 inch (2.5 cm) of water per week, either through rainfall or supplemental irrigation. Reduce watering a few weeks before harvesting to allow the bulbs to dry and mature properly.
When and how should garlic be harvested?
Harvest garlic typically in early to mid-summer when leaves begin yellowing and drying out. Gently lift bulbs from the soil using a garden fork or spade, avoiding injury to bulbs. Allow harvested garlic bulbs to cure in a cool, dry, and well-ventilated area for two to three weeks before storage.
Can garlic be grown successfully in containers?
Yes, garlic thrives well in containers. Select containers at least 10 inches (25 cm) deep to accommodate bulb growth. Fill pots with a fertile, well-draining potting mix, and position them where they receive at least six hours of direct sunlight daily. Water regularly and ensure adequate drainage to promote healthy bulb formation.
Growing garlic is all about timing, patience, and a bit of dirt under the nails. Tuck your cloves in before winter’s chill, keep the soil loose and weed-free, and don’t let them go thirsty in spring.
When those green tops start to yellow, it’s time to pull—don’t wait too long, or you’ll lose those perfect bulbs to rot. Cure them in a dry, shady spot, and you’ll have a stash that keeps its bite for months.
There’s nothing quite like homegrown garlic—sharp, sweet, and honest. If you’ve mastered growing garlic, you might want to branch out and try your hand at growing chives or dill for even more flavor in your kitchen.
Stick with the basics, respect the process, and you’ll never look at store-bought garlic the same way again.