Growing Burdock Root: How to Plant, Grow, and Harvest Easily
Growing Burdock Root
Growing Burdock Root delivers earthy, healing flavors straight into your kitchen. Start seeds directly outside in fertile, loosened soil during early spring, space them a solid two feet apart, and keep the planting area well-watered but not soggy. Harvest roots carefully in late summer or early autumn, when their texture is tender and the flavor mild—read on to master harvesting tips and enjoy your homegrown medicinal fare.
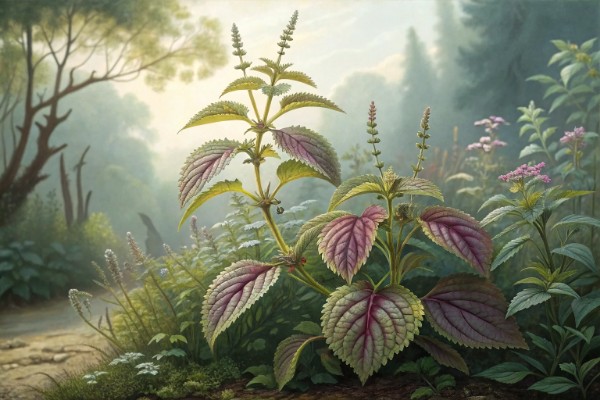
I grow burdock for its clean, mineral flavor and for the way it turns poor ground into friable, root-friendly soil the season after. It behaves like a living soil auger when you give it the right runway.
Why Grow Burdock Root
The root tastes like artichoke met salsify and decided to be useful. It brings prebiotic inulin, potassium, and crunch to the kitchen, and stores like a champ.
"100 g raw burdock root provides about 72 kcal and supplies inulin-rich fiber." (USDA FoodData Central)
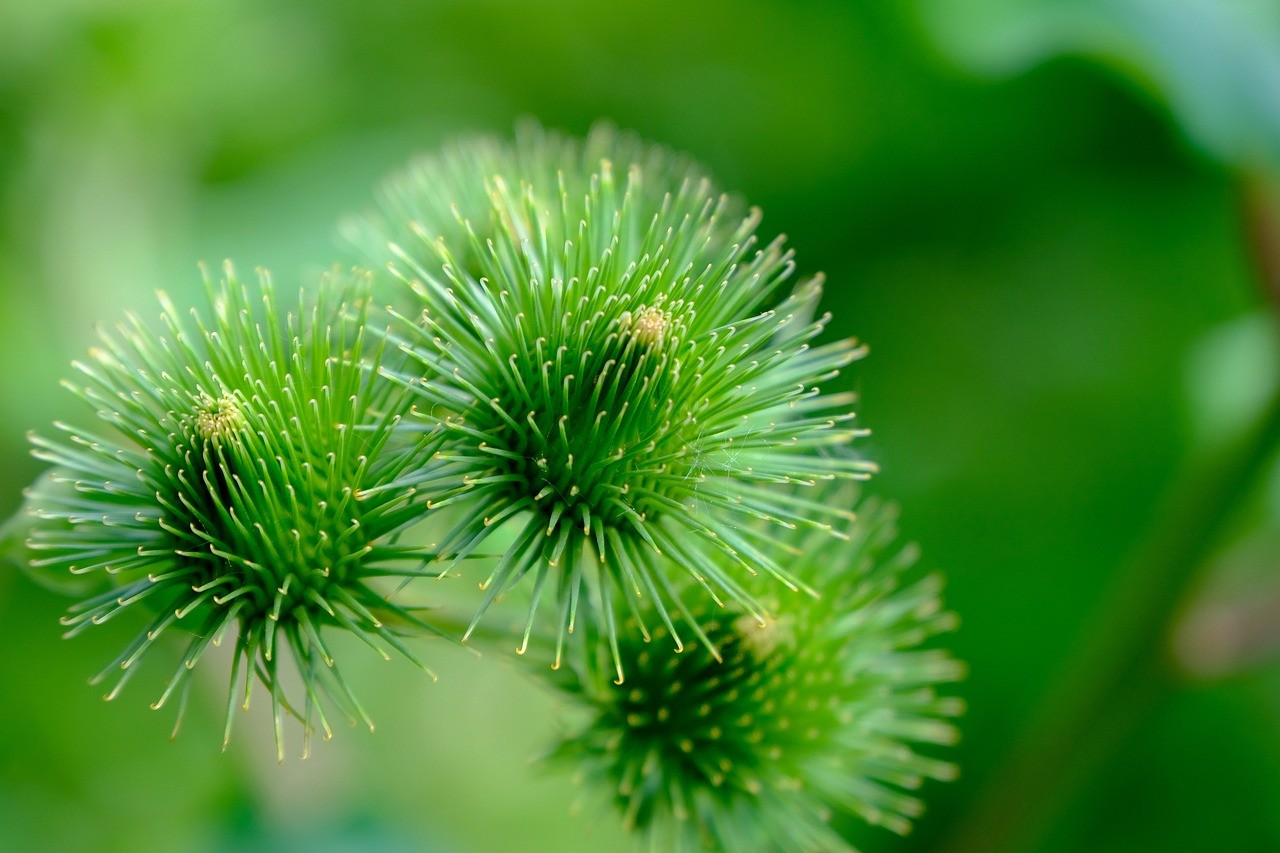
It also birthed a gear icon. Those clingy burrs inspired Velcro after a 1940s walk with a dog. (Smithsonian)
Varieties I Trust for Growing Burdock Root
- Takinogawa Long (Arctium lappa var. sativa): long, straight gobo up to 60 to 90 cm in deep soil, 90 to 120 days. I reach for this when I want market-length roots.
- Watanabe Early: quicker to size, slightly shorter, harvestable in tighter beds.
- Arctium minus (lesser burdock): tougher and shorter roots, better for wild craft vibes than fine slicing.
Buy fresh seed from a reputable vendor since viability drops after a couple of years. Look for days-to-maturity on the packet and an image that shows long, unforked roots.
Site and Soil Prep
Give full sun and deep, loose soil with pH 6.0 to 6.8. Aim for sandy loam that drains yet holds moisture.
I broadfork or double-dig a trench to at least 45 cm, breaking any hardpan. I avoid fresh manure since it forks roots and boosts hairiness.
- Compost: 2 to 3 cm worked in across the top 20 cm.
- Phosphorus and potassium: moderate, slow release. I use rock phosphate and greensand sparingly after a soil test.
- Raised beds: 20 to 30 cm high help where subsoil compacts.
Sowing for Success
Direct sow only. The taproot sulks after transplanting and you end up with split or J-shaped roots.
- Timing: spring after soil hits 50 to 60 F (10 to 16 C), or late summer for a fall harvest.
- Depth: 1 to 1.5 cm deep. Keep the surface evenly moist until emergence.
- Spacing: thin to 15 cm in row, rows 30 to 45 cm apart.
- Germination: 8 to 20 days with soil at 60 to 85 F (16 to 29 C). A 6 to 12 hour seed soak speeds things up.
I oversow a little, then thin with scissors once the first true leaves show. The thinnings go into miso soup like micro greens.
Water and Feeding
Moisture consistency builds straight, sweet roots. I keep 2 to 5 cm of water per week across rain plus irrigation, and mulch lightly once seedlings anchor.
Side dress with mature compost at 30 to 45 days. Heavy nitrogen late in the game makes roots pithy.
Weed, Pest, and Disease Notes
Weed early, then the foliage will do the shading for you. I hand hoe until leaves touch.
- Flea beetles: floating row cover during the first month keeps leaves intact.
- Slugs: iron phosphate bait or beer traps in wet spells.
- Root rots: avoid soggy ground and tight spacing, rotate out for three seasons.
I cut flower stalks at the base if any appear, since seeds spread far on clothes and pets. Some regions list burdock as invasive, so check your local extension guidance before letting it set seed. (NC State Extension, University of Minnesota Extension)
Containment Tricks in Sensitive Areas
- Grow in 75 to 100 liter fabric pots, at least 45 to 60 cm deep.
- Line a trench with removable PVC sleeves filled with sandy mix, then lift sleeves to harvest clean roots.
- Bag developing burrs if saving seed, or chop stalks before they brown.
Calendar by Climate
- Cool temperate zones 3 to 6: sow April to May, harvest September to November after a light frost sweetens flavor.
- Zones 7 to 9: sow October to February for spring harvest before heat, or sow late September for winter growth.
- Zones 10: grow as a cool-season crop and choose quicker varieties.
How I Keep Roots Long and Straight
I water the bed the night before harvest. Hydrated soil gives, not grabs.
- With a trenching spade, cut a vertical slit 10 to 15 cm from the row along the full length.
- Open a trench 20 to 30 cm deep beside the plants, then pry the root sideways, never yank. A digging bar under the crown helps pop it free.
- In heavy ground, I use a post-hole digger every 20 cm to free the subsoil ahead of the root.
Expect 30 to 90 cm roots depending on soil, with 0.3 to 1 kg per plant in good conditions. Short or forked roots still taste great in stock.
Harvest Timing
First-year roots are prime at 90 to 150 days, before any hint of a flower stalk. Late fall roots after light frost taste sweeter.
Second spring, the root turns woody as energy shifts upward. I harvest the young peeled flower stalks then, which cook like mild cardoon.
Cleaning, Storage, and Prep
Scrub under cold water, peel if you want a paler look, and dunk cut pieces in water with a splash of vinegar or lemon to slow browning. I cut into long matchsticks for quick sauté.
- Cold storage: pack in damp sand at 32 to 40 F (0 to 4 C) for 2 to 4 months.
- Fridge: wrap in a damp towel inside a bag for up to 3 weeks.
- Freezer: blanch 2 minutes, chill, pat dry, and freeze for soups.
Culinary Uses That Earn Repeat Plantings
- Kinpira gobo: sautéed sticks of burdock and carrot with soy and mirin.
- Miso soup, hot pot, and stews for earthy backbone.
- Pickled with rice vinegar and chile for sandwiches.
- Tea from thinly sliced dried root, mild and nutty.
The texture stays crisp if you cook it like a vegetable, not a noodle. It rewards a little knife work.
Commercial and Seed-Buying Notes
- Choose seed labeled Arctium lappa var. sativa for long gobo roots.
- Seed viability drops after 2 to 3 years, so buy in amounts you will sow in two seasons.
- If selling, plan successions every 3 weeks for a steady crate, and rinse roots carefully to keep skins unscuffed.
I grade by length and straightness, then bundle with damp paper. Chefs pay for uniform sticks that cut clean.
Common Problems and Fixes
- Forked roots: soil clods, fresh manure, or root disturbance during early growth. Prep deeper and skip raw manure.
- Short roots: compacted subsoil or a pan at 20 to 30 cm. Break it up with a broadfork before sowing.
- Pithy center: heat or drought late in growth. Water evenly and harvest on time.
- Bitter notes: older roots, or drought stress. Peel and soak slices 10 minutes before cooking.
Rotation and Companions
I follow burdock with carrots, parsnips, and daikon since the bed is already loosened. I avoid following lettuce or brassicas that share flea beetle pressure.
Do a 3-year rotation away from other Asteraceae like lettuce and artichoke in tight gardens. Clean leaf debris if you see any leaf spot.
Safety, Allergies, and Lookalikes
Burdock is in the Aster family, so ragweed-sensitive folks can react. Wear gloves around burrs since they cling and scratch.
If foraging, confirm ID since first-year rosettes can confuse beginners. For cultivation, buy seed and label rows to remove doubt. (RHS, local extension)
Tools That Make Burdock Easy
- Broadfork or trenching spade for deep prep.
- Long-handled digging fork for gentle lift.
- Post-hole digger for clay harvests.
- Fabric grow bags 60 cm deep for patio crops.
- Row cover for flea beetle defense.
I have cracked fewer roots since I switched to a trenching approach. It takes time, but the roots come out whole and beautiful.
Alternatives and Comparisons
- Parsnip: sweeter, shallower, faster to fork in rocky soil.
- Salsify: thinner, oyster hint, needs steady moisture.
- Scorzonera: black skin, winter-hardy, silkier texture.
- Daikon: quicker, more water content, less mineral depth.
Growing Burdock Root gives the richest flavor of the bunch, with top storage and a kitchen personality that stands up to soy, miso, and vinegar. I still plant all four for range.
Quick Reference Cheat Sheet
- Soil: deep, loose, pH 6.0 to 6.8.
- Sow: direct, 1 to 1.5 cm deep, thin to 15 cm.
- Water: 2 to 5 cm per week, mulch lightly.
- Harvest: 90 to 150 days first year, before bolting.
- Storage: damp sand at 32 to 40 F (0 to 4 C).
"Direct sow into deep, loose soil for straight, market-length roots." (RHS Growing Advice)
Give burdock length and air, and it will pay you back in quiet abundance. The plants ask for depth and patience, and reward with crisp roots that cut like a chef’s dream.
Cheatsheet: Easy Steps for Burdock Root Success
🪴 Site & Soil
Full sun is best. Use deep, loose loam. pH: 6.0–7.5. Avoid stones: roots split easily.
🌱 Sowing & Planting
- Direct sow after last frost (spring or autumn). Soil temp: 50–80°F / 10–27°C.
- Sow seeds ½ in (1 cm) deep, 2 in (5 cm) apart. Thin to 6 in (15 cm).
- Rows: 18–24 in (45–60 cm) apart.
💧 Water & Care
- Keep soil moist (not soggy). Deep, infrequent watering is best.
- Mulch to suppress weeds and retain moisture.
- Remove flower stalks to extend root harvest.
🌱 Growth & Harvest
- Roots ready in 90–150 days.
- Harvest: Loosen soil with a fork, pull roots gently. Mature roots reach 2–3 ft (60–90 cm)!
- Best flavor: Young, pencil-thick roots.
- Store: Cool, humid cellar. Use within 2–3 months.
🛠️ Tools and products you’ll need
- Garden fork or broadfork
- Quality burdock seeds (Gobo)
- Mulch (straw or leaves)
- Watering can or hose
- Gloves (optional, sap can irritate skin)
🥕 Nutrition & Self-Sufficiency
Burdock root is rich in inulin, potassium, fiber, and antioxidants. Promotes digestive health. Reliable calorie crop—often 5 lbs (2.2 kg) per 10 ft (3 m) row.
⚡ Quick Facts
- Harvest up to 3 ft (90 cm) roots
- Heirloom Japanese “Gobo” popular for flavor
- Tolerates light frost
Burdock Root FAQs: Growing Tips and Troubleshooting
What soil type makes burdock root thrive?
Burdock roots spread vigorously in loose, fertile soil that's deep enough to accommodate their impressive size. Incorporate generous amounts of compost or aged manure beforehand; heavy clay restricts growth and distorts their prized, earthy shape.
How much sunlight do burdock plants require?
Give these resilient plants a sunny spot. Burdock relishes approximately six to eight hours of full sunlight daily, fueling growth and producing roots that chefs and herbalists covet alike.
What's the ideal watering routine for healthy burdock roots?
Apply water regularly but avoid soggy soil; deep, consistent watering once or twice per week is usually sufficient. Remember, burdock dislikes waterlogged conditions—aim for moisture, not mud.
When and how should I harvest my burdock root?
Harvesting is best at the end of the first growing season—typically after 3 to 4 months, when roots feel thick and solid. Loosen the soil carefully around each plant with a garden fork before lifting; damaged roots lose culinary appeal and shelf life.
Can burdock root be grown in containers successfully?
Growing burdock root in containers presents challenges—but they aren't insurmountable. Choose deep, roomy pots (at minimum, 18-20 inches deep) to accommodate the plant's substantial root development. Frequent watering remains key; soil in containers often dries swiftly.
How can I prevent pests and diseases in burdock?
Burdock resists most garden maladies naturally, yet slugs and aphids occasionally threaten younger plants. For prevention, maintain garden sanitation and encourage beneficial insects and birds. If pests invade, apply organic remedies such as neem oil or diatomaceous earth judiciously.
Growing Burdock Root rewards patience with big, earthy flavors and a crop that’s as tough as it is generous. Start with deep, loose soil—your roots will thank you. Keep your rows weeded, and don’t forget steady moisture. In a few months, you’ll harvest long, medicinal roots that’ll add backbone to your kitchen or medicine cabinet.
Put in a little sweat early, and this humble plant will pay you back double. If you’re into adventurous gardens, why not try vegetables with similar depth—like Jerusalem artichoke? In the end, growing burdock root is about digging in—literally and figuratively—and letting the good earth do its thing. Simple, honest, satisfying.