Growing Cauliflower: Expert Advice for a Healthy, Full Harvest
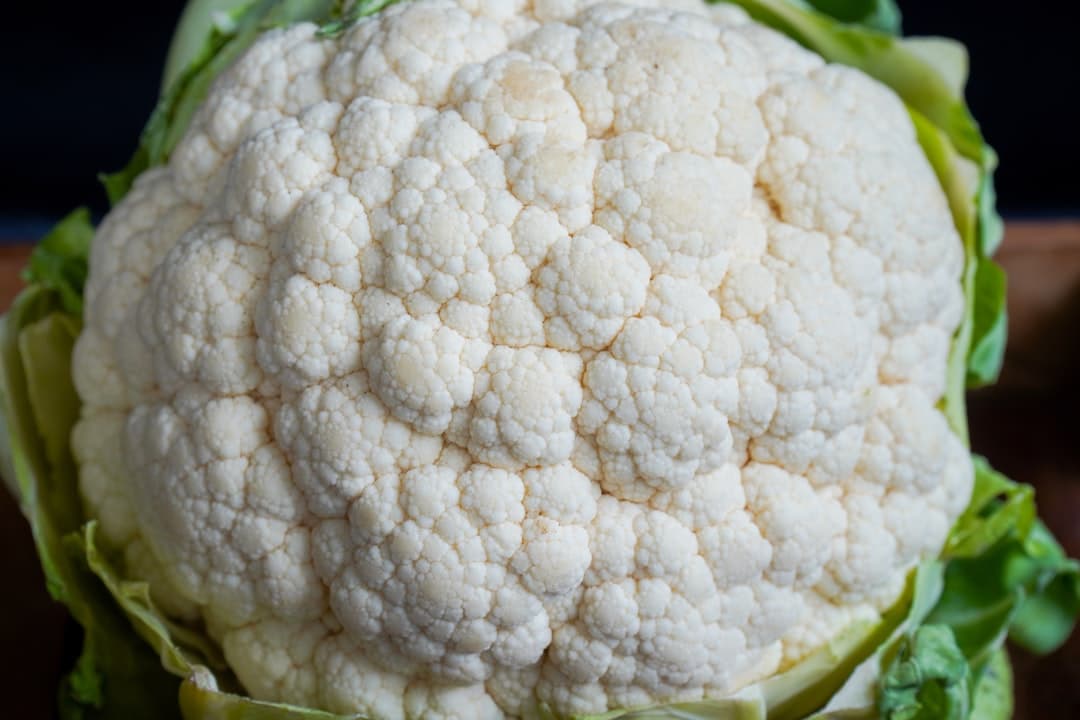
Growing Cauliflower
If you've dreamed of growing cauliflower that's sweet, crisp, and worthy of your dinner plate, start seedlings indoors 4-6 weeks before the last frost. Cauliflower loves cool temperatures, thriving best between 60-65°F, so time your planting accordingly. Give it rich soil, consistent moisture, and plenty of sun, and you'll savor garden-fresh heads in no time—read on to master the art of cultivating this elegant vegetable.
Table of Contents
Cheatsheet: Cauliflower Growing for Abundant Yields
🌱 Variety Selection
- Choose: Early (60 days), mid (75 days), or late (90+ days)
- Best for taste: Romanesco, Snowball, Cheddar
- Self-sufficiency: One head = 2–3 servings; high in Vitamin C, K, and fiber
🗓️ Timing & Climate
- Sow 4–6 weeks before last frost (spring) or mid-summer for fall
- Optimal temps: 60–65°F (15–18°C) day, 50–55°F (10–13°C) night
- Heat stress stunts or bolts; frost damages heads
🌾 Soil Prep
- pH: 6.5–7.0
- Enrich: 2–4" (5–10cm) compost or aged manure
- Drainage: Loose, friable soil prevents rot
- Feed: Nitrogen-rich fertilizer during growth
🌤️ Planting Steps
- Sow seeds ¼–½" (0.6–1.2cm) deep, 18–24" (45–60cm) apart
- Transplant outdoors at 4–6 weeks, after hardening off
- Mulch 2–3" (5–8cm) to keep roots cool and moist
- Water 1–1.5" (2.5–4cm) weekly, evenly
- Blanch white varieties: Tie outer leaves over head as domes form
- Harvest when heads are tight, 6–8" (15–20cm) across
🪴 Tools and Products You'll Need
- Trowel
- Mulch
- pH test kit
- Pruners
- Seeds or seedlings
- Compost or fertilizer
🐛 Pest & Disease Prevention
- Row covers block cabbage worms
- Rotate crops yearly; avoid Brassica beds in back-to-back years
- Remove infested leaves immediately
- Neem spray deters aphids safely
🥦 Nutrition & Storage
- High in fiber, vitamin C, K, folate
- Store at 32–40°F (0–4°C), humid, up to 3 weeks
- Flash freeze florets for year-round supply
📈 Quick Stats
- Avg. yield: 15–25 lbs (7–12 kg) per 10 ft row (3m)
- 80% of commercial crops lost to heat or pests without protection
I grow cauliflower for the thrill of its perfect geometry and for the way it steam-surrenders to butter. It asks a lot, yet it pays back with a head that feels like a small moon in your hands.
Climate timing and planning
Growing Cauliflower succeeds in cool, steady weather with air temps around 60 to 65 F or 15 to 18 C. Heat above 80 F or 27 C or hard freezes during early growth can trigger tiny heads called buttoning.
For spring crops, I start seed indoors 4 to 6 weeks before last frost and transplant 1 to 2 weeks before that frost date. For fall crops with richer flavor, I start seed 10 to 12 weeks before first frost and set plants out once nights slide under 60 F or 15 C.
"Cauliflower thrives with uniform cool temperatures; stress during early growth often results in premature small heads." Source: University of California ANR, Vegetable Research and Information Center.
Soil prep that sets the tone
Cauliflower is a heavy feeder with a shallow root system that hates swings in moisture. I amend beds with 2 to 3 inches or 5 to 7.5 cm of finished compost and aim for soil pH 6.8 to 7.2 to suppress clubroot.
If your soil test shows low phosphorus, work in a starter fertilizer at planting. I keep the nitrogen steady but never blast it, since excess late N can make loose, grainy curds.
Seed starting and transplants
I sow at 70 to 75 F or 21 to 24 C for germination, then grow on at 60 to 65 F or 15 to 18 C under bright light. Harden off for 7 to 10 days, giving seedlings a gentle breeze and partial sun so stems toughen without stress.
Transplant when plants have 4 to 5 true leaves and a pencil-thick stem. Younger transplants handle shock better and head on time.
Spacing and planting
Set plants 18 to 24 inches or 45 to 60 cm apart with 30 inches or 75 cm between rows. Tuck them in deep to the first leaves and water immediately to settle soil around roots.
I mulch after the first irrigation with 2 to 3 inches or 5 to 7.5 cm of clean straw or shredded leaves. The mulch keeps moisture predictable and the soil cooler in a heat snap.
Water and feeding rhythm
Consistency beats intensity every time. Target 1 to 1.5 inches or 25 to 38 mm of water per week, delivered as two slow irrigations so the profile moistens to 8 inches or 20 cm.
At transplant, I side-dress with a balanced organic fertilizer, then again when plants start cupping leaves. A simple rule at home scale: 1 tablespoon of a nitrogen source such as 21-0-0 per plant at each side-dress, scratched in and watered well.
"Maintain even soil moisture to avoid head disorders like ricing and browning." Source: University of Minnesota Extension.
Blanching for snow-white curds
As the head reaches 2 to 3 inches or 5 to 7.5 cm across, I pull three inner leaves over the curd and tie with soft twine. This keeps light off the head to prevent yellowing or purple blush in cold spells.
Self-blanching types fold leaves on their own, yet I still check. Heads usually finish 7 to 12 days after blanching, depending on weather.
Recognizing problems early
- Buttoning: Tiny heads from early stress, cold shock, or poor fertility. Protect young plants with row cover and avoid planting before soil hits 50 F or 10 C.
- Ricing: Grainy curd from heat or late excess nitrogen. Harvest promptly at full size with tight beads.
- Tip burn: Brown curd edges from calcium transport issues during irregular watering. Keep moisture even and avoid heavy late feedings.
- Bolting: Flower stalks in heat or long days with stress. Choose heat-tolerant varieties for summer-leaning windows.
Pests and how I shut the door on them
Cabbage worms, loopers, and diamondback moths chew first and ask questions later. I keep beds covered from transplant with insect netting and scout undersides of leaves twice a week.
If I see frass or windowpane chewing, I handpick or spray Bacillus thuringiensis at dusk so it sticks. Aphids fade with a hard water jet, lady beetles, or a light horticultural soap spray.
Flea beetles pockmark leaves during warm dry spells. Fine mesh, sticky traps, and clean borders limit pressure.
"Rotate brassicas at least 3 to 4 years to reduce clubroot and black rot pressure." Source: North Carolina State Extension.
Diseases I plan around
- Clubroot: Swollen roots and wilting on warm afternoons. Keep pH near 7.2, improve drainage, and never move infested soil on tools.
- Downy mildew: Pale patches on leaves in cool, humid stretches. Increase spacing, water at soil level, and remove lower leaves that touch mulch.
- Black rot: V-shaped yellow lesions from leaf edges. Start with certified seed, avoid overhead irrigation, and cull infected plants fast.
Harvest and handling
Cut when heads are firm, full, and still tight, usually 1.5 to 3 pounds or 0.7 to 1.4 kg depending on variety. Take a collar of leaves to cushion the curd in the basket.
Chill to 32 to 40 F or 0 to 4 C within an hour for best texture and sweetness. Stored dry, heads keep about a week, though I prefer them the same day.
Varieties that earn their keep
- ‘Snow Crown’: Reliable early, self-blanching, 50 to 65 days. Good for spring schedules that need a quick finish.
- ‘Cheddar’: Orange curd with extra beta-carotene and a nutty taste. Handles slight heat better than standard whites.
- ‘Graffiti’: Vivid purple that turns deeper with cool nights. Great for fall markets and kids who doubt vegetables.
- ‘Apex’ or ‘Amazing’: Tight heavy heads with strong wrapper leaves for clean blanching. Solid for home and small-scale sales.
- ‘Veronica’ Romanesco: Chartreuse spirals that look like sacred geometry on a plate. Needs steady cool weather and rewards patience.
- ‘Fioretto’ sprouting types: Long stems with sweet mini florets. Flexible harvests over several weeks.
- Heat-tolerant picks: ‘Freedom’ F1 and ‘Incline’ F1 for shoulder seasons edging warm. They hold better if a heat pulse hits.
I choose days-to-maturity to land peak head formation in the most even weather window. For my zone, that means early types for spring and mid to late types for fall.
Buying guide: seed, starts, and gear that actually help
- Seed vs starts: Seed gives access to specialty types and lower cost per plant. Starts save 4 weeks and help in short springs.
- Soil thermometer: Prevents cold transplants that stall and button. Plant when soil reaches 50 F or 10 C at 4 inches or 10 cm deep.
- Insect netting: Fine mesh 0.8 mm keeps moths out while allowing airflow. Lightweight row cover at 0.55 oz per sq yd or about 18 g per sq m works in early spring.
- Drip lines: Two lines per 30 inch or 75 cm bed for even moisture. Pressure-compensating emitters give consistent delivery on slopes.
- Balanced organic fertilizer: A 4-4-4 or 5-5-5 for pre-plant. Supplement with a modest nitrogen side-dress at cupping.
Fertility notes from the field
Cauliflower is sensitive to early shortages of nitrogen and phosphorus. I front-load with compost and a light starter, then keep the throttle steady, not floored.
If leaves pale midseason, I foliar feed with fish hydrolysate and seaweed on a cool evening. The color returns, and the heads size up evenly.
Companions, rotation, and bed hygiene
I rotate brassicas on a 4-year clock with legumes or onions in between. This starves soil-borne pathogens and steadies nutrient use.
Dill and sweet alyssum invite wasps that hunt caterpillars like hawks. Clean edges and weed-free aisles keep humidity lower around the canopy.
Curd quality checklist
- Keep light off the head after it sets to prevent yellowing or pinking from anthocyanins in cold snaps.
- Harvest before beads separate to avoid ricing and off texture.
- Cool quickly and keep dry to preserve that tight, porcelain finish.
Quick answers to common questions
- How deep are roots: Mostly in the top 8 to 12 inches or 20 to 30 cm, so moisture swings bite hard.
- Yield per plant: One main head, often 1.5 to 3 pounds or 0.7 to 1.4 kg, plus side florets on sprouting types.
- Can I regrow after cutting: Standard types do not rebound with full heads. Sprouting types will push tasty side shoots.
- Best season for flavor: Fall. Cool nights sweeten curds and tighten texture.
"Aim for soil pH near neutral to reduce clubroot severity; lime if needed based on soil test." Source: Royal Horticultural Society.
Field notes and a final nudge
I have watched a bed of perfect Romanesco spiral into ricing after one missed irrigation in a hot wind. Since then I run drip and mulch early, then sleep better during July heat.
Cauliflower rewards timing, not bravado. Plan the calendar, lock in moisture, and you will feel that lunar heft in your harvest basket.
Sources I trust for the science and the practice
- University of California Agriculture and Natural Resources, Vegetable Research and Information Center: cole crop production guidance and temperature ranges.
- University of Minnesota Extension: cauliflower disorders, watering, and harvest handling.
- North Carolina State Extension: brassica rotation intervals and disease management.
- Royal Horticultural Society: soil pH management for clubroot and general cultural notes.
- Cornell Vegetable Program: caterpillar complex scouting and low-impact controls.
Frequently Asked Questions About Cultivating Cauliflower
What is the ideal climate for cauliflower cultivation?
Cauliflower thrives best in a cool climate. Ideal daytime temperatures range between 60–70°F (15–21°C), while night temperatures should stay above 50°F (10°C). Extended exposure to temperatures below freezing or above 80°F (27°C) can disrupt head formation.
How much sunlight does cauliflower require?
Cauliflower plants benefit from full sun exposure, which typically means at least 6 to 8 hours of direct sunlight daily. In warm climates, consider afternoon shade to keep the environment cooler and support steady growth.
Which soil conditions favor healthy cauliflower growth?
Choose a well-draining soil rich in organic matter with a slightly acidic to neutral pH (between 6.0 and 7.0). Consistent moisture retention without waterlogging promotes rapid and even head development.
How often and how much should cauliflower plants be watered?
Regular, even watering is essential, providing approximately 1 to 1.5 inches (2.5–3.8 cm) of water per week. Maintain moist but not waterlogged soil conditions to support steady cauliflower growth.
What can be done to protect cauliflower heads from discoloration?
Practice blanching by tying large outer leaves over the developing cauliflower head once it reaches about the size of a tennis ball. This technique shields the head from sunlight, preserving its white color and tender texture.
When is cauliflower ready for harvesting?
Harvest cauliflower heads when they measure 6–8 inches (15–20 cm) in diameter, remain compact, and firm. Timely harvesting ensures optimal flavor and prevents head splitting or discoloration.
What common pests affect cauliflower, and how can they be managed?
Cauliflower may attract pests such as cabbage worms, aphids, or flea beetles. Regularly inspect plants and manage infestations by introducing beneficial insects, applying insecticidal soaps, or using floating row covers to prevent pest access.
Growing Cauliflower rewards patience and attention. Start with rich soil, keep the water steady, and don’t skimp on mulch. Watch for pests and act fast—those little invaders love cauliflower as much as we do.
Give your plants room, and they’ll give you tight, snowy heads you’ll be proud to show off. If you’re hungry for more variety, try purple cauliflower for a colorful twist, or consider growing broccoli as a companion.
In the end, healthy harvests come down to the basics: good soil, smart timing, and a watchful eye. Keep it simple, stay curious, and your cauliflower patch will pay you back in spades.