Growing Pinto Beans at Home for Fresh, Flavorful Harvests
Growing Pinto Beans
Growing pinto beans rewards your garden and palate with earthy, nutritious pods. Starting by soaking beans overnight, then planting them one inch deep in rich, well-drained soil ensures vigorous vines and abundant harvests. Growing pinto beans thrives best in sunny spots, so choose a warm corner to coax out their hearty flavor—read on for an easy step-by-step guide to homegrown goodness.
Cheatsheet: Homegrown Pinto Bean Success
🌱 Choosing Seeds
Heirloom or organic seeds produce best flavor. Pinto beans fix nitrogen and enrich soil.
🗓️ Timing & Location
- Direct sow after frost; soil temp 65–85°F (18–29°C).
- Full sun, at least 6 hours daily.
- 120 days to dried beans; 90 days for green pods.
🔧 Tools and Products You'll Need
- Garden trowel
- Seed packets
- Mulch
- Watering can or hose
- Compost or aged manure
- Support stakes (optional for windy areas)
🌾 Sowing Steps
- Prep: Loosen soil 6" (15cm) deep. Mix compost in rows.
- Sow: Plant seeds 1–1.5" (2.5–4cm) deep, 3" (7.5cm) apart, rows 18–24" (45–60cm) apart.
- Water: Moisten soil after planting—keep evenly damp, not soaked.
- Thin: Remove weaker seedlings, leaving 6" (15cm) between plants.
🌤️ Care & Maintenance
- Mulch to retain moisture & suppress weeds.
- Water weekly if rainfall <1" (2.5cm); avoid wetting leaves.
- Skip fertilizer; beans fix their own nitrogen.
- Weed gently; beans have shallow roots.
- Stake if needed for wind protection.
✂️ Harvest & Yield
- Pick green pods at 90 days for fresh eating.
- For dried beans, wait until pods yellow and rattle (100–120 days).
- Air-dry pods indoors if rain threatens.
- 1 plant yields up to 50 beans. 50 plants feeds a family for a year.
🥗 Nutrition & Self-Sufficiency
- High in protein, fiber, magnesium, iron.
- One cup cooked pinto = 245 calories, 15g protein.
- Perfect for soups, salads, and homemade refried beans.
-
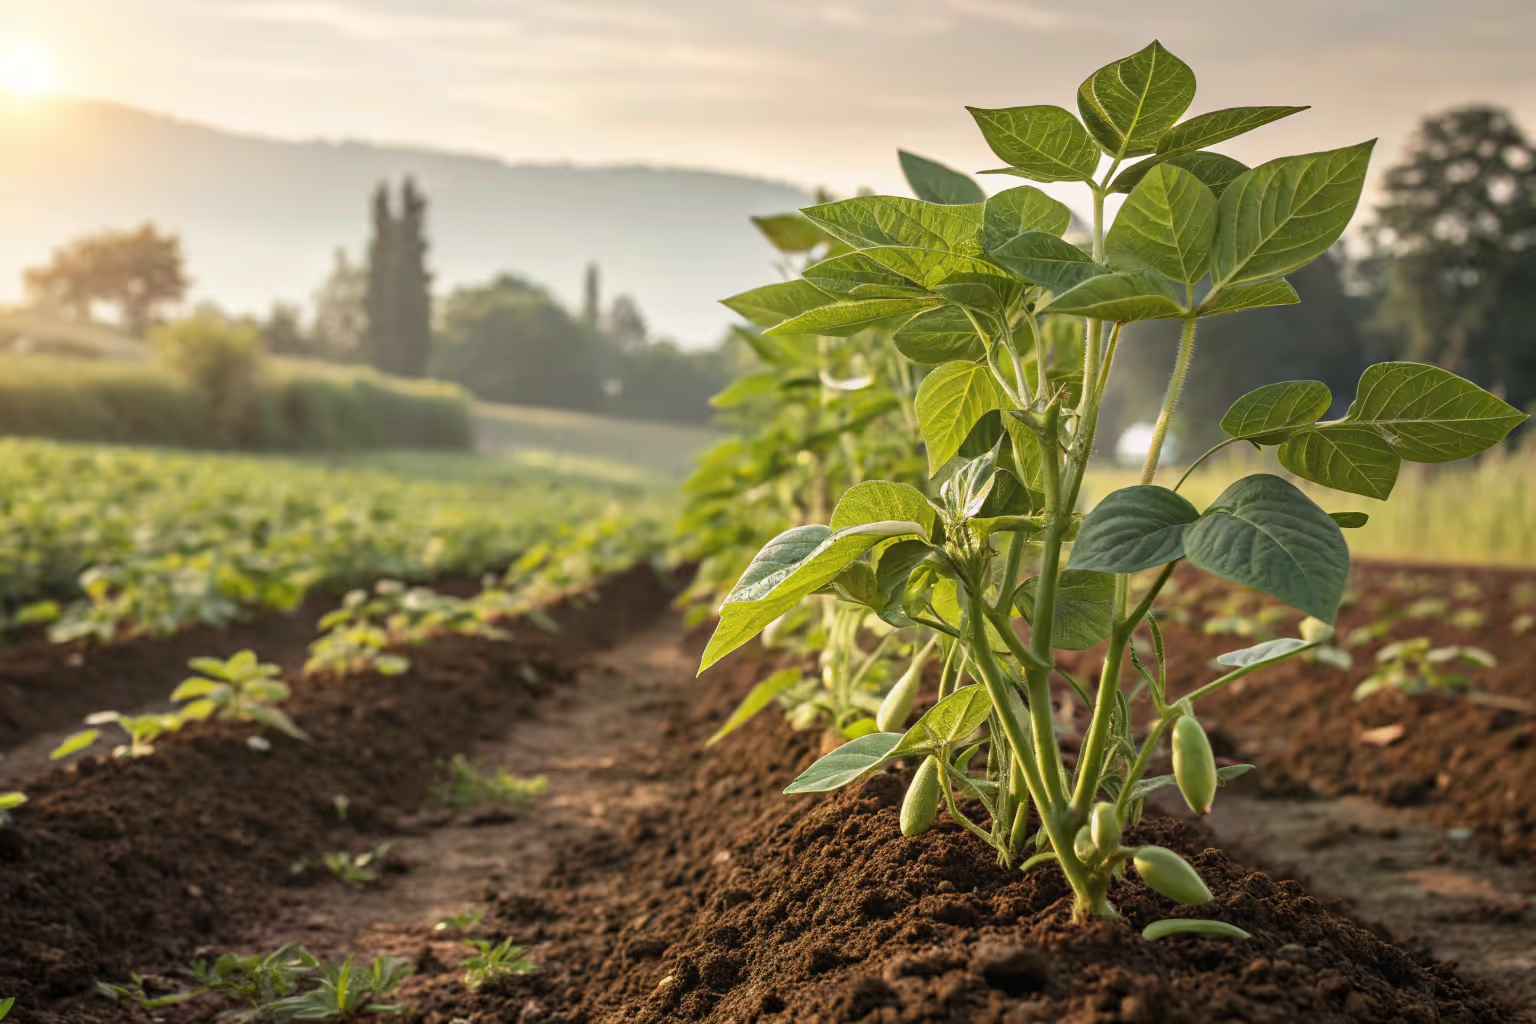
Growing Pinto Beans: from seed to skillet
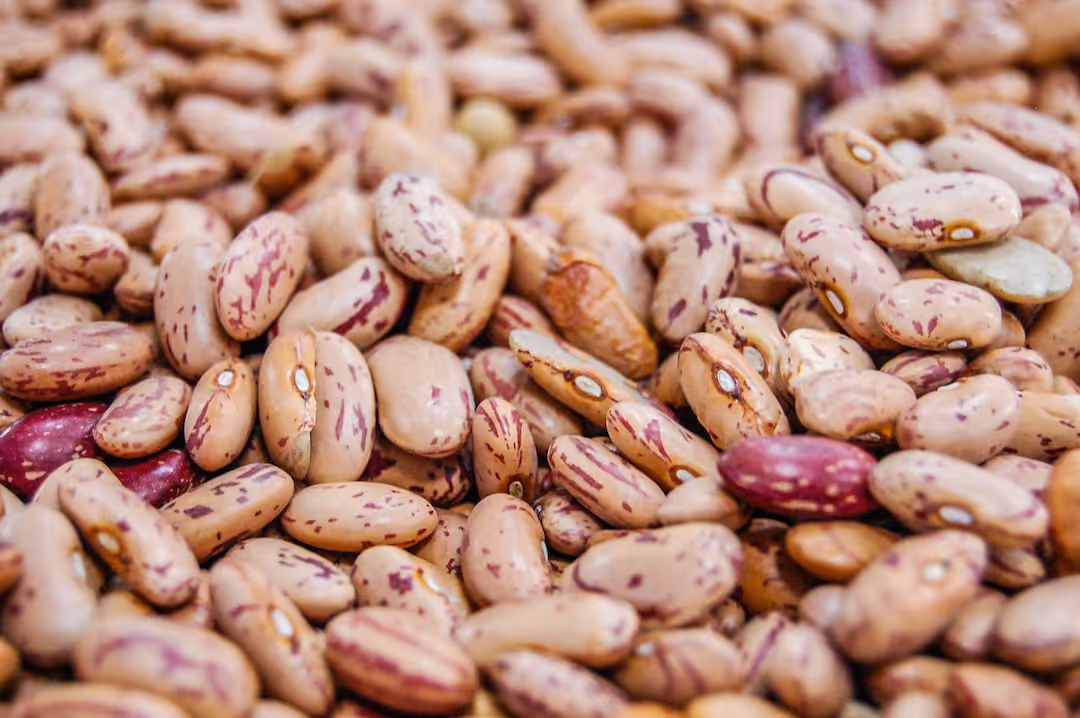
I grow pinto beans for flavor first, yield second. Fresh-dried pintos cook creamy and perfume the kitchen like rain on hot asphalt.
Why Growing Pinto Beans belongs in your plan
Growing Pinto Beans stacks protein, soil health, and pantry security in one crop. Dry beans carry about 21 percent protein by weight, according to USDA FoodData Central.
"Common bean is self-pollinating, warm-season, and frost-tender; sow into warm soil after the last frost." Source: Cornell Vegetable Program and multiple U.S. Extension guides.
Climate, timing, and site
I sow after soil warms to at least 60 to 65 F or 16 to 18 C. Night air below 50 F or 10 C slows growth and invites rot.
Pick a full-sun bed that drains fast. Beans hate wet feet.
Soil prep that pays off
I target pH 6.2 to 7.2, which aligns with Cornell and CSU Extension guidance. A fall compost dressing builds tilth, then I rake in a light pre-plant fertilizer low in nitrogen.
Nitrogen-heavy feed reduces nodulation and delays maturity. If your soil test shows low phosphorus or potassium, correct that now because beans mine N but still need P and K for pods.
Seed, inoculation, and varieties
Use fresh, untreated seed. I dust seed with a Rhizobium leguminosarum bv. phaseoli inoculant if the bed has not seen beans in 3 to 5 years.
Under typical garden conditions, legumes contribute roughly 20 to 40 kg N per hectare or 18 to 36 lb per acre to soil organic pools, according to FAO and CIAT summaries. That reduces fertilizer needs for the next crop.
Top pinto bean varieties I trust
- Othello bush type, reliable set, 95 to 100 days to dry down.
- Maverick bush, uniform, handles heat, 95 to 105 days.
- Sierra bush, steady yields, good seed coat integrity for storage.
- Burke bush, early, tidy canopy that dries evenly.
- Santa Maria semi-upright, good in arid gardens where drip rules the day.
Look to reputable seed houses with recent germ tests and regional trials. I have had consistent results from vegetable-breeding focused vendors and seed banks that publish disease-resistance notes.
Sowing depth, spacing, and layout
I plant 1 to 1.5 inches deep or 2.5 to 4 cm, deeper in sandy soil. Space seeds 3 to 4 inches or 7.5 to 10 cm apart in rows 18 to 24 inches or 45 to 60 cm apart.
Most pintos are bush types that do not need trellis, which simplifies cultivation and harvest. For occasional semi-vining lines, a low string between stakes keeps pods clean.
Water like a pro
Beans want about 1 inch or 25 mm of water per week. I run drip at 0.5 gph or 1.9 lph emitters for longer, less frequent sets to drive roots deep.
Keep foliage dry to avoid blights. Mulch with clean straw after the first cultivation to steady soil moisture and block weeds.
Weeding, thinning, and cultivation
I hoe lightly when seedlings hit the unifoliate-to-first trifoliate stage. A second thinning to the final 4-inch spacing lets air and light in.
Shallow cultivation protects surface nodules and feeder roots. Stop working the bed once plants canopy to avoid breaking stems.
Flowering, pods, and physiology
Common bean self-pollinates, so wind and bees are a bonus rather than a requirement. Heat above 95 F or 35 C can drop blossoms; steady water and mulch buffer that stress.
Pest watchlist and how I handle it
- Mexican bean beetle: Hand-crush clusters of yellow eggs, use lightweight row cover early, and consider beneficial releases of Pediobius foveolatus where available per Rutgers IPM notes.
- Aphids and spider mites: Rinse with a firm water jet, then spot-treat with insecticidal soap. Heat plus drought spikes mite pressure, so water evenly.
- Leaf-chewers: Bacillus thuringiensis kurstaki works on caterpillars while sparing beneficials.
Scout twice weekly. Catching pests small saves the crop and your weekend.
Diseases and cultural defense
- Anthracnose, rust, halo blight, common bacterial blight: Start with certified clean seed and resistant varieties where offered.
- Rotate at least 3 years away from beans and peas per University of Wisconsin recommendations.
- Avoid overhead irrigation, especially late afternoon. Work plants only when dry.
"Dry beans thrive under warm, dry finishing conditions; excess late nitrogen and irrigation delay maturity and invite disease." Source: North Dakota State University Extension dry bean management guides.
Feeding strategy that actually works
On fertile ground I skip nitrogen entirely. Where soil tests show deficiency, I side-dress at first bloom with a low-N, high-K organic blend at 0.5 to 1 lb per 10 row feet or 0.75 to 1.5 kg per 10 m, keeping granules off stems.
Container Growing Pinto Beans
Bush pintos handle containers if you give volume. I use 5-gallon or 19-liter pots at 12 inches or 30 cm deep, one to two plants per pot with drip stakes.
Use a peat-free, bark-based mix with slow-release organic fertilizer and a pinch of inoculant. Containers heat up, so water checks become daily in high summer.
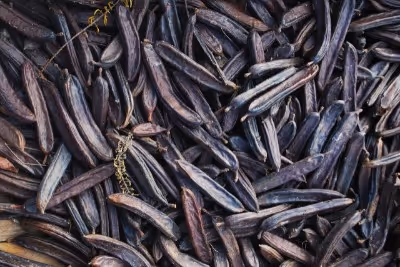
Harvest stages: green, shell, and dry
For shellies, pick when pods fill and seeds color but the pod still snaps. For dry beans, wait until pods turn parchment and rattle.
I pull whole plants before a rain, then hang upside down on a wire in a breezy shed. If weather turns humid, I finish drying on screens with a fan until seeds bite hard.
Threshing, cleaning, and curing
Old pillowcase, gentle stomp, quick winnow in a light breeze. I finish beans at 12 to 14 percent moisture by feel and sound, then jar them for a week to equalize before long storage.
For long-term storage, I use glass jars or food-grade buckets with tight lids under 60 F or 15.5 C. Oxygen absorbers stretch shelf life, but dry to safe moisture first to prevent condensation.
Yield math that helps plan space
My gardens average 1 to 1.5 lb or 0.45 to 0.7 kg of dry pintos per 10 row feet or 3 m under drip. In good years on loams, 2 lb or 0.9 kg per 10 feet is attainable.
"Dry bean maturity ranges 90 to 110 days from direct seeding, cultivar and climate dependent." Source: Johnny’s Selected Seeds and regional Extension guides.
Cooking advantage of homegrown dry beans
Fresh-dried beans from the current season cook in about 45 to 60 minutes without soaking on my stove. Older store beans can take two hours and still sulk.
"Fresh-crop beans are a different food." Steve Sando, Rancho Gordo, on why harvest-year beans taste and cook better.
Companions and rotations
I tuck pintos after early lettuce or spinach to use the warm slot cleanly. Avoid back-to-back plantings with other legumes to reduce disease carryover.
Alliums like onions nearby do not harm beans, but I keep a little space to ease cultivation. Corn-bean guilds work with pole types; most pintos are bush and prefer their own bed.
Buying guide: seeds, inoculant, and gear
- Seed quality: Look for recent germination test percentages and disease screening notes.
- Inoculant: Choose a product labeled for Phaseolus, kept cool and used within its date.
- Irrigation: Basic 1 gph or 3.8 lph button emitters or 8 mil drip tape at 12 inch or 30 cm spacing simplify water management.
- Row cover: Light 0.5 oz or 17 gsm for early beetle exclusion, secured tight at the edges.
- Storage: Glass jars with gasket lids or food-grade buckets with gamma lids for bulk lots.
Troubleshooting quick hits
- Yellowing between veins: Possible iron chlorosis in high pH soils; add chelated Fe and adjust irrigation water alkalinity.
- Lots of vine, few pods: Too much nitrogen or shade; back off N and widen spacing slightly.
- Pods split at dry-down: Late irrigation or uneven moisture; stop watering as pods begin to turn.
- Poor germination: Cold soil or crusting; wait for 65 F or 18 C soil and use a light mulch after sowing.
Seed saving notes
Common beans self-pollinate, so 20 to 50 feet or 6 to 15 m between different varieties keeps strain pure. Dry pods thoroughly, label by plant, and store cool for 3 to 5 years of good vigor.
Field tips from seasons that went sideways
After a hailstorm shredded leaves, I side-dressed with kelp meal and watered deeply. Plants regrew and still dried down on time because I stopped all nitrogen and irrigation at first yellow pods.
On a scorching July, I shaded the west side with 30 percent cloth from 2 to 6 pm to keep flowers from aborting. Yield held steady while the unshaded control row stumbled.
Numbers worth remembering
- Soil temp for sowing: 60 to 65 F or 16 to 18 C.
- pH target: 6.2 to 7.2.
- Water: 1 inch or 25 mm per week until pods start to tan.
- Days to maturity dry: 90 to 110.
Credible references I lean on
USDA FoodData Central for nutrient profiles. FAO and CIAT legume nitrogen fixation summaries for realistic N credits.
Cornell, Colorado State University, North Dakota State University, and University of Wisconsin Extension for production, IPM, and disease management. Rutgers IPM for Mexican bean beetle biological control with Pediobius foveolatus in suitable regions.
Frequently Asked Questions About Growing Pinto Beans
How much sunlight do pinto beans require?
Pinto beans thrive best under full sunlight conditions, typically needing at least 6 to 8 hours daily. Select a garden area receiving direct sunlight throughout most of the day for optimal growth and bean production.
What type of soil suits pinto beans best?
Pinto beans prefer well-draining, loose soils rich in organic matter. Aim for a slightly acidic to neutral soil pH ranging from 6.0 to 7.0. Adding compost before planting can enhance soil structure and nutrients, facilitating healthy root development.
When is the best time to plant pinto beans outdoors?
Plant pinto bean seeds directly outdoors once the soil temperature warms consistently above 60°F (16°C), usually from late spring to early summer. Cooler soil temperatures may hinder seed germination and growth.
How deep and far apart do I plant pinto bean seeds?
Sow pinto beans about 1½ inches (4 cm) deep into the soil. Space individual seeds roughly 3 to 4 inches (7.5 to 10 cm) apart, ensuring rows have approximately 18 to 24 inches (46 to 61 cm) between them to accommodate mature plant sizes.
How often should pinto beans be watered?
Maintain consistent moisture by providing approximately 1 inch (2.5 cm) of water weekly. Avoid overwatering, particularly during flowering and pod formation, as this may lead to disease or impaired bean development. Water in the early morning to reduce evaporation and fungal issues.
Do pinto beans require fertilizing during their growing cycle?
As legumes, pinto beans naturally fix nitrogen and usually require minimal fertilization. Before planting, incorporate a balanced, organic fertilizer into the soil. Excessive nitrogen application later will boost foliage growth at the expense of bean production.
When and how do I harvest pinto beans?
Harvest pinto beans once pods dry and turn brown, typically 90 to 150 days after planting. Pods will feel brittle, and rattling inside indicates dried beans. Pick pods by hand and dry beans further indoors before storing in airtight containers.
Are common garden pests a significant issue for pinto beans?
Pinto beans may encounter pests like bean beetles, aphids, and spider mites. Regularly inspect your plants for signs of damage and act quickly by manually removing pests or utilizing insecticidal soap treatments to control infestations before they escalate.
Can I grow pinto beans in containers indoors?
Although challenging indoors due to their growth habits and space requirements, growing pinto beans in spacious containers can succeed with sufficient sunlight. Choose deep containers providing at least 8 inches (20 cm) of root depth and position them near a sunny window or under adequate grow lights to encourage proper growth.
Growing Pinto Beans at home is about more than filling your pantry—it’s about flavor, self-reliance, and reconnecting with honest food. These beans reward patience, a bit of sun, and regular water with harvests that put store-bought legumes to shame. Keep your soil well-drained, avoid overwatering, and give your plants space to breathe. Rotate crops to dodge disease, and you’ll get plump, speckled pods that are as satisfying to shell as they are to eat. If you’re hungry for more bean adventures, try azuki beans next season. In the end, a patch of pinto beans is a reminder: the best food often comes from your own backyard, grown with care and a little dirt under your nails.
The Money Saver's Guide to Homegrown Pinto Beans
Maximize Savings with Strategic Planting
- Bulk Dry Bean Advantage: Purchase dry pinto beans in bulk from grocery stores as inexpensive seed alternative; germination rates remain high, typically above 85%.
- Succession Planting: Sow beans every 2 weeks to harvest continually, significantly reducing dependency on costly store-bought beans.
- Bean Pod Efficiency: Let pods fully mature to dry on plant; dried beans offer year-long storage without additional costs.
Boost Yields through Cost-Effective Soil Methods
- Natural Nitrogen Fixation: Rotate beans with leafy greens or corn; beans enrich soil naturally, reducing fertilizer usage.
- Homemade Compost: Apply kitchen scraps and yard waste compost to plots before planting; improves yields by up to 20% without purchased amendments.
Economical and Nutritional Impact
- Cost Comparison: Homegrown pinto beans cost about 75% less per kilogram (2.2 lbs) than canned store beans.
- Health Benefits: Fresh beans contain higher folate and fiber levels compared to processed store varieties, enhancing health and reducing grocery expenses.
Preserve and Store Beans Without Extra Costs
- Low-Tech Storage: Store dried beans sealed in repurposed containers, kept cool and dry; shelf life extends beyond 3 years.
- Budget-Friendly Preservation: Easily preserve harvest by sun-drying pods naturally, eliminating additional energy or equipment expenses.


Find out which plants will thrive in your garden!
Answer a few fun questions and get custom plant recommendations perfect for your space. Let’s grow something amazing together!

start your season