Growing Azuki Beans: A Simple Guide for Healthy Harvests
Growing Azuki Beans
Growing Azuki Beans rewards gardeners with protein-rich legumes and enriches soil by fixing nitrogen. Sow these hardy beans directly outdoors after frost danger passes, plant them in full sun, and water moderately until established. Harvest arrives swiftly—within 90–120 days—offering vibrant beans celebrated in Asian dishes and desserts; read on to ensure your crop flourishes.
Table of Contents
Cheatsheet: Azuki Success from Seed to Harvest
🌱 Choose Location & Prep Soil
- Full sun; at least 6 hr/day
- Sandy loam, well-drained, pH 6.0–7.5
- Add compost before sowing
🗓️ Plant at the Right Time
- Direct sow after last frost, soil 65–85°F (18–30°C)
- Space seeds 2 in (5 cm) apart, rows 18 in (45 cm) apart
- Plant 1 in (2.5 cm) deep
💧 Water & Feed
- Water consistently, but avoid wetting foliage
- Keep soil moist, not soggy
- Use organic mulch to retain moisture
- Azuki fix nitrogen; fertilizer rarely needed
🌿 Growth & Care
- Thin seedlings to 4 in (10 cm) once true leaves appear
- Minimize weed competition
- Stake if plants flop
- 80% of pods set within 3 weeks
🦗 Common Challenges
- Watch for aphids, leafhoppers
- Use row cover or insecticidal soap if needed
- Rotate crops yearly to reduce disease
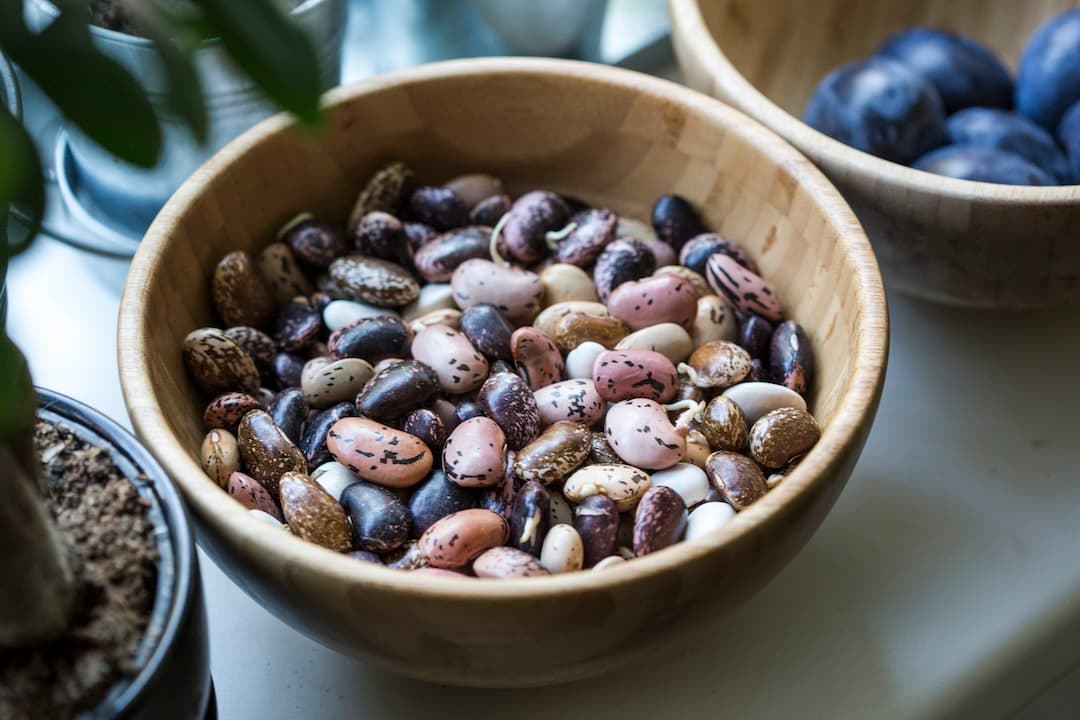
🌾 Harvest & Store
- Ready in 80–100 days
- Harvest when pods are dry & rattling
- Shell beans, air-dry for storage
- Store in airtight jars up to 1 year
🧰 Tools and Products You’ll Need
- Azuki bean seeds (non-treated)
- Compost or aged manure
- Mulch (straw or leaf mold)
- Hoe or hand cultivator
- Row markers, stakes
- Harvest basket, drying tray
🥗 Eat for Health & Self-Sufficiency
Protein-rich: 17g per cup cooked. High in fiber, iron, and antioxidants. Dried beans store up to 12 months for year-round nutrition.
Growing Azuki Beans: Site, Soil, and Season
I start Growing Azuki Beans only after soil warms to 60 to 70 F, which is 16 to 21 C. Cold, soggy ground slows emergence and invites root rot.
Pick a bed with full sun and excellent drainage. Azuki, Vigna angularis, hates wet feet and performs best in a sandy loam with a pH near 6.2 to 7.0.
I keep nitrogen modest and focus on phosphorus and potassium based on a soil test. Too much N gives leafy vines and fewer pods.
Temperature and day length
My best crops hit their stride in warm, settled weather. Many Asian cultivars respond to day length, so I choose day-neutral types for mid-latitude summers.
Timing, Spacing, and Planting
Direct sow 1 to 1.25 inches deep, which is 2.5 to 3 cm, into pre-warmed soil a week after the last frost. Space seeds 2 to 3 inches apart, which is 5 to 7.5 cm, with rows 18 to 24 inches apart, which is 45 to 60 cm.
I aim for 90 to 110 days to maturity. In cool zones, an early cultivar and black plastic mulch push the season just enough.
Beans dislike root disturbance, though I have transplanted in 2 inch soil blocks without stalling. If you try it, sow 2 to 3 weeks before set-out and plant blocks gently at true-leaf stage.
Inoculation and Fertility
Inoculation pays. Use a cowpea-group rhizobia inoculant labeled for Vigna to boost nodulation and biological nitrogen fixation.
I dust seed right before planting. In new ground, I see pink, healthy nodules by week four and sturdier plants in lean soils.
For fertility, I side-dress lightly with compost at first bloom. Avoid high-salt fertilizers and fresh manure which can scorch roots or feed foliar disease.
Water and Mulch
Keep moisture steady at 1 inch per week, which is 25 mm, with drip or soaker lines. The plant forgives short dry spells, yet drought at flowering and early pod fill cuts yield.
Mulch with clean straw after emergence. It cools the soil during hot spells and reduces soil splash that spreads foliar pathogens.
Varieties I Trust
- Erimo: Early, compact bush, uniform red seed, finishes in 90 to 95 days for me in zone 6.
- Dainagon: Large-seeded confection type with standout flavor, needs a longer window, about 100 to 115 days.
- Hokkaido small red: Reliable general-purpose strain with even maturity and good dry-down.
- Black adzuki selections: Slightly later, striking color, great for sprouts and rice blends.
- Day-neutral garden strains: Sold by specialty seed houses for temperate latitudes, less photoperiod fuss.
Availability shifts each season. I buy fresh stock from reputable seed companies and trial two side by side to learn how they behave in my soil.
Trellising and Growth Habit
Most garden adzuki are self-supporting bushes at 16 to 24 inches tall, which is 40 to 60 cm. I still run a low string or pea fence to keep pods clean after summer storms.
Vining selections benefit from a net or cattle panel. Shaded lower leaves dry faster on a trellis and that cuts disease in humid summers.
Pests, Diseases, and IPM
My main field issues are spider mites in hot, dusty stretches and occasional Mexican bean beetle. A firm overhead rinse at midday knocks mites off, then I return to drip to avoid damp foliage at night.
Row cover helps early, removed at bloom. For beetles, hand-pick egg clusters on leaf undersides and release parasitoid wasps where available.
Diseases include bacterial blight, anthracnose, and pythium or fusarium root rots in tight soils. Rotate 3 to 4 years away from beans and keep irrigation off the leaves to cut risk.
Sanitation matters. I skip working wet plants, prune weedy edges that trap humidity, and compost only thoroughly dried, symptom-free residue.
Harvest and Dry-Down
Pods mature unevenly. I start stripping when two thirds of pods have browned and rattle like maracas.
Rain at maturity can shatter pods. On a wet forecast, I cut whole plants, bundle, and finish-dry under cover with good airflow.
Thresh on a tarp and winnow with a box fan. For storage, dry seed to about 12 to 13 percent moisture, which is 120 to 130 g water per kg seed, then pack airtight.
For pantry pests, I freeze beans at 0 F which is minus 18 C for 72 hours. That stops bruchid weevils before they start.
Yield Benchmarks
In my small beds I average 0.5 to 1.2 pounds per 10 square feet, which is 0.25 to 0.6 kg per square meter. Fertile, well-drained soil and timely harvest swing the needle.
"Pulses are the edible seeds of plants in the legume family." FAO
Kitchen Payoff
Fresh-dried adzuki cook in 45 to 60 minutes without pre-soak. They hold shape, taste sweet-nutty, and shine in rice blends, salads, and sweet pastes.
Cooked adzuki deliver about 7.5 g protein per 100 g serving per USDA FoodData Central. I stash smaller jars for quick weeknight meals.
Buyer’s Guide: Tools and Supplies That Actually Help
- Cowpea-group inoculant: Labeled for Vigna, applied right before sowing, store cool and dry.
- Soaker hose or 1 gph drip line: Keeps foliage dry and soil evenly moist at bloom and pod fill.
- Black mulch film or landscape fabric: For cool springs, it warms soil and controls early weeds.
- Low trellis net or pea fence: Keeps pods off soil and simplifies picking.
- Moisture meter or hygrometer jars: Confirms safe storage moisture near 12 to 13 percent.
- Food-safe oxygen absorbers and tight jars: Extend shelf life and deter pantry pests.
Soil Science, Simplified
Azuki roots want air. I loosen compacted beds with a fall cover crop like oats and till in early, then rake in compost to create a crumbly tilth.
A balanced pre-plant blend with modest P and K supports flowering and pod set. I target soil pH near neutral for best nutrient uptake.
FAO and agronomy texts report many pulses can fix roughly 30 to 80 kg nitrogen per hectare under good nodulation. That is 27 to 71 pounds per acre.
My Field Notes and Little Fixes
One blistering July, heat stalled pod set until I shifted watering to predawn and mulched heavier. The next flush of flowers stuck and yield recovered.
An overfed bed gave me lush plants with stingy pods. Cutting nitrogen to zero the next season and adding inoculant flipped the result.
Comparisons and Smart Alternatives
- Azuki vs kidney bean: Azuki matures earlier and handles cooler nights better, yet needs careful dry-down to avoid shatter.
- Azuki vs mung bean: Azuki prefers drier air and has firmer skins after cooking, while mung excels for quick sprouts.
- Azuki vs cowpea: Cowpea tolerates heat and poor soils, yet azuki gives cleaner flavor in sweets and mixed grains.
- Short-season backup: In foggy, short summers, pick early azuki like Erimo or grow mung as a sure bet.
Companions and Rotation
I rotate after cereals, garlic, or brassicas. Avoid following or preceding other legumes for at least three years to lower disease load.
Edges of buckwheat or alyssum bring beneficials that keep mites and beetles honest. Azuki self-pollinates, so bee traffic is a bonus for biodiversity more than seed set.
Regional Tips by Temperature Zone
- Cool summer zones 4 to 5: Warm the bed with plastic, choose day-neutral, early types, and avoid shade from tall crops.
- Temperate zones 6 to 7: Standard schedule after last frost, mulch early, and watch for midsummer mites.
- Hot zones 8 to 9: Sow a bit earlier, irrigate at dawn, and give plants afternoon airflow to limit heat stress.
Frequently Asked Quick Answers
How deep to plant: 1 to 1.25 inches, which is 2.5 to 3 cm. Shallower in cool soils, deeper in warm sands.
Do I need a trellis: Bush types do fine, yet a low fence lifts pods and speeds harvest.
How do I know they are dry enough: Seeds are hard, glossy, and crack under a bite test, or pass a 12 to 13 percent moisture reading.
Can I eat them fresh: Yes, shell at full size when still green and cook like shelling beans, though flavor is milder than dried.
Sourcing and Credible References
I rely on seed houses that list days to maturity, growth habit, and photoperiod notes. Regional trials beat catalog prose every time.
For cultivation details and statistics, see FAO pulse resources, USDA FoodData Central nutrition data for adzuki, and prairie province guides on adzuki production from agriculture ministries. Hokkaido research reports are useful for confection types and post-harvest handling in humid climates.
Frequently Asked Questions About Growing Azuki Beans
What soil conditions promote healthy Azuki bean growth?
Azuki beans thrive in well-draining, fertile soil with a neutral to slightly acidic pH (6.0–7.0). Before planting, enrich your soil with organic compost to improve nutrient content and drainage.
How much sunlight do Azuki bean plants require?
Azuki beans prefer a location offering full sun exposure, receiving at least 6 to 8 hours of direct sunlight each day. This ample sunshine encourages vigorous growth, flowering, and pod formation.
At what time of year should Azuki beans be planted?
Begin planting Azuki beans outdoors after all threat of frost has passed and when daytime temperatures consistently reach around 70°F (21°C). Typically, planting occurs in late spring or early summer, depending on your location.
What watering practices best support Azuki bean plants?
Azuki beans prefer moderate, consistent moisture. Water regularly, ensuring the soil remains moist but not waterlogged. Overwatering may result in root rot, while inconsistent watering can reduce pod development.
How long does it typically take Azuki beans to mature and become harvest-ready?
Azuki beans usually reach maturity within 90–120 days after planting. Harvest pods when they appear fully dry, brittle, and light brown, indicating the beans inside have fully developed.
Should Azuki beans be provided with supports or trellises?
While Azuki bean plants do not strictly require supports, providing a small trellis or stakes encourages upward growth, prevents overcrowding, and facilitates air circulation, leading to healthier plants and easier harvesting.
Are Azuki bean plants susceptible to specific pests or diseases?
Azuki beans may attract common garden pests such as aphids, bean beetles, and spider mites. Regularly inspect your plants, promptly remove any pests, and employ natural pest control methods like beneficial insects and neem oil applications to maintain plant health.
Growing Azuki Beans isn’t complicated, but it does reward attention and patience. Give these little legumes a sunny patch, loose soil, and steady moisture—they’ll return the favor with rich, nutty pods ready for everything from sweet paste to hearty stews.
Rotate your beans, keep the weeds down, and let the pods mature fully before picking. That’s how you get the best flavor and a healthy crop year after year. If you’re curious about other protein-packed plants, try mung beans or lentils next season.
At the end of the day, the real reward is a bowl of homegrown beans—simple, honest, and packed with the taste of your own work.