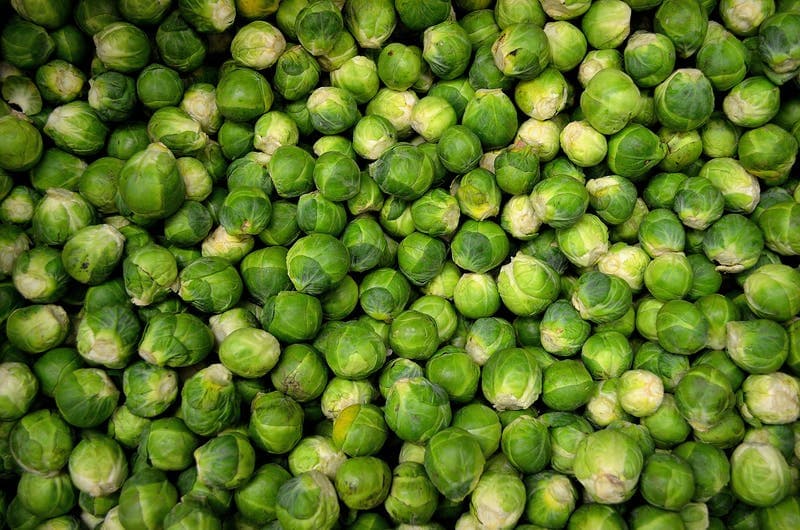
Growing Brussels Sprouts: How to Plant, Grow, and Harvest
Growing Brussels Sprouts
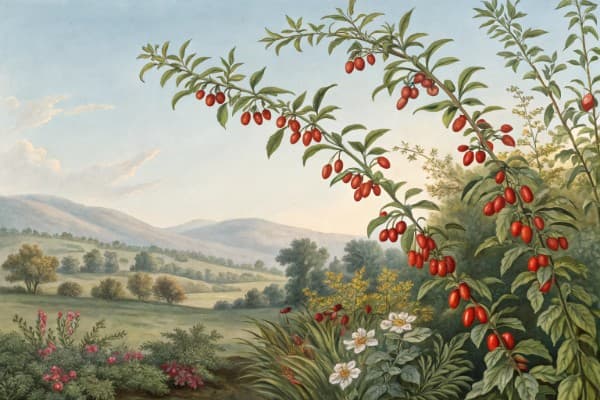
Growing Brussels sprouts starts with planting seeds indoors about six weeks before your final spring frost. Transplant seedlings into well-drained, fertile soil with full sun exposure, spaced roughly two feet apart to allow ample growth. Ensure steady moisture and consistent feeding to help sprouts thrive—follow these straightforward steps, and you'll savor a rewarding autumn harvest of tender, garden-grown sprouts.
Table of Contents
Cheatsheet: Brussels Sprouts Planting & Harvest Guide
🌱 Choose Site & Timing
- Full sun; 6+ hrs daily
- Soil: pH 6.5–7.5, rich, drains well
- Sow indoors 4-6 weeks before last frost (spring), or sow outside in summer for fall harvest
🧰 Tools and Products You'll Need
- Brussels sprout seeds or starter plants
- Seed trays or 3" pots
- Compost or aged manure
- Balanced vegetable fertilizer (10-10-10)
- Mulch (straw or leaves)
- Hand trowel
- Garden fork
- Pruning shears
- Watering can or hose
🌡️ Planting
- Sow Depth: ½ in (1.2cm)
- Spacing: 18–24 in (45–60cm) between plants; rows 30 in (75cm) apart
- Transplant when seedlings have 2–3 true leaves
- Soil temp: 45–80°F (7–27°C)
Mix compost into bed 2 weeks before planting. Level soil and amend if needed to reach neutral pH.
Set seeds ½ in (1.2cm) deep or plant starts at crown level. Space as above. Firm gently. Water deeply.
Apply balanced fertilizer 3–4 weeks after transplanting. Mulch to suppress weeds and retain moisture.
Keep soil evenly moist (1–1.5 in / 2.5–3.5cm per week). Do not let soil dry out
As sprouts form, snap off yellowing leaves below maturing sprouts to boost yield.
Ready in 90–180 days. Sprouts firm, 1–2 in (2.5–5cm) diameter. Pick from bottom up. Flavor peaks after light frost.
🍽️ Health & Nutrition
- High in vitamin C, K, fiber, and antioxidants
- 1 cup: 38 calories, 124% DV vitamin C
- Boosts self-sufficiency; stores 3–5 weeks in fridge
🐛 Troubleshooting
- Watch for aphids, cabbage worms, clubroot
- Use floating row covers, rotate crops yearly
My first frost-sweetened sprout snapped off like a tiny drum, and I ate it raw in the field with dirt on my boots. Since then I’ve chased that flavor by dialing in timing, soil, and ruthless patience.
Brussels sprouts in a nutshell
Cool-season brassica with a long runway and a big payoff, happiest in steady chill. Expect 80 to 110 days from transplant to first pick, depending on variety and weather.
The plant builds a thick stalk, then sets tight buds along the stem that we call sprouts. Cold nights 28 to 40 F, 2 to 4 C, concentrate sugars and tighten the buttons.
Timing for success
I target a fall harvest for peak flavor and fewer pests. Start seeds indoors 6 to 8 weeks before your late summer transplant window.
Transplant 12 to 14 weeks before first fall frost so the crop sizes up before hard cold. In Zones 5 to 7, I set plants out mid to late July; in Zones 8 to 9, late August works.
Spring crops can work in cool coastal sites, but heat over 80 F, 27 C, makes loose, bitter sprouts. If summer blasts you, choose earlier hybrids and use shade cloth.
Site and soil
Full sun and steady moisture ride shotgun here. Aim for pH 6.5 to 7.2 to reduce clubroot risk and improve nutrient uptake.
I feed heavy with compost and a pre-plant, balanced organic fertilizer based on soil test results. High nitrogen helps build the stalk, yet too much late can puff the sprouts.
Mulch with straw or shredded leaves to keep roots cool and even out moisture. This crop hates feast-and-famine watering cycles.
Transplanting and spacing
Start sturdy seedlings in deep cells and transplant at 4 to 6 weeks old with stems the width of a pencil. Bury to the first true leaves for anchoring.
Space 18 to 24 in, 45 to 60 cm, between plants and 30 to 36 in, 75 to 90 cm, between rows. In windy plots I stake each plant with a bamboo cane to prevent lean.
Water and feeding
Target 1 to 1.5 in, 25 to 38 mm, of water per week, more in sandy beds. Drip lines keep foliage dry and diseases at bay.
Side-dress nitrogen at 3 to 4 weeks after transplanting, then again as the first marble-sized sprouts appear. Follow your soil lab’s recommendation for rates.
Can you grow them in containers?
Yes, if the container is big and heavy. Use 10 to 15 gallon, 38 to 57 liter, tubs, one plant per pot, and a high-quality peat-free mix with added compost.
Top-dress midseason and water daily in heat. Stake the stem so the sail of leaves does not tip the pot.
Cultural tricks that make the difference
- Lower leaf removal: Once the bottom sprouts firm up, strip the corresponding leaf to open air channels. I remove a few each week, never a whole skirt in one go.
- Topping: Cut 1 to 2 in, 2.5 to 5 cm, off the growing tip 3 to 4 weeks before your last pick to redirect energy into sizing the remaining sprouts.
- Apical dominance: Topping breaks the tip’s control so side buds bulk up. Time it for your climate so plants still have light and warmth to finish.
- Frost sweetening: Leave plants standing through light frosts for flavor. I harvest stalks ahead of deep freezes to avoid burst cells.
“Flavor improves after a light frost, and sprouts hold well on the stalk in cool weather,” notes RHS and multiple US Extension guides. Optimal growth sits around 60 to 65 F, 15 to 18 C.
Pests and diseases: my field playbook
I run prevention hard, then spot-treat early. This crop pays back vigilance.
- Cabbage worms and loopers: Scout undersides of leaves twice a week and squeeze eggs. Apply Bacillus thuringiensis kurstaki at first tiny chew marks; reapply after rain.
- Aphids: They pack into the sprout layers late in the season. Blast with water, follow with insecticidal soap, and keep nitrogen moderate so growth isn’t too sappy.
- Flea beetles: Floating row cover from transplant protects young leaves. Healthy, fast growth outruns minor feeding.
- Clubroot: Avoid brassica beds for 3 to 4 years and keep pH near neutral. Pick clubroot-resistant varieties if your ground has history.
- Black rot and downy mildew: Good spacing, clean seed, drip irrigation, and steady airflow help. Strip older yellowing leaves promptly and sanitize tools.
Harvest and handling
Sprouts are ready when tight, firm, and 1 to 1.5 in, 2.5 to 4 cm, across. Twist downward to pop them off, or cut whole stalks for fridge storage.
Refrigerate unwashed in a breathable bag for up to 10 days. For freezing, blanch 3 to 5 minutes, chill, dry, and pack.
Flavor and kitchen notes from the field
Small, tight buttons cook evenly and taste sweeter. I slice them pole-to-pole so leaves unfurl in the pan and char like they mean it.
A quick roast at 425 F, 220 C, with oil and salt, then a splash of vinegar at the end, makes a weeknight plate feel earned. Save the outer leaves for a cook’s snack in the skillet.
Growing Brussels Sprouts by variety
I trial fresh picks every season and keep a core roster. These have paid rent in both flavor and yield.
- ‘Gustus F1’: Dependable, uniform, great fall finisher.
- ‘Dagan F1’: Tall, easy to strip, loves topping, excellent stalk strength.
- ‘Diablo F1’: Early for warmer areas where fall is short.
- ‘Hestia F1’: Handles a bit more warmth and still buttons tight.
- ‘Crispus F1’: Clubroot resistance where that disease lurks.
- ‘Long Island Improved’: Classic open-pollinated line, reliable in small gardens.
- ‘Falstaff’ purple: Showy, nutty, and holds color best with quick high-heat cooking.
Shopping and gear guide
I keep it simple but specific so plants don’t stall. Here’s the short list that actually moves the needle.
- Seed starting trays: Deep cells for stout roots; add a gentle bottom heat for germination at 70 to 75 F, 21 to 24 C, then grow cool under lights.
- Row cover: Lightweight fabric over hoops at transplant to block moths without cooking the plants.
- Drip irrigation: Consistent moisture without leaf wetting, paired with a mulch cap.
- Soil test kit or lab test: Dial pH and nutrients; this saves more money than any fertilizer sale.
- Stakes and soft ties: Tall stalks catch wind; give them a spine.
Crop rotation and bed hygiene
Keep all brassicas on a 3 to 4 year rotation to starve soilborne pathogens. Pull and trash diseased material instead of composting it.
Clean up plant debris after the final pick so pests do not overwinter. Wash stakes and knives before they go back on the rack.
Troubleshooting cheat-sheet
- Loose, leafy sprouts: Heat or too much nitrogen late; switch to fall timing, top plants, and give more airflow.
- Tiny buttons that stall: Late planting or drought; water deeply and top 3 to 4 weeks before first hard freeze.
- Yellowing lower leaves: Normal aging or nitrogen dip; strip a few leaves and side-dress modestly if growth is pale.
- Bitterness: Heat stress or overmaturity; harvest smaller and aim for colder finish next cycle.
Companions and biodiversity
I border beds with dill and sweet alyssum to pull in hoverflies and lacewings. Nasturtiums make a decent aphid sink if you can tolerate the theater.
Interplanting with fast radishes keeps soil working while the stalks bulk up. Keep spacing generous so neighbors do not steal light.
Numbers that set expectations
A mature plant can produce 50 to 100 sprouts in a good season. Yields of 1.5 to 3 pounds, 0.7 to 1.4 kg, per plant are common in healthy soil with a cool finish.
Sprouts hold on the stalk down to about 20 F, minus 6 C, with row cover. Below that, pick and store cold.
Why frost flips the flavor
Cold cues the plant to convert starches into sugars as antifreeze. That is why late fall markets taste better than summer restaurant sprouts grown in cool coastal pockets.
Field note
On a raw November morning I’ll cut a whole stalk, set it upright in a bucket of water, and park it in the garage like a strange bouquet. It buys me two extra weeks of prime eating without crowding the fridge.
Further reading and sources
- Royal Horticultural Society, Grow Your Own Brussels Sprouts: cultivation timing, spacing, and frost-improved flavor.
- University of Minnesota Extension, Cole Crops: temperature ranges, topping for uniform maturity, and nutrient guidance.
- UC IPM, Cole Crops Pest Management: scouting frequency, Bt timing, and cultural controls.
- North Carolina State Extension, Vegetable Gardening Handbook: pH targets, rotation intervals, and watering benchmarks.
- University of Maine Cooperative Extension, Brassica Production: transplant scheduling for fall crops and harvest practices.
- Johnny’s Selected Seeds Grower’s Library, Brussels Sprouts Culture: variety notes, topping windows, and stalk stripping technique.
Frequently Asked Questions: Growing Brussels Sprouts
What is the optimal time of year to plant Brussels sprouts?
Plant Brussels sprouts in early spring for summer harvest or in mid to late summer for autumn and winter harvests. Aim for planting four months ahead of expected frost dates, typically in temperatures around 60–65°F (15–18°C).
How deep and how far apart should Brussels sprouts be planted?
Plant Brussels sprout seedlings approximately ½ inch (1–2 cm) deep, spacing them 18–24 inches (45–60 cm) apart in rows separated by about 30 inches (75 cm). Proper spacing ensures adequate airflow and vigorous plant growth.
What kind of soil benefits Brussels sprouts most effectively?
Brussels sprouts flourish in rich, fertile, and well-drained soil with a neutral pH range of 6.5–7.0. Enrich your planting bed with plenty of organic compost or aged manure prior to planting for optimal nutrient availability.
How much water do Brussels sprouts require for healthy growth?
Water Brussels sprouts regularly, providing about 1–1½ inches (2.5–4 cm) of water per week. Consistent moisture is key, but avoid oversaturation to prevent root rot.
Should Brussels sprouts undergo fertilization during growth?
Yes. Apply a balanced fertilizer or side-dress plants with compost or aged manure approximately four to six weeks after planting. Additional feedings every three to four weeks help encourage healthy, productive growth.
At what point are Brussels sprouts ready to harvest?
Harvest Brussels sprouts when sprouts measure about 1–2 inches (2.5–5 cm) in diameter, and feel firm and compact. Start picking from the bottom up, usually 90 to 110 days after planting.
How do you prevent common pests from damaging Brussels sprouts plants?
Regularly check the Brussels sprout plants for signs of cabbage loopers, aphids, and cabbage worms. Use lightweight row covers, insecticidal soap, or practice crop rotation annually to maintain plant health and minimize pest threats.
Growing Brussels Sprouts rewards patience, grit, and a bit of humility. These little cabbages thrive with steady care: rich soil, cool weather, and a watchful eye for pests. Start early, space them well, and don’t rush the harvest—let the cold sweeten those tight green buds.
Rotate crops and feed the soil to keep your patch healthy. If you’re hooked on brassicas, try your hand at growing cauliflower or broccoli for a more varied plate.
In the end, the flavor of homegrown sprouts—earthy, nutty, kissed by frost—is worth every bit of effort. Respect the process, and you’ll bring something honest and delicious to your table.