Growing Stevia: A Simple Guide to Planting Sweetness
Growing Stevia
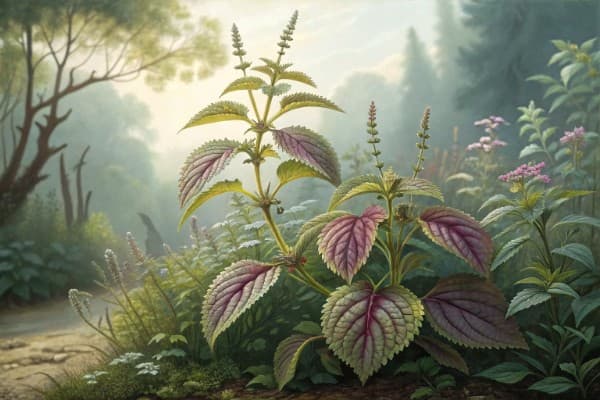
Growing stevia offers sweet rewards without the calorie guilt. Start by planting stevia seeds indoors 8-10 weeks before the final frost, placing them near a sunny window and watering lightly. Once established, transplant seedlings to rich, loamy, well-drained garden soil under full sun—and you'll soon harvest your own natural sweetener. Here's how to cultivate this intriguing, sugar-free herb in your backyard.
Table of Contents
- Growing Stevia: Planting Sweetness With Confidence
- Starting Plants: Seeds, Cuttings, or Transplants
- Planting Day, Step by Step
- Water, Feeding, and Pruning That Sweetens the Deal
- Harvest Timing and Handling
- Drying and DIY Sweeteners
- Flavor Tweaks: Glycosides, Varieties, and Bitterness Control
- Containers, Balcony Rigs, and Overwintering
- Pest and Disease Playbook
- Companions and Garden Fit
Cheatsheet: How To Grow Stevia for Pure Sweetness
🌱 Planting Location & Timing
- Light: 6+ hours full sun
- Soil: Loose, well-drained, pH 6.7–7.2
- Temp: ≥70°F (21°C) for germination. Avoid frost.
- Start indoors 8 weeks before last frost, transplant after danger passes.
🛠️ Tools and Products You'll Need
- Stevia seeds or starter plants
- Potting mix or garden soil
- Seed trays or small pots
- Hand trowel
- Watering can or drip system
- Mulch
- Sharp scissors (for harvest)
🔁 Step-by-Step Growing Process
- Sow seeds shallowly (⅛"/3 mm) in moist mix. Cover lightly.
- Keep temps 70–75°F (21–24°C) for sprouting. Moist but not soggy.
- Transplant after last frost, 12" (30 cm) apart, full sun.
- Mulch. Water when top inch (2.5 cm) dries out. Avoid overwatering.
- Pinch tips for bushier shape.
🌿 Care & Maintenance
- Fertilizer: Minimal. Compost works best.
- Watch for whiteflies & aphids. Use neem or soapy water if needed.
- Harvest leaves before flowering for top sweetness.
- Dry leaves in shade to preserve flavor.
🍵 Health & Self-Sufficiency Perks
- 0 calories: Natural sweetener for diabetics, keto, and low-carb diets.
- 1 plant yields enough to replace 10–20 lbs (4.5–9 kg) sugar yearly.
👩🍳 Harvest & Use
- Snip stems early a.m. for crucial oils.
- Air dry. Store in airtight jars.
- Grind or steep leaves for teas, baking, or syrups.
Growing Stevia: Planting Sweetness With Confidence
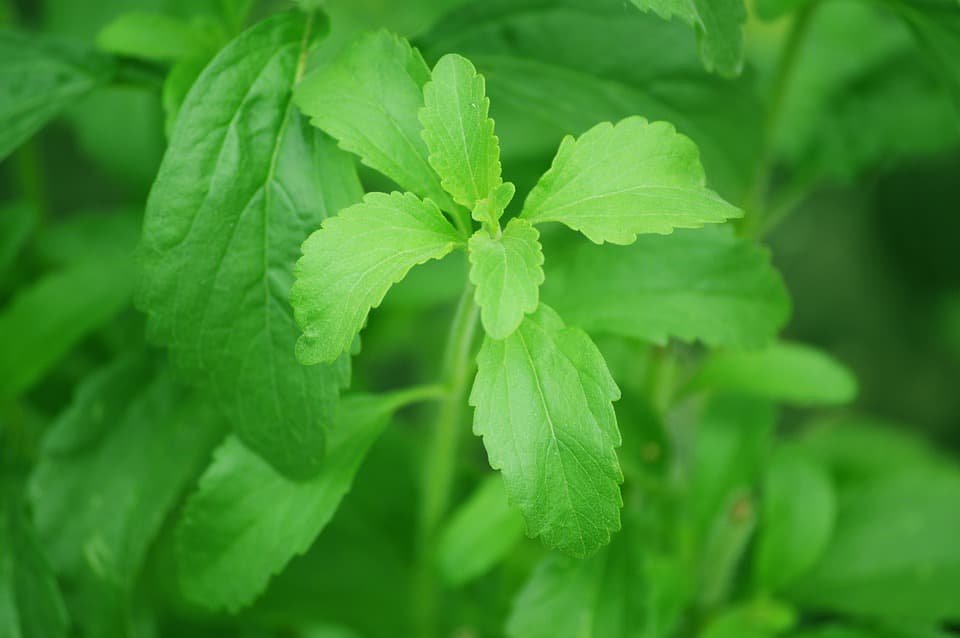
I grow Stevia rebaudiana for one reason, and it has nothing to do with fads. I like a leaf that can sweeten iced tea straight off the stem, then dry down into a pantry staple that saves me from refined sugar.
Climate and site
Stevia behaves as a tender perennial in USDA zones 9 to 11, and as an annual elsewhere, since the first frost can flatten it. Give it full sun, at least 6 to 8 hours, and shelter it from cold spring winds that stunt new growth.
Soil should drain fast yet hold moisture, like a sandy loam with added compost. Aim for a pH between 6.5 and 7.5, and keep salts low or leaves taste muddier than sweet.
Soil prep and spacing
I till in 2 to 3 inches of finished compost and a handful of slow-release organic fertilizer low in nitrogen, since excess N makes leaves lush and less sweet. Space plants 18 inches apart, rows 24 inches apart, because airflow keeps foliar problems away.
In containers, a 3 to 5 gallon pot per plant works, filled with a high-porosity mix made of peat or coco, perlite, and a little compost. I mix in extra perlite so roots never sit soggy after a summer storm.
Starting Plants: Seeds, Cuttings, or Transplants
I have started stevia every which way, and cuttings win for uniform flavor and vigor. Seed lots can vary wildly, germinate unevenly, and throw bitter plants that waste space.
- Seeds: Start indoors 8 to 10 weeks before last frost at 70 to 75 F, 21 to 24 C, with light contact since tiny seeds need light to germinate.
- Cuttings: Take 3 to 4 inch, 7 to 10 cm, softwood tips, strip lower leaves, dip in rooting hormone, and stick in a sterile mix under high humidity for two weeks.
- Nursery transplants: Easiest on time and space, and you can taste a leaf before you buy to avoid off-flavors.
I keep a mother plant under LEDs each winter for spring cuttings, since clones keep the sweetness profile I like. It saves money and avoids the seed lottery.
Planting Day, Step by Step
- Wait until nights stay above 55 F, 13 C, and soil hits 65 F, 18 C.
- Harden plants for a week, increasing outdoor time each day.
- Plant crowns level with soil, never buried, then water to settle roots.
- Mulch 1 inch, 2.5 cm, with shredded leaves or straw to moderate moisture.
- Pinch the top pair of leaves after establishment to push branching.
Water, Feeding, and Pruning That Sweetens the Deal
Stevia drinks steadily but hates wet feet, so I irrigate when the top inch, 2.5 cm, dries, then water deeply. Drip lines shine here, and they keep foliage dry in humid summers.
Feed lightly every 3 to 4 weeks with a balanced organic fertilizer or fish and kelp, at half strength. I prune to a 12 to 18 inch, 30 to 45 cm, dome through summer, which yields more tender tips and a higher leaf-to-stem ratio.
Harvest Timing and Handling
Leaves peak in sweetness right before flower buds open, so I watch for swelling nodes and harvest hard. Morning harvest after dew dries keeps volatile compounds and reduces drying time.
I strip leaves from stems, rinse fast, and spin or pat dry. Then I spread them thin on screens, out of direct sun, with a fan on low.
“Steviol glycosides have 200 to 300 times the sweetness of sucrose.” — European Food Safety Authority, 2010
“High-purity steviol glycosides are considered GRAS for use in foods in the United States, while whole-leaf stevia and crude extracts are not approved as sweeteners.” — U.S. Food and Drug Administration
Drying and DIY Sweeteners
Dry at or below 95 F, 35 C, to preserve flavor and color. A dehydrator on the lowest setting finishes a batch in a few hours without cooking it.
- Green leaf powder: Pulse brittle-dry leaves in a clean coffee grinder, then sieve for a fine, bright powder that sweetens tea and oatmeal.
- Water extract: Steep crushed leaves in hot water at 160 F, 71 C, for 10 to 15 minutes, strain, and refrigerate for a week’s use.
- Alcohol tincture: Cover leaves with vodka, steep 24 hours, strain, then warm gently to drive off some alcohol for a more syrupy finish.
Store dried leaves or powder in airtight jars away from light for six months of reliable flavor. I label jars by harvest date since early fall batches taste rounder than spring ones.
Flavor Tweaks: Glycosides, Varieties, and Bitterness Control
Sweetness comes from stevioside and rebaudioside A, and higher Reb A often means cleaner sweet with less lingering aftertaste. Varieties like Morita II and Eirete skew sweeter for me, while some seed-grown strains lean herbal and slightly licorice.
Harvest earlier and avoid overfertilizing with nitrogen to curb bitterness. Consistent moisture also softens sharp notes, while drought stress concentrates harsher compounds.
Containers, Balcony Rigs, and Overwintering
In pots, I top-dress monthly with worm castings and water with a calcium-magnesium supplement once midseason to steady growth. A 12 inch, 30 cm, fabric pot breathes well in heat and keeps roots happier than plastic.
Before first frost, I cut plants back to 6 inches, 15 cm, pot the crowns, and bring them inside by a bright window or under LEDs at 14 to 16 hours of light. Keep temps around 65 to 72 F, 18 to 22 C, and water sparingly until spring.
Pest and Disease Playbook
Aphids, whiteflies, and spider mites show up on tender tips in mid summer, so I scout twice a week. Yellow sticky cards catch the first wave, then I use insecticidal soap or neem oil with good coverage under leaves.
Root rot only appears when drainage falters, which is why I keep mulch thin and avoid overhead watering in late day. Good spacing, clean pruners, and dry mornings cut disease pressure more than any spray.
Companions and Garden Fit
Stevia sits well with peppers and eggplant that share sun and irrigation needs. I tuck it at the end of tomato rows so I can nip leaves for tasting during brix checks on fruit.
Herb borders love its texture, especially alongside basil, lemon verbena, and mint, though I corral mints in pots to stop turf wars. Bees visit flowers late season, so I leave a corner to bloom after my main harvest.
Yield, Use, and Kitchen Math
One well-grown plant supplies jars of dried leaf, enough to sweeten beverages for months. A teaspoon of fine powder can sweeten a full liter of iced tea, though I dial to taste since leaf strength varies by batch.
I blend stevia powder with a touch of erythritol or dried lemon peel when I want better dispersion in baking. Leaf sweetener shines in infusions, sauces, and yogurt, less so in high-heat caramelization where sugar chemistry matters.
Smart Buying Guide: Plants, Seed, and Helpful Gear
- Transplants: Choose sturdy, well-branched plants with clean leaf edges and no sticky residue under leaves.
- Seed: Look for fresh, current-season lots and vendors who disclose germination rates and parentage.
- Rooting kit: Humidity dome, sterile seed-starting mix, and a mild rooting hormone make cloning painless.
- Soil meter: A reliable pH test kit helps keep that 6.5 to 7.5 pocket dialed.
- Irrigation: Simple drip lines and 1 gph emitters prevent the cycle of drought and flood that blunts sweetness.
- Drying gear: Mesh racks or a low-temp dehydrator, plus airtight glass jars, lock in flavor.
Quick Answers
- Is stevia safe: High-purity steviol glycosides are widely accepted for food use, per FDA and international evaluations.
- When to harvest: Right before flower buds open gives the brightest, cleanest sweet.
- Perennial or annual: Perennial in warm zones, annual elsewhere, yet easy to overwinter indoors under lights.
- How often to feed: Light, steady nutrition every few weeks beats heavy doses that dilute sweetness.
Field Notes From Trials
In side-by-side beds, plants with morning sun and light afternoon shade tasted cleaner during heat waves than those in all-day scorch. The shaded batch also held color better at drying.
A single hard pinch at 6 weeks after transplanting increased my leaf yield by about a third compared to unpinched controls. Repeated micro pinches every two weeks added labor for little gain.
Related Alternatives for Home Sweetening
- Monk fruit Lyophilized extract is intensely sweet, yet the vine needs long seasons and space.
- Sugar leaf herb blends Pair dried stevia with lemon balm or mint for a rounder cup of tea.
- Agave and maple Great pantry staples, though they add calories and require sourcing rather than backyard production.
Trusted Sources
- U.S. Food and Drug Administration, High-Purity Steviol Glycosides GRAS status and guidance on stevia leaf and crude extracts.
- European Food Safety Authority, Steviol Glycosides Scientific Opinion, EFSA Journal 2010.
- Oregon State University Extension, Grower guidance for stevia cultivation and harvest timing.
- University of Florida IFAS Extension, Home production notes for Stevia rebaudiana.
- FAO/WHO JECFA, Safety evaluation and acceptable daily intake for steviol glycosides.
Frequently Asked Questions About Growing Stevia
What soil conditions support optimal stevia growth?
Stevia prefers a well-draining, fertile soil rich in organic matter. A slightly acidic to neutral soil (pH of 6.0–7.0) creates ideal conditions. Adding compost or aged manure significantly improves soil fertility and ensures healthy plant development.
When is the best time to start planting stevia?
Begin planting stevia seeds indoors approximately 6 to 8 weeks before the last expected frost date. Once nighttime temperatures consistently exceed 50°F (10°C), transplant seedlings outdoors into your garden or containers.
How much sunlight does stevia need?
Stevia thrives with full sun exposure, ideally receiving at least 6 to 8 hours of direct sunlight daily. In regions with intense afternoon heat, partial afternoon shade can help prevent leaf scorching.
How often should stevia plants be watered?
Regular watering is essential, especially during dry periods. Aim to maintain consistently moist but not overly saturated soil. Typically, watering once or twice per week suffices, increasing frequency during very hot or dry conditions.
Can stevia be grown successfully in containers?
Absolutely. Stevia grows exceptionally well in containers or pots at least 12 inches (30 cm) deep and wide. Ensure your containers have sufficient drainage holes, and fill them with quality potting soil amended with compost to support robust plant growth.
What temperatures are best suited for stevia?
Stevia prefers warm climates and flourishes at temperatures between 60°F–85°F (16°C–29°C). Protect plants from frost, as exposure to temperatures below 32°F (0°C) can harm or kill the plants.
When and how should stevia leaves be harvested?
Harvest stevia shortly before flowering when the leaves reach peak sweetness, usually around mid-summer through early fall. Snip fresh leaves or trim entire stems, allowing new growth to continue. Regular harvesting encourages continued leaf production.
What common pests or diseases affect stevia plants?
Aphids, whiteflies, and powdery mildew commonly affect stevia. Combat pests through natural solutions like insecticidal soap and regular monitoring. Ensure proper plant spacing and airflow to minimize diseases such as mildew.
Growing Stevia isn’t rocket science, but it does reward patience and a bit of observation. Give this sweet herb well-drained soil, plenty of sun, and regular pruning—it’ll return the favor with leaves that pack serious sweetness, minus the calories. Don’t overwater; stevia hates wet feet.
Start cuttings early if you want a steady supply, and harvest before the flowers show up for the best flavor. With these basics, you’ll have a steady stash of natural sweetener for tea, baking, or snacking straight from the garden.
For more edible plant inspiration, check out how to grow marjoram or oregano—herbs that play well alongside your stevia patch.