Growing Cape Gooseberry: Expert Advice for Healthy Harvests
Growing Cape Gooseberry
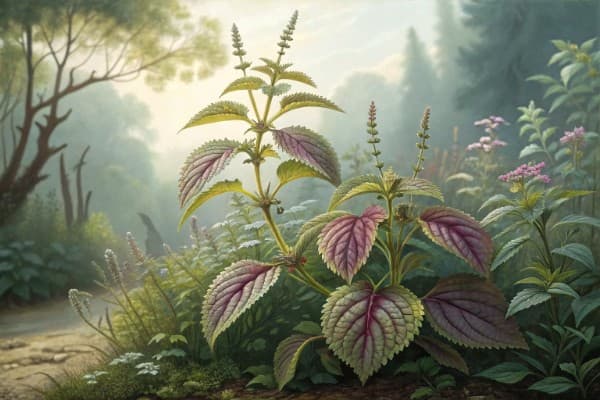
Growing Cape Gooseberry rewards gardeners with tangy, golden fruits and lush, quirky foliage. Start seeds indoors six weeks before the final frost, plant in full sun once temperatures steady, and nourish soil with compost—Cape Gooseberries thrive best in warmth and organic richness. For a fruit that dances deliciously between sweet and tart, read on for expert tips that make cultivating this exotic berry a simple pleasure.
Table of Contents
Cheatsheet: Cape Gooseberry Quick-Grow Guide
🌱 Start From Seed
- Sow indoors 6-8 weeks before last frost
- Press seeds lightly into moist seed mix
- Germinate at 70-80°F (21-27°C)
- Transplant outside after night temps stay above 55°F (13°C)
🌞 Site & Soil
- Pick full sun (6+ hrs daily)
- Soil: well-drained, sandy loam, pH 5.5-6.8
- Add compost for nutrients
💧 Water & Feed
- Keep soil consistently moist, not soggy
- Mulch to retain water & prevent weeds
- Fertilize every 4 weeks with balanced feed
🌼 Grow & Support
- Stake plants or install tomato cages
- Space plants 3 ft (90 cm) apart
- Pinch tips for bushier growth
- Cover to protect from frost in autumn
🍊 Harvest & Store
- Fruits ripen in 70-90 days (husks turn brown, fruit drops)
- Pick from ground or snap off stem
- Husked fruit keeps 3+ weeks in cool, dry place
🧰 Tools and Products You'll Need
- Seed trays or pots
- Seed-starting mix
- Trowel & garden fork
- Tomato cages or bamboo stakes
- Compost or aged manure
- Organic mulch (straw or leaf mold)
- Balanced fertilizer (10-10-10)
🥗 Nutrition & Benefits
High in vitamin C, antioxidants, fiber. Harvest up to 1,500 fruits/plant. Boosts self-sufficiency and garden diversity.
I grow Physalis peruviana for its papery lanterns and bright, tangy fruit that tastes like mango met tomato and decided to start a band. It’s called goldenberry or poha in some catalogs, which matters when you buy seed.
Climate and timing
This crop hates frost and loves a long, warm season. I sow 8 to 10 weeks before last frost, then transplant once nights stay above 50°F, 10°C.
In USDA zones 9b to 12 it can behave as a short-lived perennial, yet I still replant for vigor. Elsewhere, treat it as an annual and lean on season extension if your summers run short.
Seed starting that actually works
- Sow 1/8 inch deep, 3 mm, in clean trays at 70 to 85°F, 21 to 29°C, with steady moisture.
- Expect sprouting in 7 to 14 days if the mix stays warm and airy.
- Feed at cotyledon stage with quarter-strength fish or seaweed fertilizer, then pot up to 3 to 4 inch, 7.5 to 10 cm, cells before they tangle roots.
- Harden off for a week, out of wind, then plant deep like a tomato to encourage adventitious roots.
Site, spacing, and soil
Full sun is non-negotiable, at least 6 to 8 hours. I space plants 24 to 36 inches apart, 60 to 90 cm, in rows 36 to 48 inches, 90 to 120 cm, for airflow.
Target a pH near 6.0 to 6.8 with a crumbly loam that drains after a soaking. I blend in 1 to 2 inches, 2.5 to 5 cm, of finished compost plus a modest preplant fertilizer low in nitrogen, something like 4-6-3 or 5-10-10.
USDA FoodData Central lists goldenberries at roughly 53 kcal and about 11 mg vitamin C per 100 g, which explains why I snack in the field and still feel virtuous. Source: USDA FoodData Central.
Water and mulch
Keep soil evenly moist with about 1 inch, 25 mm, of water per week, more during heatwaves and in containers. I mulch 2 inches, 5 cm, with straw or shredded leaves to hold moisture and keep dropped fruit clean.
Training and pruning
The plant sprawls unless you manage it, so I drop a tomato cage on each transplant or run twine between stakes. I thin to 3 to 5 main stems, remove low leaves to the first split, and pinch rank shoots that shade fruiting clusters.
Feeding schedule that prevents leafy monsters
- Preplant: compost plus a balanced, low-N fertilizer scratched into the top 4 inches, 10 cm.
- At first flowers: side-dress with compost or a 2-3-4 organic and water in.
- Midseason: foliar kelp every 2 to 3 weeks if plants stall after heavy set.
Too much nitrogen fuels vines, not berries. The right balance pushes a steady wave of lanterns.
Pollination and fruit set
Flowers are self-fertile, though bees speed things up. On humid mornings I gently shake cages to move pollen and even out set.
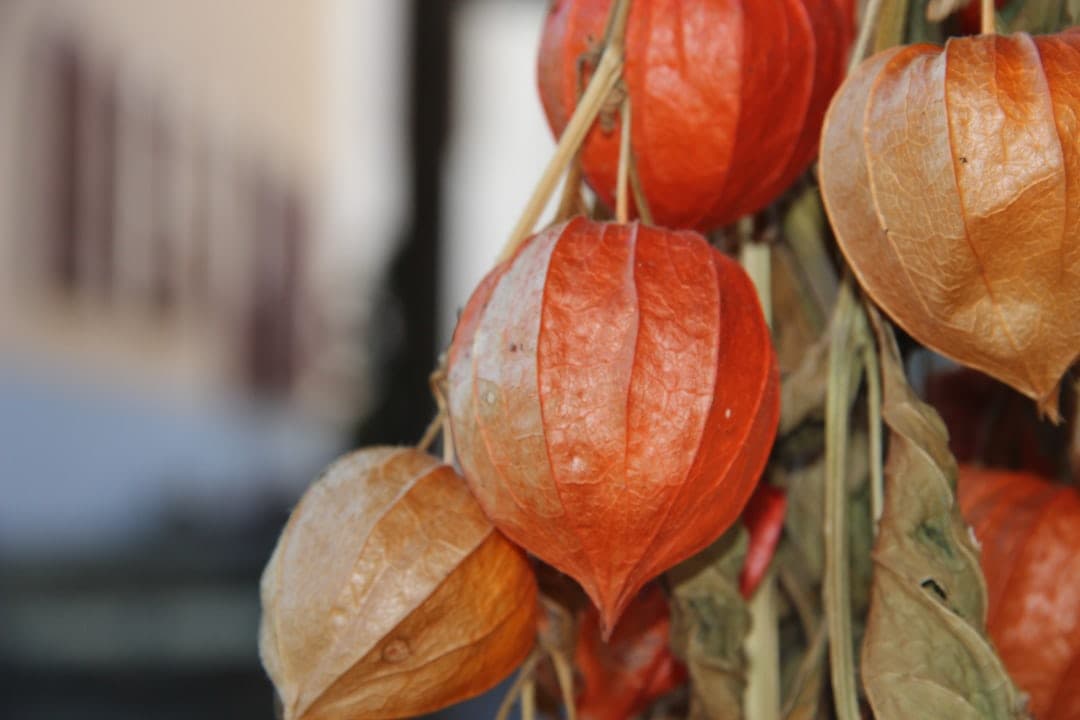
Harvest cues, flavor, and storage
Fruit is ready when husks turn tan and papery, and the berry tastes sweet-tart with a tropical finish. Many drop when ripe, and the best ones roll into the mulch like marbles.
I keep them in the husk at room temperature for 2 to 3 weeks, or at 45 to 55°F, 7 to 13°C, with low humidity for longer. If the husk feels damp, I dry them on a rack before storing.
In field trials from South America to Florida, a single well-grown plant can produce roughly 1 to 3 kg, 2.2 to 6.6 lb, of fruit in a long season. Sources: FAO reports and land-grant horticulture bulletins.
Pests, diseases, and how I actually keep fruit coming
- Aphids and whiteflies: blast with water early, then use insecticidal soap, and release lacewings if pressure builds.
- Spider mites in heat: increase humidity at canopy level and rotate oil and soap sprays.
- Flea beetles: lightweight row cover or insect netting from transplant until flowering works wonders.
- Hornworms: daily handpicks, then keep parasitic wasp cocoons intact when you see them.
- Botrytis and powdery mildew: prune for airflow, water at the base, and avoid late-day overhead irrigation.
I rotate away from tomatoes, potatoes, and peppers for at least two years to dodge soilborne headaches. Clean up husks and dropped fruit at season’s end to break pest cycles.
Containers and small spaces
Use at least 10 gallons, 38 liters, per plant with a chunky, peat-free mix amended with compost and perlite. I run a cage in the pot, water deeply, and feed lightly every 2 to 3 weeks once flowering starts.
Cold-climate tricks
Start early, use black plastic or a dark mulch to warm soil, and surround plants with reflective fabric to boost light. A low tunnel or portable dome can add precious growing degree days in spring and fall.
Overwintering and saving stock
In zone 9b and warmer, cut back after harvest and mulch the crown, then let it reshoot in spring. In cooler areas, take tip cuttings in late summer or pot up a mother plant and hold it bright at 55 to 60°F, 13 to 16°C.
Safety note on ripeness
Unripe green berries and foliage contain nightshade alkaloids that can upset your stomach. I only eat fully colored fruit that slides from the calyx and tastes sweet.
My yield formula, season after season
- Warm start, zero transplant shock, and deep planting.
- Lean nutrition early, potassium lift at bloom, steady water with mulch.
- Stout cage, open canopy, and daily harvest once plants hit stride.
Follow that rhythm and you will fill trays, simple as that. I have pulled five quarts per week from three plants at peak, which made the kitchen crew very happy.
Growing Cape Gooseberry: Best varieties and smart alternatives
Top choices I rate for flavor and vigor
- Poha Berry, Hawaiian selections: bright flavor, steady set, good in heat.
- Goldenberry Improved types from Andean stock: larger fruit, thicker husk for storage.
- Giant Cape Gooseberry: big berries and showy lanterns, plants need stout cages.
Seed names vary across catalogs, so read descriptions and aim for selections described for fresh eating over processing. Choose lots with disease screening and recent germ tests for reliable emergence.
Alternatives worth growing, and how they differ
- Ground cherry, Physalis pruinosa: shorter plants, earlier, sweeter candy flavor, great in small beds.
- Tomatillo, Physalis philadelphica: larger plants and fruits, savory use, earlier set for salsa lovers.
- Chinese lantern, Physalis alkekengi: ornamental only, not grown for eating, avoid confusion at purchase.
Buying guide and kit list for Growing Cape Gooseberry
- Seed from reputable vendors labeled Physalis peruviana with recent lot dates.
- Heat mat and dome for germination at 70 to 85°F, 21 to 29°C.
- Two strong tomato cages per plant or a Florida weave with 5 to 6 foot, 1.5 to 1.8 m, stakes.
- pH test kit, compost, low-N starter fertilizer, and insect netting if flea beetles visit your site.
- Pruners, soft ties, and shallow harvest crates that let husks breathe.
Growing Cape Gooseberry: Calendar by region
- Cool summer areas: start indoors late winter, transplant after last frost, expect first ripe fruit 100 to 140 days from sowing.
- Warm summer areas: direct transplant once soil hits 65°F, 18°C, with first ripe fruit 70 to 90 days after transplant.
- Tropics and subtropics: stagger plantings to avoid peak wet season disease, prune lightly for continuous set.
Kitchen uses that drive variety choice
I macerate ripe fruit with sugar and a pinch of salt for pie, then roast the surplus with chilies for chutney. Dehydrated halves make a tart, golden snack that disappears during pruning breaks.
Common mistakes I stopped making
- Overfeeding nitrogen early, which gives vines without lanterns.
- Skipping support, which invites rot and slug picnics.
- Harvesting on color alone, instead of waiting for papery husks and drop-time flavor.
Soil health links to fruit quality
On beds with steady compost and cover crops, Brix climbs and flavor sharpens. I seed winter rye and vetch, then mow and tarp before spring transplanting for a living pantry under the roots.
Trusted references for deeper reading
- USDA FoodData Central for nutrient profiles and commodity names.
- Royal Horticultural Society guidance on Physalis culture and frost sensitivity.
- University of California IPM notes on aphids, whiteflies, mites, and cultural controls.
- University of Florida IFAS extension briefs on goldenberry production and postharvest handling.
- FAO horticulture reports on Andean fruit yields and storage behavior.
Frequently Asked Questions About Growing Cape Gooseberry
What's the ideal soil to grow vibrant Cape Gooseberries?
A soil mix that drains swiftly and stays lightly sandy gives Cape Gooseberry plants plenty of room to breathe. Incorporate compost or aged manure into the soil before planting to infuse the roots with nutrients and sustain a balanced growth rhythm.
How much sunlight do Cape Gooseberries need to thrive?
Let them bask openly. Cape Gooseberries relish full, direct sunlight, absorbing at least 6 to 8 hours daily. Less sun stifles fruit production and weakens the plant's vigor, so scout out your sunniest spot.
When should I start planting Cape Gooseberry seeds?
Begin planting indoors about 6–8 weeks before your area's last expected frost. After the frost danger passes, transplant seedlings outdoors. Planting early ensures ample space and warmth to thrive once weather conditions mellow out.
How often should I water my Cape Gooseberry plants?
Water consistently, yet avoid drowning—these plants despise soggy feet. Providing water once weekly is ideal in most climates. Allow soil to dry lightly between waterings, encouraging roots to stretch deeply for moisture.
Should I fertilize Cape Gooseberries, and if so, how often?
A moderate dose of balanced organic fertilizer once monthly keeps your plants energized without overwhelming their subtle fruit flavors. Go easy, though—a little nurturing goes far with the curious Cape Gooseberry.
When and how should I harvest my cape gooseberries?
Wait until fruits ripen into their characteristic golden-orange hue and their papery husks dry and turn crisp. Carefully pinch or clip fruits from their stems. Harvest frequently to continue prompting the plant toward abundant fruiting through the season.
Growing Cape Gooseberry rewards patience and attention. Start with rich, well-drained soil, give these plants a good hit of sun, and don’t crowd them—airflow keeps disease at bay. Water deeply, but let the soil dry a bit between drinks. Stay sharp about pests, especially aphids.
When those husks turn golden and papery, you’re in business. The fruit will taste like summer, with a tang you don’t forget. If you’re hungry for more gardening challenges, try growing blackcurrant or experiment with cherry tomatoes.
Ultimately, growing Cape Gooseberry is about patience, steady care, and the simple pleasure of harvesting something most people never taste.