Growing Ginger: A Gardener's Guide to Planting Success
Growing Ginger
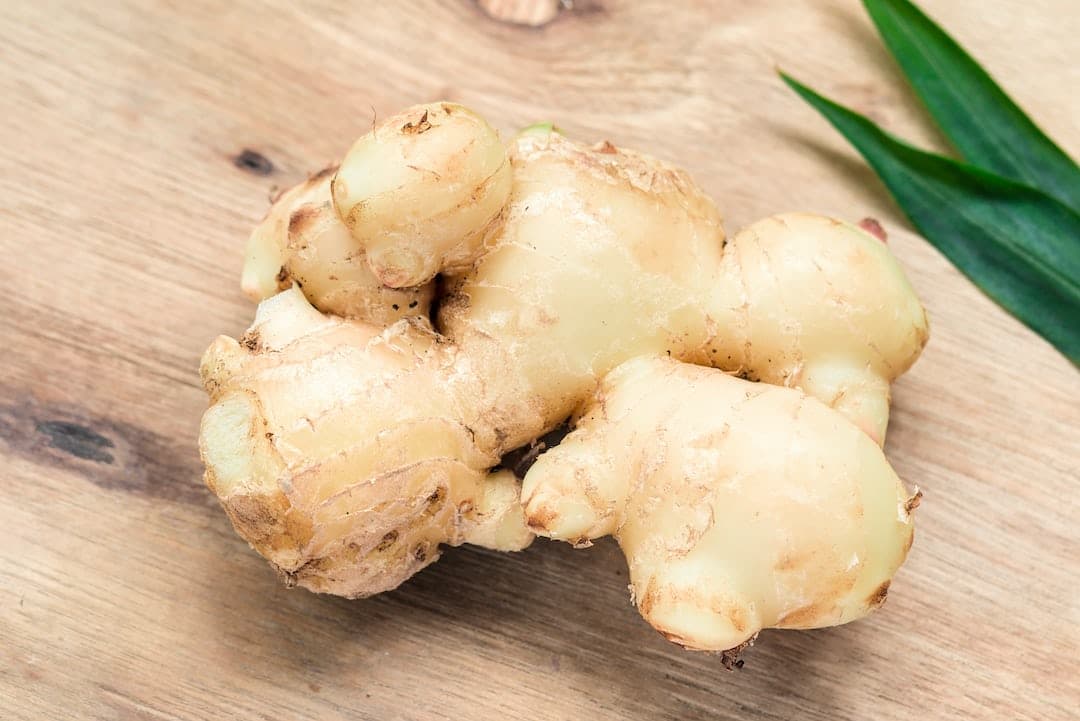
Growing ginger starts easily indoors from store-bought rhizomes and thrives outdoors in warm, humid climates. Potting ginger rhizomes in rich, loose soil with excellent drainage sets the stage for continuous harvests. Consider growing ginger in partial shade and ample moisture—perfect conditions for its lush foliage and spicy underground bounty.
Table of Contents
- Growing Ginger: Site, Heat, and Timing
- Rhizome Prep That Actually Works
- Soil Mix, Containers, and Spacing
- Planting: Depth and Orientation
- Light: Gentle Sun, Happy Rhizomes
- Water and Feeding Rhythm
- Temperature, Humidity, and Mulch
- Hilling and Canopy Management
- Calendar by Climate
- Baby Ginger vs. Mature Ginger
Cheatsheet: Fast-Track Guide to Homegrown Ginger
🌱 Choose Fresh Rhizomes
- Plump, unwrinkled ginger pieces with visible eyes/buds
- Organic store-bought works well
🌡️ Ideal Growing Conditions
- Warmth: 75–85°F (24–29°C)
- Shade/filtered sun; avoid harsh midday rays
- High humidity boosts growth
- Frost kills sprouts; grow indoors or wait for frost-free weather
🛠 Tools and Products You'll Need
- Shallow pots or raised beds (6–12 in / 15–30 cm deep)
- Sharp knife for splitting rhizomes
- Rich, loose potting mix with compost
- Mulch (straw or leaf mold)
- Spray bottle for misting
- Balanced liquid fertilizer
🌿 Planting Steps
- Soak rhizomes overnight in water to rehydrate.
- Cut into 1–2 in (2.5–5 cm) chunks, each with at least 1 bud/eye.
- Plant 1–2 in (2.5–5 cm) deep, buds facing up, 8 in (20 cm) apart.
- Water well, keep consistently moist but not soggy.
- Mist daily if air is dry; mulch to retain soil moisture.
- Feed every 3–4 weeks with liquid fertilizer.
⏳ Harvest & Storage
- Harvest after 8–10 months; leaves yellow and die back
- Young "green" ginger ready at 4–5 months
- Lift carefully; break off what you need, replant remainder
- Store in cool, dry spot, or freeze pieces for year-round use
💪 Nutrition & Self-Sufficiency
- Anti-inflammatory, aids digestion, boosts immunity
- Up to 10x fresher phytonutrients than supermarket roots
- One plant yields 2–5 lbs (0.9–2.3 kg) per season
Growing Ginger: Site, Heat, and Timing
Growing Ginger loves warm soil, steady moisture, and bright shade that mimics an understory. Target soil temps of 68 to 86 F (20 to 30 C) and protect it from any frost.
Outdoors works in USDA zones 8 to 12, while cooler zones treat it as a long-season annual or a container plant brought inside before cold bites. I plant after nights hold above 55 F (13 C) and the soil feels warm to the wrist.
Rhizome Prep That Actually Works
I start with clean “seed” rhizomes from a reputable supplier, since grocery pieces may be treated or carry rot. Look for fat fingers with 2 to 4 visible eyes and zero shrivel.
Before potting, I soak pieces in lukewarm water for 2 hours, then pre-sprout in barely moist coco coir at 75 to 80 F (24 to 27 C) until nubs swell. Sprouts pop in 10 to 21 days under a loose lid or humidity dome.
Soil Mix, Containers, and Spacing
Ginger hates wet feet and compaction, so I mix 40% fine bark, 30% coco coir, 20% compost, and 10% perlite by volume. Aim for pH 5.5 to 6.5 and a friable, well-drained texture.
Shallow width beats depth: in containers I use 7 to 10 gallon (26 to 38 L) tubs, 12 to 16 inches (30 to 40 cm) deep. In beds, I set pieces 8 to 10 inches (20 to 25 cm) apart in rows 12 to 16 inches (30 to 40 cm) apart.
Planting: Depth and Orientation
Plant rhizomes horizontally with the eyes facing up, 1 to 2 inches (2.5 to 5 cm) deep. Water lightly to settle, then mulch with 1 to 2 inches (2.5 to 5 cm) of clean straw or shredded leaves.
A little patience pays off. Shoots often idle until the soil warms steadily.
Light: Gentle Sun, Happy Rhizomes
I give morning sun and dappled afternoon light, or 30 to 40 percent shade cloth where summers cook. Leaves scorch under harsh midday rays, which slows rhizome fill.
Indoors, a bright east window or LED lighting at roughly 200 to 400 PPFD keeps growth steady. Keep fixtures 12 to 18 inches (30 to 45 cm) from leaf tips.
Water and Feeding Rhythm
Keep the medium evenly moist, never soupy. I water when the top 1 inch (2.5 cm) dries, then drench thoroughly.
Feed light but frequent: start monthly with a balanced organic fertilizer like 4-4-4, then shift to higher potassium (around 3-1-5) every 2 to 3 weeks once stems reach 12 inches (30 cm). A sprinkle of sulfate of potash midseason improves density and flavor.
Temperature, Humidity, and Mulch
Ginger grows fastest at 70 to 90 F (21 to 32 C) air temps with 50 to 70 percent humidity. Below 55 F (13 C) growth idles and roots sulk.
Mulch stabilizes moisture and warms shallow rhizomes. I refresh mulch midseason to keep the top layer loose and alive with microbes.
Hilling and Canopy Management
As shoots thicken, I hill 1 to 2 inches (2.5 to 5 cm) of loose mix around the base to invite new rhizome fingers. Repeat monthly until the tub nears full.
In windy spots, a low hoop or bamboo tripods prevent lodging. Less stress equals better fill.
Calendar by Climate
Zones 9 to 12: plant late winter to spring; harvest late summer through fall. Zone 8: plant after last frost; harvest before first frost.
Zones 3 to 7: pre-sprout indoors by late winter, pot up in April, set outside after true heat arrives, then bring back inside to finish when nights fall below 55 F (13 C).
Baby Ginger vs. Mature Ginger
Baby ginger is harvested at 4 to 5 months, pale skinned, low fiber, and wildly aromatic. Mature ginger takes 8 to 10 months until leaves yellow and canes lean, with full heat and storage life.
I lift a third of the clump early for baby ginger, then let the rest harden for winter storage. That stagger spreads the flavor window for months.
Harvest, Cleaning, and Storage
Loosen soil with your hands or a fork well outside the clump to avoid cuts. Snap off what you need and backfill to keep the plant trucking.
Rinse gently, dry until surfaces lose their sheen, and store at 55 to 60 F (13 to 16 C) with moderate humidity. Chilling below 50 F (10 C) dulls flavor and invites rot.
Yield and Cost Reality Check
With decent culture, I average 5 to 8 pounds (2.3 to 3.6 kg) of rhizome per pound (0.45 kg) of seed planted. Flavor and fiber balance hinges on heat, light, and potassium.
Seed rhizome often runs 8 to 25 USD per pound (18 to 55 USD per kg), depending on season and supply. Wide, shallow containers punch above their weight in yield per square foot.
Key stat: Extension trials routinely report 5 to 8 pounds of harvest per pound of seed under protected culture (University of Maine Cooperative Extension).
Global snapshot: FAOSTAT puts annual ginger production at roughly 4 million metric tons, with India leading and China close behind.
Top Choices and Near Cousins
- Zingiber officinale, common culinary ginger: reliable, broad flavor, best all-around.
- Jamaican/Yellow types: citrus bright and hot; great for quick pickles and tea.
- Rio de Janeiro/Chinese types: bigger fingers, slightly milder heat, heavy yielders.
- Zingiber mioga (mioga): edible flower buds, cool-tolerant tops, delicate flavor.
- Alpinia galanga (galangal): piney, peppery bite; needs more heat; stellar in Thai soups.
- Curcuma longa (turmeric): cousin with earthy, golden rhizomes; similar culture, longer season.
Indoors: My Shelf Setup
I run 16 hours on, 8 off in early growth, then 12 to 14 hours once canes thicken. A small fan on low and a tray of water under the bench holds humidity near 50 percent without encouraging mildew.
Bottom heat at 75 F (24 C) under seed flats jump-starts sprouting. I cut heat once roots fill the first container to prevent lanky tops.
Pests, Diseases, and Clean Culture
Fungus gnats signal chronically wet media; I let the surface dry, add yellow traps, and drench with Bacillus-based bio-controls. Spider mites flare in dry heat, so I rinse undersides weekly and use predatory mites if needed.
Soft rot from Pythium or Fusarium wipes out clumps in cold, saturated soil. I stick with clean seed, sanitize tools, avoid overwatering, and rotate containers away from solanaceous crops.
Diagnostic Shortlist
- Yellow leaves midseason: cold roots, low nitrogen, or soggy media. Warm the pot, feed lightly, improve drainage.
- Leaf tips browning: salt buildup or sunscald. Flush the pot and increase shade in afternoons.
- Stunted clumps: compacted soil or low pot volume. Repot into a wider tub with airy mix.
- Rhizomes fibrous early: high heat with drought stress. Increase water and potassium, mulch better.
My Go-To Planting Recipe
- Pre-sprout rhizomes at 75 to 80 F (24 to 27 C) until eyes swell 0.25 inch (6 mm).
- Pot into a wide container, eyes up, 1.5 inches (4 cm) deep, then mulch.
- Water lightly for two weeks, then shift to deep, less frequent soaks.
- Feed a light balanced fertilizer monthly, then switch to higher potassium by midsummer.
- Hill fresh mix around the base every month during active growth.
- Harvest baby ginger at 120 to 150 days; cure mature ginger at 8 to 10 months.
Buying Guide: What To Look For
- Certified disease-free seed rhizomes with multiple eyes and firm texture.
- Suppliers that ship during your warm-up window to avoid storage losses.
- Organic options for culinary use and potting indoors.
- Containers: 7 to 10 gallon (26 to 38 L) wide tubs, plus mulch and a slow-release fertilizer suited to fruiting crops.
- Shade cloth in hot regions, 30 to 40 percent rating.
Culinary Payoff
I grate baby ginger straight into vinaigrettes and freeze coin slices for stir-fries. Mature ginger skins easily with a spoon and carries heat that stands up to long braises.
The aroma fills the kitchen like a good story, sharp at first, then layered. A garden teaches that better than any spice jar.
Field Notes from Experience
In a heat wave I lost a bed to rot because I watered late on cool nights and the soil stayed cold and wet. Now I water mornings only, which dried the surface by dusk and cut disease to near zero.
Under bananas and taro, my shade-grown ginger built the fattest fingers I have seen outside the tropics. Jungle logic wins again.
Quick Answers
- How deep to plant? 1 to 2 inches (2.5 to 5 cm), eyes up.
- How long from planting to baby ginger? 4 to 5 months with steady heat.
- Can I grow from grocery ginger? Sometimes, if untreated and fresh; clean seed is more reliable.
- Why are leaves pale? Cool roots or low nitrogen; warm the medium and feed modestly.
- Best storage temp? About 55 F (13 C), never below 50 F (10 C).
Trusted References
Royal Horticultural Society on tender perennials and frost sensitivity. Kew Gardens’ profiles on Zingiberaceae for botanical context.
University of Hawai‘i CTAHR and University of Maine Cooperative Extension for culture, disease notes, and yield ranges. FAOSTAT for production data that frames market expectations.
Frequently Asked Questions About Growing Ginger
What Conditions Does Ginger Prefer for Optimal Growth?
Ginger thrives when you recreate lush, tropical conditions. Provide a warm spot with dappled sunlight, fertile and organically rich soil, and constant moisture without drowning the roots. A little humidity makes ginger dance.
Can Ginger be Cultivated Indoors?
Absolutely. Ginger willingly lounges in containers as long as they have excellent drainage and sufficient room. Position the pots near ample sunlight, and maintain moderate humidity levels to coax out its aromatic bounty.
How Long From Planting to Harvesting Ginger?
Patience is key. Ginger generously rewards growers who wait 8 to 10 months from planting. When the stalks yellow and wilt, that's ginger declaring itself ready for harvest. Dig up carefully to enjoy its pungent warmth.
Should Ginger be Fertilized, And If So, How Often?
Feed ginger modestly and regularly during the growing months with gentle organic fertilizers, like compost tea or diluted fish emulsion, roughly every six to eight weeks. Overfeeding turns ginger moody, so moderation is recommended.
What Common Pitfalls Should I Avoid While Growing Ginger?
The greatest crime against ginger is drowning it. Ensure excellent drainage to evade root rot. Also, shield ginger plants from cold snaps, as it's distinctly tropical and detests chilly punishments.
Growing ginger rewards patience and a bit of daring. Give it warmth, rich soil, and steady moisture, and it will give you bold, aromatic rhizomes that put any store-bought piece to shame. Start with fresh, healthy root cuttings.
Tuck them just beneath the surface, and keep them out of direct, scorching sun. Don’t rush the harvest—let the plant fatten up underground.
If you’ve enjoyed coaxing ginger from soil to plate, you might also be curious about growing turmeric—another spice worth space in your garden.
Let experimentation guide you—every season, every patch of earth teaches something new. Growing ginger makes you pay attention. It asks you to slow down, get your hands dirty, and savor the slow burn of success. Every root you dig up is proof that with the right care, the ordinary can become extraordinary.