Growing Split Peas With Thoughtful, Attentive Gardening Care
Growing Split Peas
Growing split peas rewards patience and smart gardening. Start these legumes in loose, well-drained soil, spacing seeds two inches apart for solid airflow. Water weekly—split peas despise soggy roots—and your plants will thrive. Give attention, receive bounty; read on for practical growing techniques that'll ensure a thriving crop.
Growing Split Peas: clear steps, clean flavors, steady hands
Split peas come from dried field peas, then dehulled and mechanically split, so in the garden we grow peas for drying and handle the splitting later. I learned that the hard way after my first season, standing in the kitchen with a rolling pin, a sieve, and a strong sense of optimism.
USDA FoodData Central lists dry split peas at roughly 24 to 25 percent protein by weight, with high fiber and key minerals. Source: USDA, FoodData Central.
Choose the right pea for true splitting
You want dry pea types, not snow or snap types, and not tender shelling peas bred only for fresh harvest. I aim for yellow or green cotyledon soup peas, and I keep notes on maturity because dry-down timing saves headaches.
- Yellow split types: CDC Amarillo, Eclipse, or similar soup peas used widely in prairie rotations.
- Green split types: Arvika, Kaspa, or classic marrowfat-style peas used for mushy peas in the UK.
- Dual-use home garden standbys that also dry well: Alaska, Blue Pod Capucijner, Carlin.
- Reliable sources: Johnny’s Selected Seeds, Fedco Seeds, Adaptive Seeds, and local seed co-ops.
Cotyledon color drives the final soup color and flavor nuance, with yellow peas tasting slightly sweeter and green peas leaning grassy. Marrowfat types bring a creamy texture and large seed size that mills love.
Timing and temperature
Peas are a cool-season crop, so I sow 4 to 6 weeks before the last spring frost or 8 to 10 weeks before first fall frost. Air in the 50 to 70 F range, 10 to 21 C, keeps vines happy, while heat over 80 F, 27 C, can stall set.
“Pea seeds will germinate at soil temperatures as low as 40 F.” Source: University of Minnesota Extension.
Soil prep that actually moves the needle
I target pH 6.0 to 7.5, loose tilth, and drainage that clears puddles in under a day. I avoid fresh manure and heavy nitrogen, which bloats vines and cheats pods.
I dust seed with a rhizobial inoculant for Pisum sativum whenever the bed hasn’t seen peas or beans in a few years. Those bacteria form nodules and power biological nitrogen fixation.
Field peas can fix roughly 40 to 90 lb N per acre, about 45 to 100 kg per hectare, depending on soil and inoculation, with some N left for the next crop. Sources: FAO and UC Davis/ANR publications on pulses.
Sowing and spacing that make harvest easy
- Depth: 1 to 1.5 inches, 2.5 to 4 cm, deeper in sandy soil.
- In-row spacing: 2 inches, 5 cm, for dry peas to boost stand and suppress weeds.
- Row spacing: 18 to 24 inches, 45 to 60 cm.
- Trellis: short netting, pea brush, or a cattle panel, even for semi-dwarfs, to lift pods and speed drying.
- Seed rate for beds: aim for a dense, uniform canopy without crowding the base of stems.
Old-school pea brush still wins for me. I prune a windfall branchy limb and stab it in every meter of row, cheap and effective.
Water and fertility
Peas like even moisture, about 1 inch per week, 25 mm, particularly at flowering and early pod fill. I mulch lightly after emergence, skip nitrogen, and spoon-feed phosphorus and potassium only if a soil test calls for it.
Trellises I actually buy and use
- Heavy nylon pea netting: fast to install, reusable 3 to 5 seasons if stored out of sun.
- Galvanized cattle panel: indestructible, perfect in windy sites, costs more up front.
- Bamboo and jute string grid: low-cost, compostable, best for short vines under 40 inches, 1 m.
Heat, bloom, and shade management
If a hot spell looms, I clip 30 percent shade cloth to the sunny side at midday. The yield bump is real, since pea pollen gets cranky above the mid 80s F, around 29 C, a threshold echoed by RHS and prairie extension bulletins.
IPM that respects the crop and your time
- Pea aphid: dislodge with a hose, bring in lacewings and lady beetles, and use reflective mulch early if pressure builds.
- Cutworms and slugs: collars or sharp grit at the stem base, night patrols during the first 10 days after emergence.
- Powdery mildew: steady irrigation, wide row spacing, and resistant varieties; sulfur works if started early.
- Damping-off and root rots, Pythium and Aphanomyces: rotate 3 to 4 years out of legumes, plant into draining soil, and avoid cold swampy beds.
- Virus issues, often aphid-vectored: control aphids, yank sick plants fast, and clean tools.
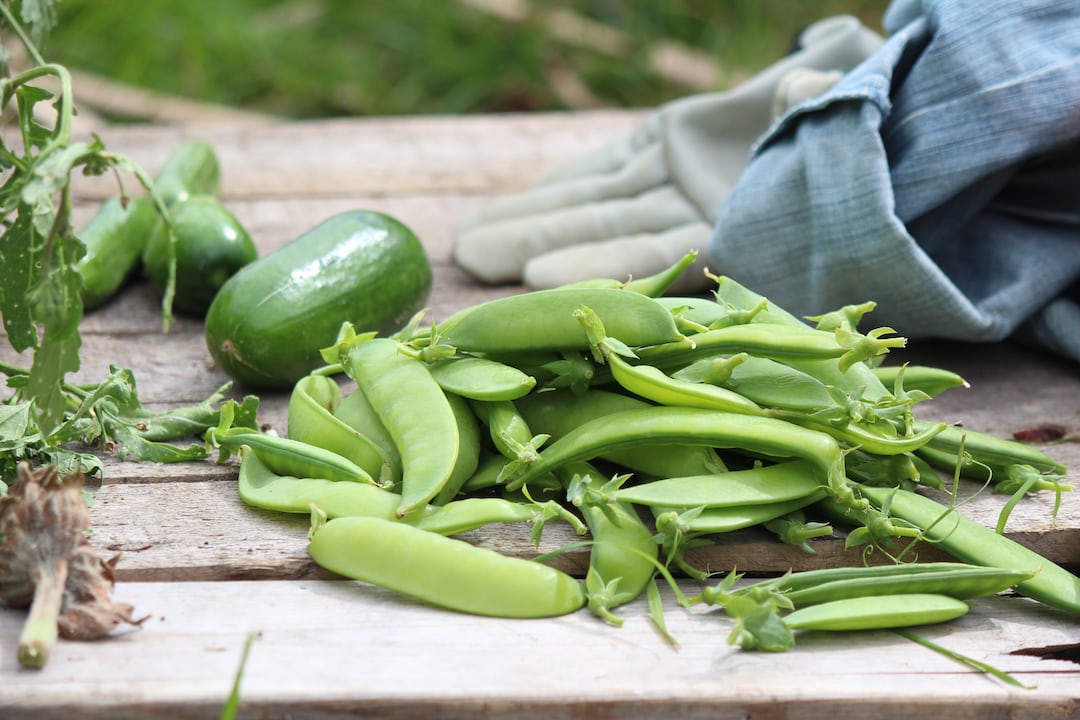
Harvesting for dry peas
I wait until pods turn parchment-brown and rattle, seeds hard enough to resist a fingernail. If rain threatens, I pull whole vines, hang them under cover, and thresh on a tarp a week later.
- Finish-dry indoors until seeds crack cleanly with a hammer and do not dent under a firm bite.
- Target storage moisture around 12 to 14 percent for long keeping.
- Store in airtight bins with bay leaves or oxygen absorbers to deter pantry pests.
“Safe long-term storage for pulses starts near 12 to 14 percent seed moisture, kept cool and dry.” Source: North Dakota State University Extension, pulse storage guides.
Turning dry peas into “split peas” at home
Splitting is a milling step where peas are dehulled and split by rollers, so commercial mills do it fast and clean. At home I often cook whole dry peas like split peas, since they break down into velvet with a longer simmer.
- For DIY splitting, rub fully dried peas in a coarse colander to scuff hulls, winnow, then crack in small batches with a hand mill on a coarse setting.
- Ask a local grain co-op or small mill if they offer dehulling; many will run a community batch.
- No mill nearby: soak whole peas overnight and cook low and slow with a lid until they collapse.
Yields and expectations
In a home bed, I plan on roughly 1 to 2 pounds of dry peas per 10-foot row, 0.45 to 0.9 kg per 3 m, depending on trellising and weather. That aligns with extension figures from Oregon and Washington, and it tracks my own records in cool springs.
Rotation and soil health
I give peas a 3-year break from any legume to dodge soilborne diseases. After harvest, I chop the straw back in to feed soil biology that made the season work in the first place.
My favorite cultivars and why
- CDC Amarillo, yellow: reliable standability and high test weight in my breezy plots.
- Arvika, green: steady in cool springs, easy to thresh, classic split-pea profile.
- Carlin, heritage: deep flavor, handsome seeds, cooks down lush for soup.
- Alaska, dual-use: early, compact, lets me sneak a second crop after harvest.
Gear that earns its keep
- Soil thermometer: I plant at 45 to 50 F soil, 7 to 10 C, and sleep better.
- Pea inoculant matched to Pisum sativum: cheap insurance for nodulation.
- Soaker hose under mulch: even moisture without wet foliage.
- 30 percent shade cloth and clips: summer insurance policy.
- Heavy-duty netting or a cattle panel: pods dry faster and cleaner off the ground.
Quick troubleshooting
- Plants lush, few pods: too much nitrogen or shade; back off fertilizer, improve light.
- Flowers aborting in heat: run shade cloth afternoons and water early morning.
- White powder on leaves late season: powdery mildew; prune for airflow and start sulfur at first signs.
- Seedlings collapsing in cool wet soil: delay planting or raise beds for drainage.
- Weeviled seed in storage: freeze sealed jars for 72 hours, then store cool and dry.
Related crops if you love Growing Split Peas
- Lentils: smaller seed, even drier conditions, similar cool-season window.
- Chickpeas: tolerate more heat, need excellent drainage, longer season.
- Fava beans: thrive in cool weather, fix hefty nitrogen, easy to dry and shell.
- Cowpeas: warm-season stand-in for hot-summer regions wanting a dry soup pea vibe.
“Provide about 1 inch of water per week during bloom and pod fill, adjusted for rainfall.” Source: CSU and WSU Extension vegetable irrigation guides.
I still remember my first winter pot of pea soup from my own dried peas, thick enough to stand a spoon. The vines had taken the edge off a tired bed, and the bowl took the edge off the day, which is the kind of barter I can live with.
Cheatsheet: Premium Care for Thriving Split Peas
🌱 Site & Soil
- Full sun fuels pod growth.
- Loose, well-drained soil pH 6.0–7.0.
- Enrich with compost before planting.
📅 Planting
- Direct sow early spring; soil 45–70°F (7–21°C).
- Plant 1" (2.5 cm) deep, 2" (5 cm) apart in rows 18" (45 cm) apart.
- No need to soak seeds.
💧 Care & Nurturing
- Water: 1" (2.5 cm) weekly, especially after flowering starts.
- Mulch: Retain soil moisture, suppress weeds.
- Fertilize lightly; too much nitrogen = excess foliage.
- Support: Use pea netting or low stakes for climbing types.
🌿 Pests & Disease
- Rotate crops yearly. Avoid growing peas in same spot 2 years straight.
- Watch for aphids, powdery mildew; use insecticidal soap or neem oil if needed.
- Promote air flow; water soil, not leaves.
⏳ Harvest
- Dry pods on plant until yellow, then pick.
- Thresh, shell, dry seeds for storage.
- Yields: Up to 1–2 lbs (0.4–0.9 kg) per 10 ft (3 m) row.
🛠️ Tools and Products You'll Need
- Garden trowel
- Compost
- Pea netting or stakes
- Mulch material
- Watering can or hose
- Harvest basket
🥗 Nutrition & Sustainability
Split peas are 22% protein, rich in fiber, B vitamins, magnesium, and iron. Fix nitrogen, building soil fertility for future crops. Excellent for self-sufficiency gardeners.
- Select sunny, well-drained site; amend soil with compost.
- Sow seeds in early spring, 1" (2.5 cm) deep and 2" (5 cm) apart.
- Water consistently, mulch, provide stakes or pea netting for support.
- Monitor for pests/disease; maintain air flow and rotate crops.
- Harvest dried pods, shell, dry peas for storage.
Frequently Asked Questions about Growing Split Peas
What soil type works best for split pea plants?
Split pea plants flourish best in well-drained, loamy soil enriched with organic matter. Maintain a slightly acidic to neutral soil pH between 6.0 and 7.0. Incorporate compost or aged manure to enhance fertility and structure before planting.
How much sunlight do split pea plants require?
Split pea plants require full sunlight to thrive. Provide at least 6 to 8 hours of direct sunlight daily. Avoid shading from taller crops or structures, as limited sun exposure reduces pod formation and yield significantly.
What watering practices encourage healthy split pea growth?
Water split peas consistently, maintaining evenly moist soil without causing waterlogging. Aim for approximately 1 inch (2.5 cm) of water weekly. Increase irrigation during particularly dry or hot weather, but always ensure proper drainage to prevent root problems.
When is the ideal planting time for split peas?
For optimal results, plant split peas early in the growing season while soil temperatures stay between 45°F and 65°F (7°C to 18°C). Early spring planting takes advantage of cooler temperatures preferred by these legumes and ensures adequate time for pod development.
How should split peas be supported during growth?
Although some varieties of split peas grow as bush types, most benefit from vertical support. Install trellises or stakes at planting time to promote upward growth, improve airflow, and simplify harvesting. Vertical supports also help reduce disease risks by keeping foliage dry and clear.
What common pests and diseases affect split peas?
Split peas can attract pests like aphids, pea weevils, and spider mites, along with diseases such as powdery mildew and root rot. Maintain plant health through appropriate watering and spacing; remove affected plants promptly. Encourage beneficial insects or apply organic pest control methods to manage infestations.
When and how are split peas harvested?
Harvest split peas when pods appear plump and bright green, typically 60 to 70 days after planting. For fresh use, pick pods regularly to encourage continued production. Allow pods destined for dried peas to stay on plants until fully mature and dry before harvesting and shelling.
Growing split peas rewards patience, sharp observation, and a bit of grit. These peas thrive on steady moisture, loose soil, and a watchful eye for pests. Give them support early, and you’ll sidestep tangled vines and wasted pods. Rotate your crops, and your soil stays healthy. Harvest when pods turn yellow and dry—too soon, and you lose flavor; too late, and you court mold. Growing split peas isn’t complicated, but it pays off in hearty soups and honest satisfaction. Plant with intention, tend with care, and your table will thank you. If you’re hungry for more homegrown variety, try growing edamame for another protein-rich harvest.