Growing Bean Sprouts at Home for Fresh and Tasty Results
Growing Bean Sprouts
Growing bean sprouts requires little more than a jar, fresh water, and a shady corner of your kitchen. Packed with protein, vitamins, and a satisfying crunch, they're ready to harvest in just a few days. Follow these straightforward steps for growing bean sprouts at home and savor a fresh, flavorful harvest whenever you want.
Table of Contents
- Fast primer: sprouts vs. microgreens
- Best seeds for Growing Bean Sprouts
- Gear that makes life easy
- Step-by-step method that never lets me down
- Food safety that actually fits a home kitchen
- Pro tips from years of soggy successes and glorious crunch
- Troubleshooting fast
- Which sprouting setup to buy
- Seed buying tips that actually matter
- Flavor map and kitchen uses
Cheatsheet: Home Bean Sprouts—Grow, Rinse, Repeat
🫘 Why Grow?
Sprouts offer 10–20x more nutrients (vitamins A, C, K; antioxidants) than mature beans. Enjoy fresh, pesticide-free, crisp taste year-round. Grown in 4 days. Self-sufficiency & zero food miles.
🛠️ Tools and Products You'll Need
- Dried beans (mung, lentil, alfalfa, adzuki—no kidney beans)
- Quart (1L) wide-mouth glass jar or sprouting tray
- Clean mesh or cheesecloth and rubber band (or jar sprouting lid)
- Water
🌱 How To Sprout:
- Measure: Use 2 tbsp (30ml) beans per quart (1L) jar.
- Soak: Rinse, then cover with cool water. Soak 8–12 hrs at 65–75°F (18–24°C).
- Drain: Pour off water. Invert jar at angle for complete drainage.
- Rinse: Twice daily, fill with water, swirl, and drain well.
- Harvest: Ready in 3–5 days. Sprouts should be 1–2 in (2–5cm) long. Expose to indirect sunlight last day for greener color.
- Store: Refrigerate in sealed container. Eat within 3 days for best taste.
⚠️ Safety & Tips
- Always use fresh, food-grade beans.
- Rinse thoroughly; drain completely to prevent mold.
- Sanitize jars before use. Discard musty-smelling sprouts.
- Boost germination: use filtered water, avoid hard tap water.
- Sprout only small beans—not kidney or soy (toxic raw).
🍽️ Serving Wonders
- Toss in salads, wraps, stir-fries, sandwiches.
- Blend into smoothies for added crunch & nutrition.
- Contains protein, fiber, vitamins, minerals.
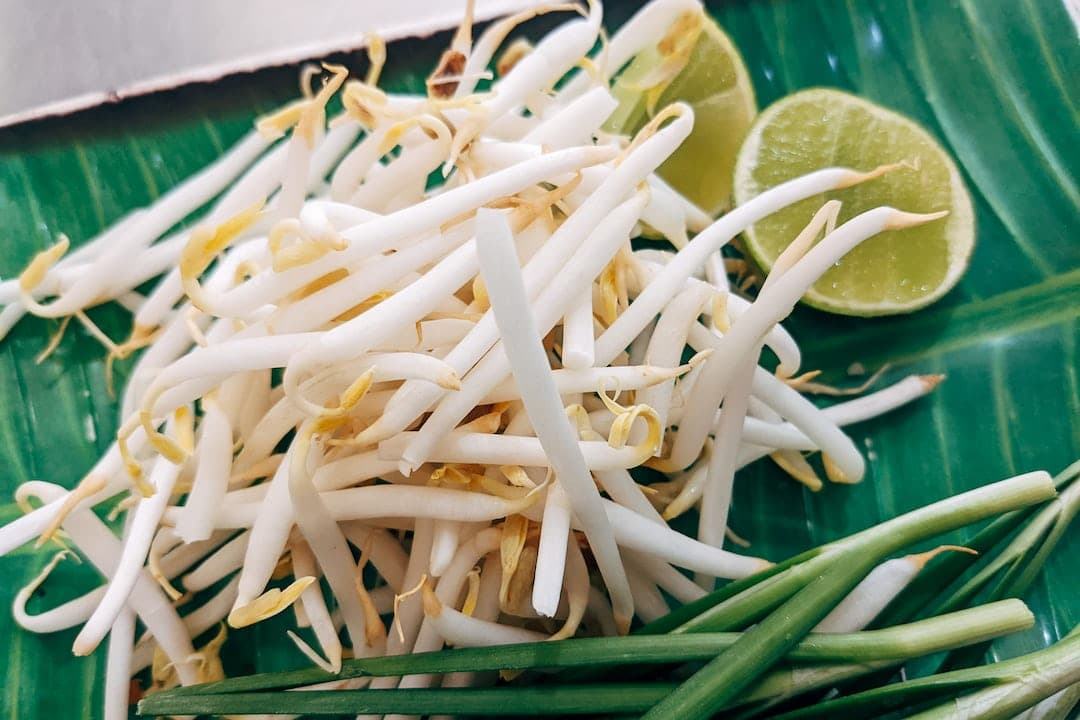
I keep a jar of crunchy mung bean sprouts near the sink, and they somehow vanish into stir-fries the same day they peak. The process feels like time-lapse gardening with a side of instant gratification.
Fast primer: sprouts vs. microgreens
Sprouts are just-germinated seeds eaten whole, seed coat, root, and shoot. Microgreens are sown on a medium, grown under light, and cut above the roots.
Sprouts grow in jars or trays with water and airflow only. Microgreens want a shallow tray, a growing medium, and more days on the clock.
Best seeds for Growing Bean Sprouts
Buy seed labeled sprouting seed, untreated, and lot-tested when available. Garden packets can work, but seed labeled for sprouting is cleaned for this wet method and performs more reliably.
My go-tos: mung bean for thick, juicy shoots; adzuki for a nutty snap; lentil for quick salads; chickpea for hearty crunch; alfalfa and broccoli for leafy freshness; fenugreek for a maple-curry note.
Gear that makes life easy
- Mason jar plus mesh lid: cheap, visible, easy to rinse, perfect for 2 to 4 cups finished sprouts.
- Tray sprouter: better airflow for leafy sprouts, simple to harvest, scales nicely.
- Breathable sprout bag: great drainage, travel-friendly, less visibility for troubleshooting.
- Automatic sprouter: convenience, higher price, moving parts to clean, good if you sprout weekly.
For lids, stainless mesh cleans fast and resists odors. Fine plastic mesh works for tiny seeds but scratches over time.
Step-by-step method that never lets me down
- Measure: 3 tablespoons mung beans (about 35 g) makes roughly 1 quart of sprouts.
- Rinse until the water runs clear. Swirl briskly to screen out floaters and cracked seed.
- Soak 8 to 12 hours in cool water at 65 to 75 F (18 to 24 C). I go overnight.
- Drain completely and tilt the jar at 45 degrees for airflow. I park it in a bowl.
- Rinse and drain 2 to 3 times daily. Keep at 65 to 75 F (18 to 24 C) for steady growth.
- For mung bean thickness, keep them in dim light and add a loose weight on top for the last 2 days. A clean ramekin works.
- Green leafy sprouts like alfalfa get 6 to 12 hours of gentle light at harvest to deepen color.
- Harvest timelines: mung bean 4 to 5 days, adzuki 4 to 6, lentil 3 to 4, alfalfa 5 to 7, broccoli 3 to 4.
- Dehull by floating sprouts in a bowl, skimming off seed coats. Dry well before chilling.
- Refrigerate at 34 to 38 F (1 to 3 C) in a breathable box with a towel. Eat within 2 to 3 days for peak snap.
“Raw and lightly cooked sprouts are a known source of foodborne illness.” — Centers for Disease Control and Prevention
I treat that as a kitchen rule. I chill promptly, keep gear clean, and cook sprouts for high-risk guests.
Food safety that actually fits a home kitchen
Rinse seeds well, sanitize gear, and use clean water. Keep jars angled to drain fully, since standing water breeds funk.
High-risk folks should avoid raw sprouts. A quick stir-fry or blanch to steaming hot reduces risk dramatically.
FDA notes that contamination can start on the farm, so clean handling at home lowers risk but never makes raw sprouts zero-risk. I label my fridge box with harvest date and trust my nose.
Optional sanitation step I use for leafy sprouts
After the soak, rinse with plenty of cool, potable water, then proceed. Commercial outfits use stronger interventions, but those belong in regulated facilities, not a home sink.
Pro tips from years of soggy successes and glorious crunch
- Dry the jar walls after each drain to slow biofilm buildup.
- Cold-shock at 33 to 36 F (0.5 to 2 C) for 2 hours after harvest for extra crispness.
- Weigh mung bean sprouts during days 3 to 4 to thicken hypocotyls. Gentle pressure only.
- Use filtered water if your tap smells of chlorine. Sprouts are tiny, and they taste like their water.
- Yield sanity check: 3 tablespoons mung beans give me 0.8 to 1.1 lb sprouts (360 to 500 g), batch after batch.
Troubleshooting fast
- Funky smell: too warm or too wet. Rinse more, drop the room temp to 60 to 70 F (15 to 21 C), and improve drainage angle.
- Brown tips: heat stress or light scorch. Move to a cooler, dimmer spot.
- Slime on leafy sprouts: overcrowding. Reduce seed quantity by one third and add a midday rinse.
- Bitter taste: overgrown. Harvest a day earlier next time and green briefly near a window.
Which sprouting setup to buy
- Best starter: wide-mouth glass jar with stainless mesh lid. Inexpensive, durable, dishwasher friendly.
- For tiny seeds like alfalfa: jar plus fine-mesh insert or a multi-tray sprouter with gentle flow.
- For volume: tiered trays with bottom drain simplify back-to-back batches.
- Low-effort routine: an automatic sprouter with a timer, provided you commit to cleaning after every cycle.
Look for BPA-free plastics, smooth surfaces, and parts that separate for scrubbing. A simple brush beats fancy features if cleaning is a chore.
Seed buying tips that actually matter
- Label says “sprouting seed,” untreated, and food-use. Garden seed coated with fungicide is a hard no.
- Whole, uniform-size seed sprouts evenly. Split peas and hulled grains perform poorly as classic sprouts.
- Buy in small lots until you test flavor and vigor. Fresh seed germinates faster and tastes sweeter.
Reputable vendors state testing practices or lot numbers. I store seed in airtight jars at 40 F (4 C) to lock in vigor.
Flavor map and kitchen uses
- Mung bean: juicy and mild. Stir-fry at high heat with scallion and soy for 90 seconds.
- Adzuki: nutty bite. Toss into grain bowls with sesame oil and lime.
- Lentil: earthy and fast. Mix with diced tomato and parsley for a 10-minute salad.
- Broccoli and alfalfa: peppery-green. Layer in sandwiches or blitz into bright dips.
Salt just before serving so they stay crisp. Heat wilts quickly, so cook last and fast.
Temperatures, time, and texture
Cool rooms build sweetness and crunch. Warm rooms speed growth but soften texture and invite off-odors.
I aim for 65 to 72 F (18 to 22 C) and adjust rinses with the season. Summer gets a third rinse, winter gets two.
Cost and yield, with real numbers
One pound of mung beans (454 g) costs a few dollars and gives several quarts of finished sprouts across batches. My average is 3 tablespoons dry to 1 quart finished, two rinses daily, harvest on day 4.
Compared to store clamshells, home sprouts taste brighter and last longer when dried thoroughly before chilling. The math favors home sprouting if you eat them weekly.
Smart cleaning routine
- Wash jars, lids, and trays with hot, soapy water after every batch. Rinse until squeaky.
- Air-dry completely between cycles. Moist gear invites trouble.
- Sanitize cutting boards and knives before handling finished sprouts. I keep a board just for fresh produce.
Light tricks for leafy types
Leafy sprouts green best in bright, indirect light for half a day. Direct sun cooks them.
A north window or under-cabinet LED works fine. Keep temperatures steady while greening.
Pairing sprouting with the rest of the garden
I test old seed lots by sprouting a teaspoon; strong germination means the rest can go in beds. Rinse water feeds houseplants after it warms to room temp.
Spent seed coats compost fast and heat up a lazy pile. The circle closes on the counter and in the soil.
Alternatives if raw sprouts are off the table
- Pea shoots and sunflower microgreens: grown in trays, then sautéed or steamed lightly.
- Blanched mung bean sprouts: drop into boiling water for 30 to 60 seconds, then chill for crunchy safety.
- Quick-pickled sprouts: vinegar, salt, and a short rest for sandwiches and bibimbap.
What the experts say
CDC advises people at higher risk to avoid raw sprouts and to cook them thoroughly. That guidance aligns with the way I serve guests who need extra caution.
FDA’s sprout safety documents explain that contamination can occur on seed before you even buy it. Clean technique helps, but heat is the final barrier.
FAQ for Growing Bean Sprouts
Do I need darkness for mung bean thickness. Dim light helps, and a gentle weight gives plump, pale shoots.
Can I sprout soybean. Use small, sprouting-grade soybeans and cook before eating for best flavor and safety.
How do I avoid grassy flavors. Keep temps under 75 F (24 C), harvest on time, and green leafy types for only half a day.
Why are my alfalfa sprouts matted. Too much seed and too little airflow. Reduce seed by a third and fluff gently at each rinse.
Frequently Asked Questions About Growing Bean Sprouts
Which bean varieties sprout best at home?
Mung beans and lentils sprout quickly and reliably at home, usually within 3–5 days. Other beans like chickpeas, adzuki beans, and soybeans also produce edible sprouts but typically require an extra day or two.
How long does it typically take to grow bean sprouts?
Most bean sprouts grow to edible lengths within 4–6 days, depending on the variety and growing conditions. Mung bean sprouts commonly reach harvesting size in 3–5 days, while lentils and chickpeas might need up to 5–6 days.
Is special equipment required for growing bean sprouts at home?
No special equipment is necessary. Glass jars covered with breathable cloth or mesh lids allow sufficient airflow and drainage, making them ideal for sprouting beans easily at home. Alternatively, sprouting trays can streamline the rinsing and draining process.
How frequently should bean sprouts be rinsed?
For best results, rinse your bean sprouts with fresh water twice daily, typically once in the morning and once in the evening. Regular rinsing prevents mold formation and maintains freshness.
Do bean sprouts need sunlight to grow?
No, direct sunlight isn't required for growing bean sprouts. In fact, sprouts thrive in a warm, dark environment—around 68–72°F (20–22°C). After sprouts reach the desired length, placing them briefly in indirect light can encourage greening and boost nutritional value.
What's the best method to store harvested bean sprouts?
After harvesting, rinse the sprouts well and pat dry gently. Store them in a covered container lined with a paper towel inside your refrigerator. When stored properly, bean sprouts remain crisp and fresh for approximately 3–5 days.
Are there safety precautions when growing bean sprouts at home?
Always use clean equipment and rinse thoroughly at each step. Avoid sprouts with unpleasant odors or slimy textures, as these indicate spoilage. Cooking sprouts briefly before eating can further ensure safe consumption, especially for individuals with weakened immune systems.
Growing Bean Sprouts at home strips everything back to the essentials: water, air, and a handful of seeds. No garden required—just patience and clean hands. The payoff is crisp, living food packed with flavor and nutrition, ready in days. Mastering the rinse and drain rhythm keeps things simple and safe, and there’s real satisfaction in seeing that tangle of fresh shoots thrive on your kitchen counter.
If beans are your thing, try exploring beyond sprouts. Give mung beans, lentils, or even lima beans a shot for variety in your home setup. Whatever you choose, growing your own is about reconnecting with food at its freshest and most honest. Keep it simple, stay curious, and let your countertop surprise you.