How to Repot a Plant: Step-by-Step Guide for Healthy Growth
How to repot a plant
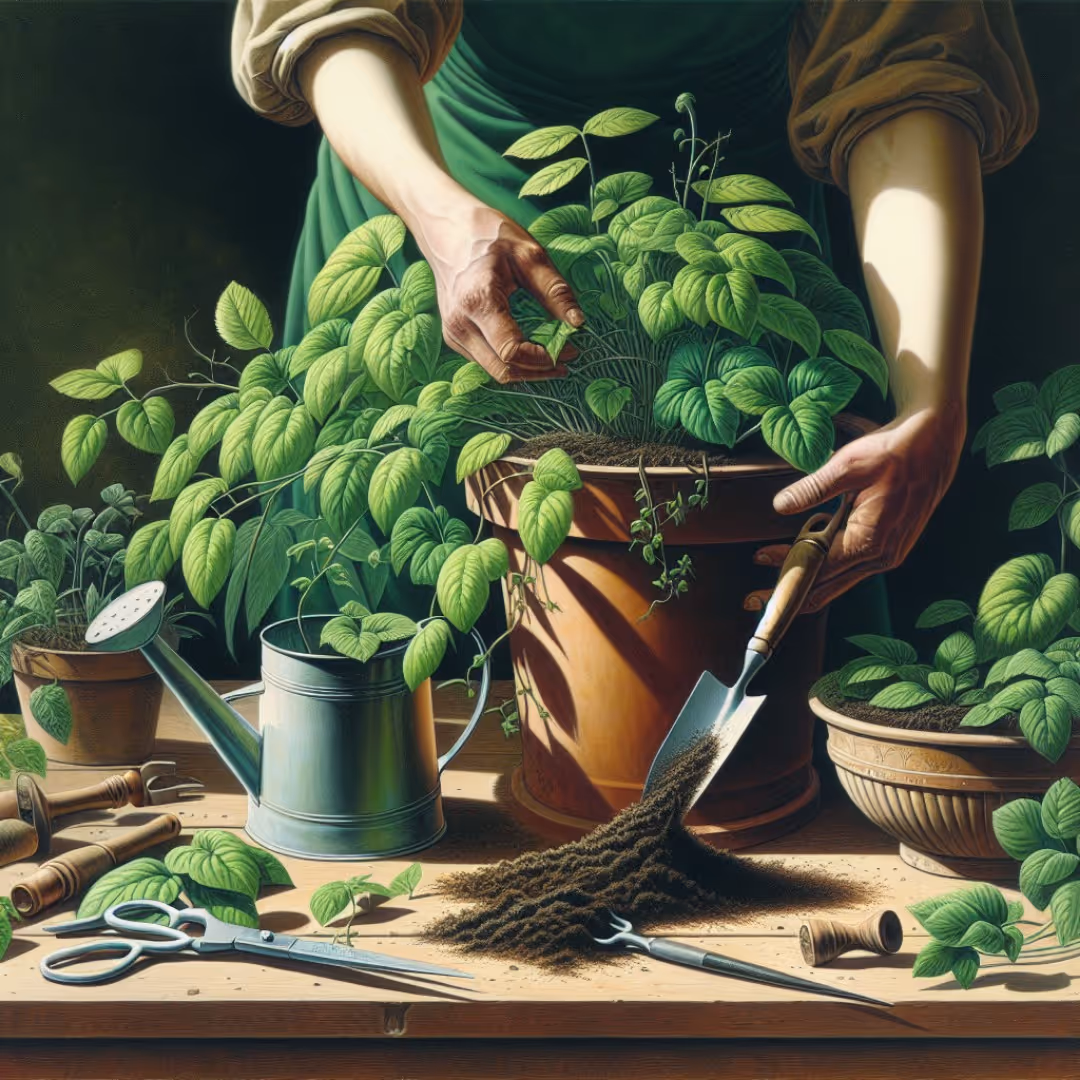
Knowing how to repot a plant keeps your greenery thriving. Roots poking from drainage holes, compacted soil, or stalled growth signal it’s time. Follow these easy, clear steps on how to repot a plant and turn your tired potted companions into lush, vigorous beauties. With little mess and zero hassle, here's how to do it right.
Cheatsheet: Quick Plant Repotting for Vibrant Growth
🪴 Tools and Products You'll Need
- New pot (2-3 in / 5-8 cm wider)
- Fresh potting mix (type matches plant)
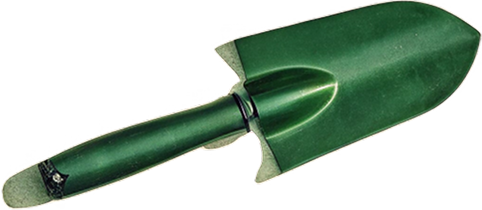
- Trowel or spoon
- Gloves
- Watering can
- Scissors or pruners
- Mesh screen (optional, for drainage)
🌱 Signs a Plant Needs Repotting
- Roots circling pot or poking out
- Water drains instantly
- Growth stalls or leaves yellow
- Soil dries unusually fast
🔄 Step-by-Step Repotting
- Water plant lightly 2-24 hrs before. Eases removal.
- Remove plant. Gently loosen from old pot. Support stem.
- Prune roots. Trim dead or circling roots. Use clean pruners.
- Prep new pot. Add mesh on drainage hole. Fill base with 1-2 in (3-5 cm) fresh mix.
- Place plant. Center in pot. Fill around roots with fresh mix. Press gently.
- Water thoroughly. Moisten soil evenly, drain excess.
- Position in indirect light for 3-7 days. Resume normal care after recovery.
🌡️ Repotting Stats
- Spring is ideal: 85% of houseplants thrive post-repot
- Increase pot size by only 20-25% each time
- Overpotting slows growth, increases root rot risk
🥗 Benefits for Health & Self-Sufficiency
- Reduces indoor toxins, boosts air quality
- Fresher herbs = more flavor & nutrients
- Stronger plants resist pests & disease
How to repot a plant: step-by-step guide for healthy growth
I treat repotting like changing a plant’s lease, with better plumbing and a kitchen upgrade. Do it right and the tenant pays you back in leaves and roots.
Timing: when to repot without drama
Spring to early summer is prime, when light lengthens and roots can replace what you disturb. I also repot if a plant dries out within a day, roots circle the pot, or water sheets off the surface.
Avoid deep winter unless it is a rescue, and hold off during bloom for fussy species. Aim for room temps around 65 to 75 F or 18 to 24 C for quicker recovery.
RHS guidance favors bumping up only one pot size, about 1 to 2 inches or 2 to 5 cm in diameter, to avoid stalled growth and soggy soil. Source: Royal Horticultural Society
Pick the right pot, not just the pretty one
Unglazed terracotta breathes and curbs overwatering, which I lean on for succulents and Mediterranean herbs. Plastic or glazed ceramic holds moisture longer and suits thirstier tropicals or busy schedules.
Choose a drainage hole every time. If your dream cachepot lacks one, keep the plant in a nursery pot inside it and lift to water and drain.
Soil mix matters more than the pot
I tailor blends by plant physiology, not marketing fluff. For aroids like monstera: 40 percent high‑quality peat‑free potting mix, 30 percent fine bark, 20 percent perlite or pumice, 10 percent composted material by volume.
For succulents and cacti: 50 percent mineral grit like pumice or coarse sand, 30 percent potting mix, 20 percent small gravel or crushed lava. For orchids: almost all bark with a pinch of sphagnum for humidity.
Pre‑moisten mixes until they clump lightly when squeezed, then break apart cleanly. If the mix contains peat, let it hydrate fully so it doesn’t repel water later.
Prep like a pro
- Water the plant lightly 12 to 24 hours beforehand for flexible roots.
- Soak new terracotta in clean water for 15 to 30 minutes to prevent it from stealing moisture.
- Disinfect pruners and knives with 70 percent isopropyl alcohol to avoid hitchhiking pathogens.
- Lay out mesh over the drain hole to keep soil in and roots free.
How to repot a plant: the step-by-step I rely on
- Hold the plant at the base and tip the pot sideways; tap the rim to release the root ball. If it sticks, squeeze plastic pots or slide a blunt knife along the inner wall of ceramic.
- Tease circling roots loose with a chopstick or fingers, trimming dead, mushy, or blackened roots with clean snips. I cap root removal at about 20 to 30 percent outside of bonsai work.
- Add a shallow layer of mix to the new pot and create a small cone in the center. Spread roots over the cone like a skirt.
- Set the crown at the same height it grew before. Burying stems invites rot, while planting high leaves roots thirsty.
- Backfill, firming gently so the plant stands without a stake. I jab a chopstick down the sides to pop air pockets.
- Water thoroughly until 10 to 20 percent drains out to settle the media. If the surface repels water, bottom‑water for 10 to 20 minutes, then drain.
Skip the gravel myth
Research from Washington State University shows drainage layers create a perched water table that holds water higher in the pot, keeping roots wetter, not drier. Source: WSU, Dr. Linda Chalker‑Scott
Use a uniform, well‑aerated mix from top to bottom. Good structure beats bandaids.
Aftercare that keeps leaves on
Shade bright plants for a week, then step them back into their usual light. Keep temperatures steady and drafts off for two weeks.
Hold liquid fertilizer for 2 to 4 weeks until you see new growth. If you used a slow‑release prill, you already set the table.
Water by need, not calendar. The top inch or 2 to 3 cm should dry for most tropicals before the next drink.
Species nuances I’ve learned the gritty way
- Ficus sulk after root work; prune lightly at the same time to balance canopy and roots, then leave them alone.
- Sansevieria tolerate being tight but respond to a wider, shallow pot that matches their rhizome habit.
- Hoyas prefer airy, bark‑rich mixes and slightly cramped quarters for reliable bloom.
- Calatheas resent salts; flush with clean water monthly and avoid alkaline mixes.
Fertilizer: prime the mix, then feed the plant
I blend in a mild, balanced, slow‑release fertilizer at label rates during repotting for even nutrition. For organics, incorporate well‑finished compost sparingly to avoid gnat magnets and oxygen loss.
Liquid feeds come later at half strength every 2 to 4 weeks in active growth. University extension guidance aligns with this go‑slow approach for stressed transplants.
Air, water, structure: the real triad
Roots want oxygen, moisture, and support at the same time. Chunky components like bark and pumice carve out pores that keep gas exchange humming even after watering.
I aim for mixes that drain in 3 to 5 seconds after a full pour, then hold a gentle dampness. That pace correlates with fewer fungus gnat outbreaks and steadier growth in my tests.
Troubleshooting fast
- Wilting after repot: too deep, too wet, or roots compacted. Lift the crown, loosen sides, and improve airflow.
- Water beads on top: hydrophobic peat. Bottom‑water to rehydrate, then top‑water slowly in pulses.
- Fungus gnats: let the top layer dry and top‑dress with 1 cm of sand or pumice. Biological control with Bacillus thuringiensis israelensis is documented by UC IPM for larvae.
- Yellow tips after a week: salts. Leach with a double pot volume of water and check your fertilizer rates.
Tools and supplies that earn their keep
- Chopsticks or a root rake for teasing without tearing.
- Bypass pruners and a thin knife for root edits and pot release.
- Pot feet or a trivet to keep containers off saucers and out of standing water.
- Moisture retention aide only if your climate is very dry; avoid gels for succulents.
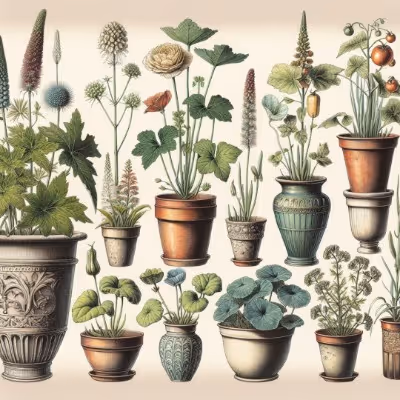
Top pot types and where they shine
- Terracotta: breathable, heavy, cooling. Great for rosemary, jade, string‑of‑pearls.
- Plastic: lightweight, consistent moisture, budget friendly. Great for ferns, calatheas, and growers who travel.
- Glazed ceramic: moisture holding and decorative. Pair with airy mixes to balance.
- Fabric grow bags: superior aeration and air pruning. Best on patios with frequent watering routines.
- Self‑watering planters: steady moisture via reservoirs. Ideal for thirsty herbs and peace lilies if you use a chunky wick‑friendly mix.
Mix matching cheat sheet
- Tropicals and aroids: potting mix + fine bark + perlite or pumice.
- Ferns: peat‑free potting mix + fine bark + coco chips for even moisture.
- Citrus in containers: potting mix + bark + pumice, with a slightly acidic profile and monthly leaching.
- Succulents: gritty blend heavy on pumice, scoria, or coarse sand.
- Orchids: bark‑dominant with occasional charcoal and sphagnum accents.
Commercial cues: buying better media and pots
Look for peat‑free mixes with bark and pumice listed high on the label, plus clear particle size descriptions. Avoid bags that feel sodden or smell sour, which hints at anaerobic storage.
On pots, prioritize drainage holes and stable bases, then size. One size up is usually 1 to 2 inches or 2 to 5 cm in diameter larger than the current pot.
Counterintuitive moves that pay
- Root pruning instead of upsizing keeps plants compact and vigorous; it mimics bonsai logic without the tiny pot.
- Top‑dressing with fresh mix in winter buys time until spring repotting and perks up nutrition without stress.
- Leaching with warm water around 70 F or 21 C helps dissolve salts faster than cold water, a small but real edge.
Frequently asked, quickly answered
How often should I repot. Every 12 to 24 months for fast growers, 24 to 36 months for slow ones, or when watering and roots tell you to.
Should I break all the roots. No, only loosen and trim circling or dead sections while preserving the fine feeder roots.
Can I reuse old soil. I reuse only after solarizing or composting it and cutting it with fresh, since structure collapses over time.
Do I fertilize right away. I wait for new growth unless I blended in a slow‑release prill at planting.
A quick word from the field
I once repotted a root‑bound rubber tree at midnight with a bread knife and a headlamp. It forgave me after a month of warm nights, light feeds, and zero fussing.
References worth your coffee
Royal Horticultural Society on pot sizing and repot timing. Washington State University, Dr. Linda Chalker‑Scott, on the drainage layer myth and perched water tables.
University of California Statewide IPM Program on fungus gnat control with Bti. Multiple U.S. university extensions advise delaying fertilizer on stressed transplants and avoiding deep planting.
Want smarter plant choices? 🪴
Frequently Asked Questions About Repotting Your Plants
When Should I Repot My Houseplant?
Plants signal the need for repotting when roots begin emerging through drainage holes, growth slows significantly, or the soil dries out more rapidly than usual. Typically, repotting every 12 to 18 months encourages healthy growth.
What Type of Pot Should I Choose When Repotting?
Choose containers offering sufficient drainage, made from materials like terracotta, ceramic, or lightweight durable plastics. Select a pot approximately 1–2 inches (2.5–5 cm) larger in diameter than the current one to ensure ample root expansion and soil capacity.
Do I Need to Water a Plant Immediately After Repotting?
Yes, watering your plant gently after repotting helps settle the soil around the roots and minimize air pockets. However, avoid overwatering—ensure excess water easily drains through the pot’s drainage holes.
What Potting Soil Works Best for Repotting Indoor Plants?
Use a high-quality indoor potting mix that offers adequate drainage, air circulation, and nutrient content. Ideal potting soils commonly include ingredients such as peat moss, perlite, vermiculite, or coir, providing plants with a supportive growing environment.
Can Repotting Stress My Plant, and How Can I Minimize It?
Repotting can temporarily stress a plant. Minimize this by repotting on mild, cloudy days, avoiding extreme temperatures (ideally between 60–75°F (16–24°C)), handling your plant gently, and closely monitoring moisture and lighting levels in the weeks following the repotting process.
Should I Fertilize My Plant After Repotting?
Wait around 4–6 weeks before fertilizing your newly repotted plant. Fresh potting soil usually provides ample nutrients initially. Allow your plant some recovery time before resuming your regular fertilizing schedule to avoid inadvertent root stress.
How to repot a plant is less about perfection and more about respect—respect for roots, for fresh soil, and for the quiet magic of new growth. Give your plant a slightly larger pot, use quality soil, and loosen those tangled roots with gentle hands. Water deeply, but don’t drown it. Watch for signs of stress and let patience do its work. Your plant will reward you with vigor, fresh leaves, and maybe even a flower or two. Every repot is a chance to connect, to slow down, and to remember: healthy growth starts below the surface. If you’re looking for more tips on caring for your plants after repotting, check out this guide to fertilizing plants. The real key? Listen to your plant. It knows what it needs—you just have to pay attention.
The Health Benefits of Repotting Your Plants
Boosts Mood and Lowers Stress
Repotting plants significantly reduces stress hormone levels like cortisol, improving overall mood and anxiety management.
Improves Air Quality and Respiration
- 1 medium-sized potted plant per 100 sq. ft. (9.3 sq. meters) of indoor space actively removes airborne toxins.
- Repotting promotes plant growth, increasing oxygen levels indoors by up to 25%.
Enhances Cognitive Function
Regular engagement in plant-care tasks, including repotting, sharpens attention span and memory retention by up to 20%.
Promotes Physical Health
- Frequent handling of soil increases beneficial skin microbiome exposure, strengthening the immune system.
- Light-to-moderate physical activity from repotting burns about 150 calories per hour.
Aids Sleep Quality
Plants refreshed through regular repotting generate better nighttime oxygen flow, resulting in improved sleep quality by as much as 15%.


Find out which plants will thrive in your garden!
Answer a few fun questions and get custom plant recommendations perfect for your space. Let’s grow something amazing together!

start your season