Composting in Cold Climates: Tips for Year-Round Decomposition
Cold climate composting
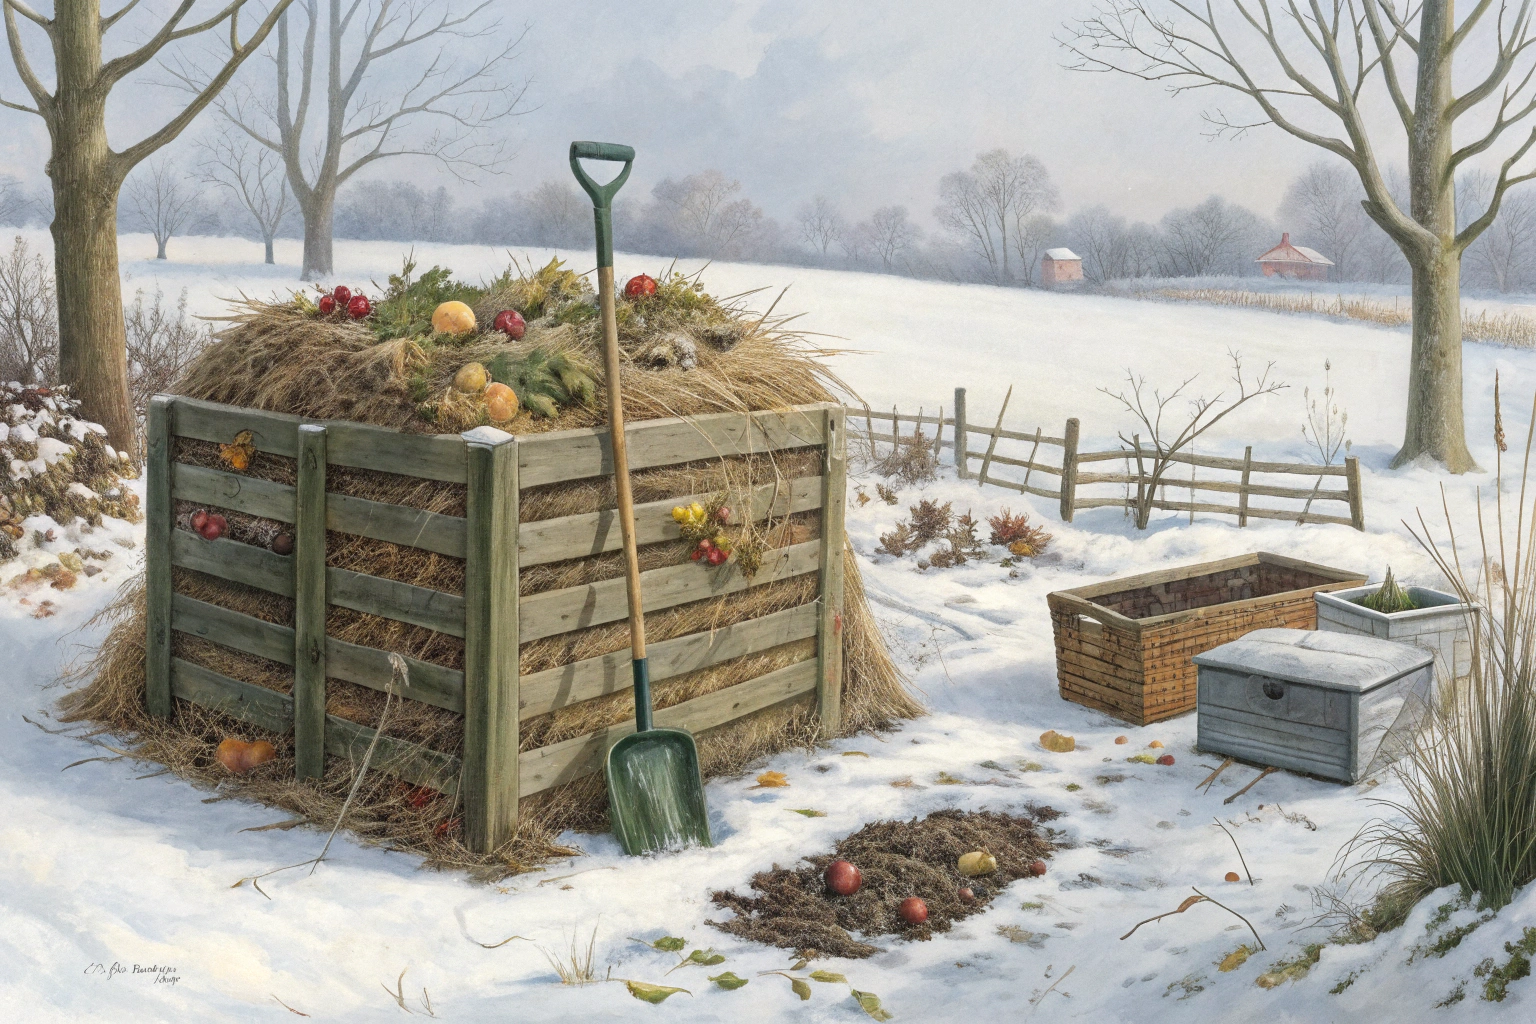
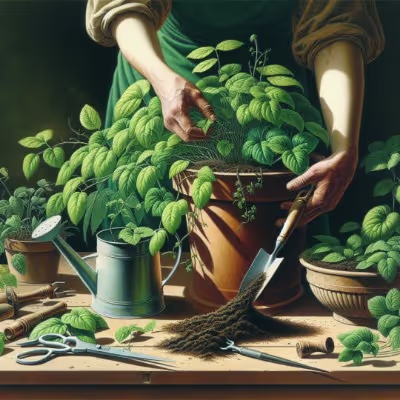
Cold climate composting thrives with a 3x3x3 ft. pile, 25–30:1 C:N, and moisture like a wrung-out sponge. For cold climate composting, layer 2–3 parts carbon to 1 part nitrogen, chop to 1 inch, and insulate with 6 inches of leaves or straw. In cold climate composting, keep the core at 130–150°F, turn less during deep freezes, and cover the bin to block wind and shed snowmelt. Stick with me—we’ll keep that heap cooking all winter.
Cheatsheet: Cold Climate Composting Essentials
❄️ Site & Bin Setup
- Insulate: Wrap bins with straw bales, old blankets, or rigid foam.
- Choose sunny spot for max warmth.
- Minimum volume: 1 cubic yard / 0.75 m³ for heat retention.
🔥 Heat Retention Tricks
- Layer greens (food scraps, grass) and browns (leaves, straw).
- Add hot water bottles or large jugs of hot water in center during deep freeze.
- Cover pile top with tarp or thick layer of leaves.
🍂 Feed & Turn
- Chop materials for faster breakdown.
- Feed pile until late fall, then slow but continue adding.
- Turn every 2 to 4 weeks if not frozen.
- Ideal internal temp: 135–160°F / 57–71°C.
🌱 Winter Survival Strategies
- Store scraps indoors in sealed bin until pile thaws.
- Start a second pile in spring if frozen solid.
- Worm bins (vermicomposting) indoors for year-round output.
🛠️ Tools and Products You'll Need
- Compost bin or pile (min. 1 cubic yard / 0.75 m³)
- Insulating material: straw bales, foam panels, or old blankets
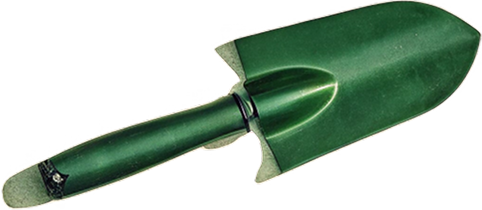
- Pitchfork or sturdy shovel
- Thermometer (compost thermometer preferred)
- Tarp or thick leaf mulch
- Optional: hot water bottles/jugs
- Kitchen scrap bin (sealed)
📈 Quick Stats & Benefits
- Active piles can reach 140°F / 60°C in subzero weather if insulated.
- Finished compost boosts soil health, saves money, and reduces waste by 30%.
- Self-sufficiency: fertile soil means stronger, healthier veggies.
Assemble bin at least 1 cubic yard / 0.75 m³. Wrap sides with straw, foam, or blankets for insulation.
Add alternating layers of greens and browns. Chop material for faster breakdown. Water lightly if dry.
Monitor with thermometer. Add hot water jugs to core when temps dip below freezing.
Turn pile every few weeks, weather permitting. Store kitchen scraps indoors if pile freezes.
Resume regular feeding and turning as soon as pile thaws. Sift finished compost for use in planting beds.
Cold climate composting that actually cooks in January
My first pile that kept steaming at 0 F (-18 C) had two secrets: size and insulation. I learned that from a neighbor who composted through blizzards and grew tomatoes like he had a wood stove under the beds.
The science that keeps the pile alive
The pile runs on microbes in a thermophilic phase that thrives around 131 to 158 F (55 to 70 C), then slides to mesophilic as it cools. Below 40 F (4 C) activity slows, yet cells endure and wake again after a thaw, helped by freeze-thaw that shreds tissues and opens surfaces.
“Maintain 131 F (55 C) for pathogen reduction: 3 days in static aerated piles, or 15 days in windrows with 5 turns.” EPA, Composting Process to Reduce Pathogens
Size, structure, and insulation that hold heat
Give winter a target: at least 3 by 3 by 3 feet (0.9 by 0.9 by 0.9 m). Bigger cores hold heat longer, yet avoid compaction that chokes airflow.
- Wall it in with wood or straw bales and line inside with 0.5 inch (13 mm) hardware cloth to block rodents.
- Wrap with a breathable cover: old moving blankets, burlap, or a compost duvet of leaves and straw 8 to 12 inches (20 to 30 cm) thick.
- Snow insulates nicely if you cap the pile after a good hot cook, then leave it.
Feedstock and C:N ratio that fire the engine
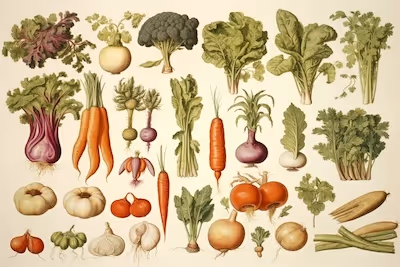
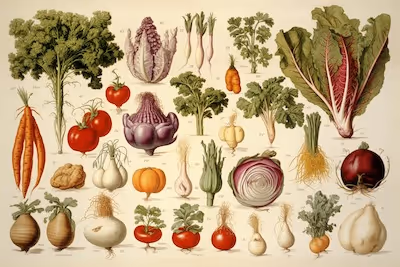
Hit a carbon to nitrogen range near 25 to 30:1 for steady heat without ammonia stink. In practice that means two buckets of browns (leaves, shredded cardboard, straw) for each bucket of greens (kitchen scraps, coffee grounds, manure).
Shred to 0.5 to 2 inches (1 to 5 cm) to boost surface area and speed colonization. I keep a lidded tote of dry leaves in the shed, because winter scraps show up wet and cold and need a carbon blanket immediately.
Moisture and air: winter edition
Moisture sweet spot sits around 50 to 60 percent: a squeezed handful should feel like a wrung-out sponge with only a drop or two. Use warm water on the edges if needed, but never soak the core or it will freeze into a brick.
Turn less when it is bitter cold. I build air into the pile with chunky browns and a vertical chimney of sticks so oxygen sneaks in without dumping heat.
Heat hacks I rely on north of 45 degrees latitude
- Build fast in late fall and finish with a thick carbon cap so the first deep cook happens before the ground locks.
- Spike nitrogen: 10 to 20 percent fresh manure or a few gallons of coffee shop grounds in each 1 cubic yard (0.76 m³) batch.
- Use a long-stem compost thermometer and feed when the core drops below 110 F (43 C); small, frequent feeds keep microbes fed without quenching the fire.
- Cover the top with 2 inches (5 cm) of finished compost before the straw cap to inoculate and buffer odors.
- A second bin cures while the first cooks so I am never opening the hot core on subzero mornings.
Indoor and low-odor paths that bridge the deep freeze
Vermicomposting that actually fits under a sink
Red wigglers run best at 55 to 77 F (13 to 25 C). I freeze kitchen scraps, thaw them, then feed lightly to avoid fruit flies and keep bedding airy with shredded paper and coco coir.
A continuous-flow bin simplifies harvest and avoids full-bin dumps in January. Castings from winter worm bins kickstart the outdoor pile in March like espresso.
Bokashi as a winter fast pass
This is anaerobic fermentation: 10 to 14 days at room temp around 68 to 77 F (20 to 25 C), then it finishes in soil or a hot pile. I trench-bury it under mulch at 8 inches (20 cm) when the ground isn’t iron, or stash it frozen until spring and feed it to the first hot mix.
Cold climate composting troubleshooting
- Frozen cap: let the sun work, then pry a feeding port and add warm, not hot, greens mixed with dry browns.
- Ammonia smell or animals snooping: add 2 to 3 times more carbon, bury food 8 inches (20 cm) deep, and restore the cap.
- Pile stalled at 80 to 100 F (27 to 38 C): add nitrogen, chop finer, and rebuild the core tighter with better contact.
- Waterlogging from sleet: add corrugated cardboard and wood chips, then re-cap with dry leaves.
Tools and gear that actually help in freezing weather
- Insulated tumblers: Jora JK125 or JK270, Aerobin 400. They hold heat, shed snow, and contain odors; expect 400 to 1,100 USD (375 to 1,025 EUR).
- Deep wooden bin: 3 by 3 by 4 feet (0.9 by 0.9 by 1.2 m) with tight-fitting lid and rodent mesh; cheap, durable, easy to insulate with straw bales.
- Compost thermometer: 20 to 24 inches (50 to 60 cm) dial type for real data in the core; aim for 131 to 150 F (55 to 66 C) in active phase.
- Breathable cover: burlap, geotextile, or wool blanket to cut wind without trapping excess moisture.
- Carbon storage: metal trash cans of shredded leaves and a bale of straw tucked under a tarp keep you supplied to balance every winter bucket.
- Aeration tool or winged turner: lift the core without full flips on icy days.
Best setups for cold climate composting
- Straw-bale three-bin: warm, modular, and cheap; replace bales each spring and you get bonus mulch.
- Insulated tumbler on a south-facing patio: perfect for small yards and constant winter feedings.
- Deep wooden box with leaf-mold skirt: the skirt buffers temperature and becomes spring gold for potting mixes.
- Basement vermicomposter plus outdoor curing bin: quiet, clean, and steady output even in February.
- Bokashi plus hot pile combo: fast indoors, then rapid thermophilic finish in April.
Safety, pests, and local rules
Skip meats, fats, and oily foods in bear or raccoon country and armor the bin with 0.5 inch (13 mm) mesh. Keep piles 50 feet (15 m) from wells and drainage, and site them on soil for leachate capture and biology contact.
“Keep compost free of meat, fat, and pet waste to avoid wildlife conflicts.” University of Minnesota Extension
Data points that shape my winter routine
- Cornell Waste Management Institute pegs optimal moisture at 50 to 60 percent and a target C:N near 25 to 30:1 for stable heat.
- EPA guidance for pathogen reduction sets 131 F (55 C) thresholds that your thermometer can verify in real time.
- USDA NRCS notes many microbes survive freezing and rebound with moisture and oxygen, which explains spring pile surges after a thaw.
- University extension trials show 1 cubic yard (0.76 m³) piles retain heat markedly longer than smaller totes because surface area to volume favors the core.
Field notes that save time and compost
Feed scraps in fist-sized batches mixed with equal parts dry browns, then seal with a carbon cap. I time turnings to the weather, waiting for a mild window at 25 to 35 F (-4 to 2 C) instead of cracking the core at minus temps.
Leaf mold parked along the north side of the bin acts like a fluffy parka and also becomes April seed-starting mix. Coffee grounds behave like green nitro, yet I always pair them with twice their volume of shredded leaves to keep porosity.
Soil payoffs that show up in spring
Winter-finished compost carries a mellow pH around 6.5 to 7.5 and a crumb that holds water like a sponge without staying soggy. I spread 0.25 to 0.5 inch (6 to 12 mm) across beds and work it into the top 2 inches (5 cm) for a strong soil food web wake-up.
Want smarter plant choices? 🪴
Frequently Asked Questions: Cold Climate Composting
How can I keep my compost pile active during freezing temperatures?
Wrap your bin with insulating materials such as straw bales, leaves, or layers of cardboard. Position your pile to catch direct winter sunlight and block cold winds with structures or fencing. Increase the pile size to at least 3 x 3 x 3 feet (about 1 x 1 x 1 meter) so that microbial activity creates more internal warmth.
Will compost continue to break down under snow and ice?
Decomposition slows significantly if temperatures plunge below 40°F (4°C), but microbes still work at a slower pace. The outer layers may freeze, though inner materials, especially in a well-insulated pile, can stay warm enough for gradual composting through winter months. Decomposition ramps up again once temperatures rise in spring.
What materials help generate and retain heat in my pile?
Add plenty of high-nitrogen (green) materials like kitchen scraps, coffee grounds, or manure to fuel microbial activity. Balance these with carbon-rich (brown) materials such as leaves, straw, or shredded paper. Moisten the pile lightly, but avoid excess water, as soggy compost cools down and compacts easily in cold climates.
Should I turn my compost pile during winter?
Turning improves airflow and mixes fresh materials, but frequent turning during cold spells can dissipate heat. Consider leaving the pile undisturbed until milder periods unless you need to add materials or notice unpleasant odors which may signal anaerobic conditions.
Can I keep adding food scraps in winter?
Yes, continue to add layers of green and brown materials throughout the colder months. To discourage pests, cover fresh kitchen scraps immediately with frozen leaves or finished compost. If using a tumbler or sealed bin, empty it promptly in spring as decomposition accelerates.
How do I manage excess moisture from snow and rain?
Protect your pile with a tarp, plastic sheeting, or a specially fitted compost cover. Too much moisture leads to compaction and slows microbial activity. Check for soggy conditions by squeezing a handful; it should feel like a wrung-out sponge. Add extra dry carbon materials such as shredded leaves if your pile feels waterlogged.
What should I do with finished compost that freezes?
Frozen compost does not harm quality. Once thawed, spread it on your planting beds, use as mulch, or dig it into garden soil. Many gardeners let finished compost accumulate during the coldest months and distribute it when the ground softens in early spring.
Cold climate composting is simple, gritty work: build heat, then guard it. Go big, 3x3x3 feet or more. Chop scraps small. Layer greens with dry browns, cap the top, and wrap the sides with leaves or straw for insulation. Keep it like a wrung sponge. Turn on thaw days; in deep freeze, just poke air holes and let the core cook. Prime the mix with finished compost, coffee grounds, or manure, and skip meat or oils. Run two bins so one can rest. In spring, screen the black gold, topdress beds, and save a scoop to inoculate the next batch. If larvae show up, adjust moisture and cover fresh feed; more help here: compost and maggots. For timing your spring beds after a long winter, check your zone: zone 3 planting guide and zone 4 planting guide. To blend finished compost into productive soil, see soil for a vegetable garden. Keep feeding the pile, even in January. The microbes will pay you back when the snow pulls back.
The Homesteader’s Toolbox: Cold Climate Compost, All Winter
Compost does not stop feeding soil simply because the mercury drops. A few strategic tweaks let northern growers build nutrient-rich compost, even as snow falls. More than 85% of rural homesteaders report composting as a primary tactic for reducing landfill waste and closing the loop on food scraps. Snow insulates, but adaptation propels decomposition forward.
Digesting pine needles, wood chips, and food scraps at 10°F (–12°C) may seem improbable, but science and preparation forge results. Root cellars stored food before refrigeration; compost piles offer similar off-grid nutrition for your soil microbes. Composting through winter supports year-round soil health and self-sufficiency, producing garden fuel for spring.
Cold-Hardy Bin Design
- Double-walled bins and straw bales slow heat loss. Salvage wooden pallets for airflow, then line with salvaged insulation
- Rodent-proofing: Hardware cloth under and around bins blocks burrowers drawn by food scraps
- Covers: Heavy reused tarp, old metal roofing, or snow layers shield piles from rain and icy winds
Sourcing Nitrogen in Winter
- Freeze buckets of kitchen scraps for slow addition through winter
- Stockpile autumn grass clippings and coffee grounds in bags or buckets
- Legume straw, rabbit bedding, and livestock urine-soaked hay boost nitrogen even after deep freezes
Tools for Cold-Climate Success
- Long-handle pitchfork, not shovel, for fluffing semi-frozen compost
- Chopping machete: Shred brown stalks and green scraps for faster microbial access
- Thermometer: Dial or digital probe reads 0°F to 180°F (–18°C to 82°C); track pile core temps
Health, Nutrition, and Self-Reliance
- Winter composting yields microbe-rich humus by thaw, supporting higher B-vitamin and trace mineral uptake in garden crops
- Reduces dependency on outside soil amendments and commercial fertilizers
- Minimizes food waste output by up to 40% annually, translating to $150–$400 USD savings per household per year
Pile Management Shortcuts
- Layer high-carbon browns atop new greens to buffer odors and trap heat
- Pre-soak dry browns so winter piles do not desiccate
- Use finished compost from last year’s bin for “microbe inoculation” after every new addition
- Leave one pile to freeze: when thaw comes, microbial populations explode, reducing processing time by weeks
Winter composting rewards steady action, practical design, and careful input management. Cold only stops you if you let it. Outlast the frost. Feed your soil.

.avif)

Find out which plants will thrive in your garden!
Answer a few fun questions and get custom plant recommendations perfect for your space. Let’s grow something amazing together!

start your season