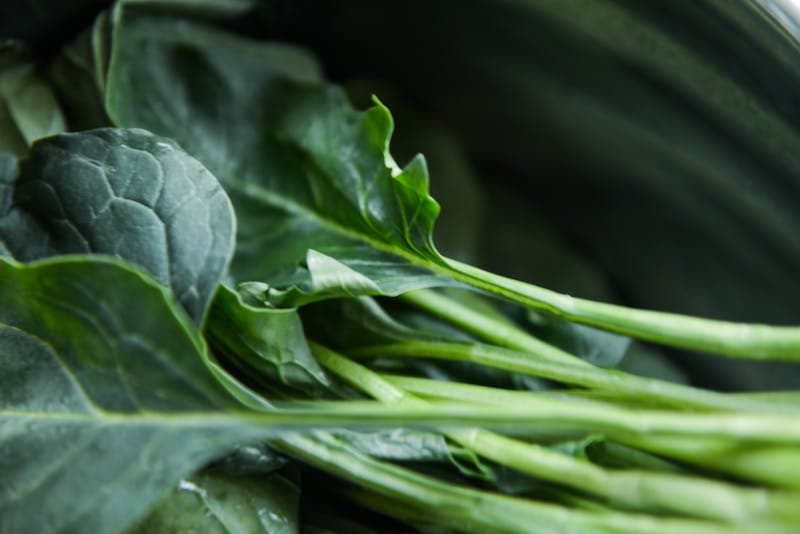
Growing Collards: How to Plant, Grow, and Harvest at Home
Growing Collards
Growing collards starts with planting hardy seeds 6-8 weeks before the last frost date. Choose a sunny spot with nutrient-rich soil, spacing seedlings 18-24 inches apart to give your collards room to spread. Water consistently, mulch generously, then prepare your skillet—delicious leafy rewards await. Here's the complete scoop on planting, tending, and harvesting incredible collard greens.
Table of Contents
Cheatsheet: Plant, Grow & Harvest Collards Fast
🌱 Soil & Light
- Full sun for fastest growth, tolerates partial shade
- pH: 6.0–6.8
- Rich, well-drained soil; add compost or aged manure
🕒 When to Plant
- Direct sow 2–4 weeks before last frost (spring) or 6–8 weeks before first frost (fall)
- Germinates best at 60–75°F (15–24°C)
🌰 Sowing Steps
- Sow seeds ¼–½ in (0.6–1.2 cm) deep, 18 in (45 cm) apart in rows 2–3 ft (60–90 cm) apart
- Keep soil moist for even germination
- Thin seedlings to 18 in (45 cm) for mature heads
💧 Water & Feed
- 1–1.5 in (2.5–4 cm) water per week
- Feed with balanced organic fertilizer every 3–4 weeks
🐛 Pest & Disease Tips
- Check for cabbage worms, aphids, flea beetles
- Use row covers or hand-pick regularly
- Rotate crops yearly to deter soil-borne disease
✂️ Harvest
- Start picking outer leaves at 8–10 in (20–25 cm) tall
- Pick bottom-up; never remove central bud
- Repeated harvests possible for 2–3 months
🧰 Tools and Products You’ll Need
- Collard seeds or seedlings
- Compost or balanced fertilizer
- Row cover (optional, pest protection)
- Hand trowel
- Watering can or hose
- Sharp garden scissors
🥗 Nutrition & Self-Sufficiency
- High in fiber, vitamin K, vitamin C, and calcium
- Yields up to 6 lbs (2.7 kg) per 10 ft (3 m) row
- Thrives even in cold snaps—down to 20°F (–6°C)
I grow collards for steady greens that shrug off weather and kitchen demands. Growing Collards rewards patience, timing, and a pinch of Southern stubbornness.
Why collards earn a square in the garden
They take heat better than kale and taste sweeter after frost, which feels like cheating. I count on them as the last leafy holdouts when everything else sulks.
USDA FoodData Central reports 1 cup cooked collards delivers roughly 266 mg calcium and well over 300 percent of the daily value for vitamin K.
They anchor soups, braises, and quick sautés, and the stems cook down silky with time. I lean on them for winter greens when the pantry thins.
Climate, timing, and frost magic
Collards prefer cool to mild, with best growth from 55 to 75 F, 13 to 24 C. They handle light freezes, and flavor jumps after a cold snap below 32 F, 0 C.
Spring crops go in 2 to 3 weeks before last frost, and fall crops start 10 to 12 weeks before first frost. In Zones 7 to 9, I harvest through winter under low tunnels.
Clemson Cooperative Extension notes collards are “more heat tolerant than other brassicas,” yet they still stall in sustained heat above 85 F, 29 C.
Soil and bed prep that keeps leaves sweet
I aim for a pH of 6.2 to 6.8, slightly higher if clubroot lurks. Deep, loose, compost-rich soil grows broad, tender leaves that don’t chew like leather.
Before planting, I mix in 1 to 2 inches, 2.5 to 5 cm, of finished compost and a balanced organic fertilizer. Heavy feeders like these repay generosity.
Sowing and transplanting
Start seeds indoors 4 to 6 weeks before planting out, or direct sow once soil hits 50 F, 10 C. Seeds sit 0.25 inch, 6 mm, deep and pop in 5 to 10 days.
Transplant when seedlings have 4 to 5 true leaves. I harden off for a week, then plant on an overcast afternoon to avoid sulking.
Spacing that breathes
For full heads, I space 18 to 24 inches, 45 to 60 cm, with rows 30 to 36 inches, 75 to 90 cm. For baby leaves, I sow densely and cut with scissors every 2 weeks.
Airflow stops disease before it starts. If I can slide my hand between plants, that bed usually stays clean.
Water and feeding
Steady moisture keeps leaves mild and supple, about 1 to 1.5 inches, 25 to 38 mm, of water a week. Mulch makes that target easy.
I side-dress with nitrogen when growth slows or leaves pale. A light sprinkle of blood meal or fish fertilizer perks things up fast.
Mulch and weed pressure
Two to three inches, 5 to 7.5 cm, of straw or shredded leaves prevent splash and lock in moisture. Keep mulch off stems to avoid rot.
Weeds set pests in motion, so I put a hoe through the row after every rain. Quick, quiet, effective.
Pests, the honest way I manage them
Cabbageworms, loopers, harlequin bugs, and aphids make the rounds. I scout twice weekly, early morning, with coffee and a bucket.
Caterpillars
Frass pellets on leaves mean action. I handpick, then use Bt in late afternoon if pressure climbs, which spares beneficials.
UC IPM notes “handpicking can provide adequate control in small plantings,” and that matches my experience to the leaf.
Harlequin bugs
Trap crop with mustard on the edge, then pull and trash the infested mustard. Row covers stop them entirely if you seal edges tight.
Aphids
I blast colonies with water, then follow with insecticidal soap. Encourage lady beetles with dill and cilantro nearby.
Diseases I avoid with habits, not heroics
Black rot shows V-shaped yellow lesions, so I plant only certified seed, rotate 3 to 4 years out of brassicas, and keep tools clean. Overhead watering is off my list after sunrise.
Downy mildew and Alternaria thrive in cool and damp. Wider spacing and morning irrigation break those cycles.
Clubroot lingers for years, so I boost pH with lime to 7.0 to 7.2 if it ever shows, then rotate hard. Prevention beats regret.
Micronutrients that matter
Boron deficiency gives hollow stems and brittle leaves. If a soil test flags low boron, I mix 1 teaspoon borax into 1 gallon, 3.8 L, water and apply to 100 square feet, 9.3 m², once per season.
Interveinal chlorosis hints at magnesium shortage. Dolomitic lime fixes pH and adds magnesium in one shot.
Harvest, frequency, and storage
I harvest outer leaves when 8 to 12 inches, 20 to 30 cm, long, leaving the crown. This cut-and-come-again rhythm keeps plants pumping for months.
Whole heads come out with a knife at the base, and the stump often resprouts if I leave 2 inches, 5 cm. That second flush tastes soft and sweet.
Store unwashed leaves in a loose bag in the fridge for 3 to 7 days. For long storage, blanch 2 minutes, chill, drain, and freeze up to a year.
Extension guidance pegs ideal storage near 32 F, 0 C, at 90 to 95 percent humidity for roughly 10 to 14 days.
Overwintering and succession
I succession-plant every 3 to 4 weeks from late summer into fall. That yields tender leaves all winter in mild climates.
In colder zones, I set hoops with lightweight row cover or insect mesh. A simple low tunnel changes the season in your favor.
Container collards that actually crank
One plant per 5 to 7 gallon, 19 to 26 L, pot gives room for roots. Use a peat-free potting mix with compost and slow-release organic fertilizer.
Containers dry out fast, so I water when the top inch, 2.5 cm, turns dry. Monthly liquid feed keeps leaves broad and glossy.
Companions and rotation
I pair collards with dill, cilantro, and onions for pest pressure relief. I never follow brassicas with brassicas within three years.
After harvest, I plant beans to reset nitrogen. That next brassica crop always looks happier.
Top cultivars and buying guide
- Vates and Champion: compact, bolt resistant, steady producers for spring and fall.
- Georgia Southern: big, crinkled leaves with classic flavor, strong cold tolerance.
- Top Bunch 2.0 and Flash: quick to harvest, uniform, dependable for markets and tight beds.
- Morris Heading, aka cabbage collards: forms a loose head, silky texture after frost.
- Yellow Cabbage Collards, heirloom: pale green leaves, sweet and tender, worth the hunt.
I buy certified seed from reputable suppliers and refresh seed every 3 to 4 years. Transplants jump ahead in spring, while direct sowing shines in late summer heat.
Troubleshooting at a glance
- Bitter leaves: plant for cool seasons, maintain even watering, pick younger leaves.
- Holes and green droppings: caterpillars, scout and treat with Bt, add row cover early.
- Yellow V-shaped lesions: black rot, remove plants, sanitize tools, rotate long.
- Pale new growth: nitrogen low, side-dress, water in well.
- Hollow stems or brittle leaves: possible boron deficiency, address only with soil test data.
- Plants bolt in spring: heat or stress, choose bolt-resistant cultivars, water consistently.
Yield expectations from an honest bed
A single healthy plant, spaced right and fed well, gives me 1 to 2 pounds, 0.45 to 0.9 kg, of leaves per month for several months. A 10-foot, 3 m, row keeps two cooks happy all season.
Fall crops carry the pantry. After a hard frost, I schedule a bigger harvest and stash blanched bags in the freezer.
Seed saving, if you like a challenge
Collards are biennials and need cold to flower, about 6 weeks under 45 F, 7 C. They cross with other brassicas, so isolate by distance or time.
I tag my best plants at season’s end, overwinter them, then save seed from the first clean, vigorous bloomers. Dry pods fully before threshing.
Cook’s notes from a hungry gardener
I strip stems for quick sautés, save them for longer braises, and never skip the potlikker. After frost, I slice ribbons and flash-cook with garlic, a splash of vinegar, and a spoon of the cooking liquor.
For wraps, I blanch leaves 30 seconds and chill, then pack rice, beans, and herbs. The texture hits like a soft tortilla with real backbone.
Field tips I learned the hard way
- Row cover from day one stops caterpillars before they happen, which beats spraying later.
- Mulch early, not after weeds start. That single habit keeps disease off lower leaves.
- A light side-dress two weeks after each big harvest recharges plants fast.
- If harlequin bugs arrive, pull any flowering mustards nearby. The party ends when the buffet closes.
Quoted guidance and sources I trust
“Collards are more heat tolerant than other brassicas,” Clemson Cooperative Extension, HGIC series on collards.
“Flavor improves with frost,” University of Georgia Extension, Home Garden Publications on leafy greens.
“Handpicking can provide adequate control in small plantings,” UC Statewide IPM Program, brassica pests guidance.
Nutrition values referenced from USDA FoodData Central. Cultivar performance summarized from North Carolina State Extension, Alabama Cooperative Extension, and long rows of my own trials.
Quick buying list for getting started
- Seeds or transplants: Vates or Champion for spring, Georgia Southern for fall.
- Row cover or insect mesh: lightweight, well-secured edges, reusable.
- Soil test kit: adjust pH and catch boron issues before they bite.
- Balanced organic fertilizer: slow release base feed, plus a nitrogen top-up.
- Mulch: clean straw or shredded leaves, 2 to 3 inches, 5 to 7.5 cm, deep.
Growing Collards pays attention back with steady, forgiving harvests. Plant them once, feed them well, and they will keep your kitchen honest through the cold months.
Frequently Asked Questions About Growing Collards
What soil conditions support healthy collard growth?
Collards thrive best in fertile, well-drained soil enriched with organic matter. Aim for a slightly acidic to neutral soil, ideally with a pH between 6.0 and 7.5. Compost or aged manure integrated into the planting area provides essential nutrients for vigorous leaf production.
How much sunlight do collard greens require?
For optimal leaf development, collard plants require at least 6 hours of direct sunlight daily. While they tolerate partial shade, abundant sunlight encourages lush foliage and healthy growth.
What's the ideal spacing for collard plants?
When transplanting seedlings or sowing seeds directly, space collard plants approximately 18 to 24 inches (45 to 60 cm) apart in rows that are 2 to 3 feet (60 to 90 cm) apart. Appropriate spacing promotes airflow and reduces the risk of disease.
How much watering do growing collards need?
Provide collard greens with consistent moisture, ensuring around 1 to 1.5 inches (2.5 to 4 cm) of water per week, either from rainfall or supplemental irrigation. Water deeply and regularly, especially during periods of drought or intense heat, to prevent stress and maintain tenderness in the leaves.
How long does it take collard greens to mature?
Collards typically mature within 60 to 75 days after planting. Young leaves can be picked earlier, while mature, full-sized leaves reach their prime around the two-month mark. Harvesting regularly encourages continuous leaf production throughout the growing season.
What temperature range is suitable for cultivating collard greens?
Collards prefer cooler temperatures and flourish best between 55°F and 75°F (13°C to 24°C). These hardy plants tolerate frost, and their flavor often improves after exposure to early frosts during autumn or mild winters.
How can pests and diseases be prevented when growing collards?
Minimize pests and diseases by practicing crop rotation, avoiding overhead watering, and maintaining sufficient spacing between plants. Regular inspection allows early detection and removal of pests like aphids or cabbage loopers. Organic treatments, such as insecticidal soap or neem oil, effectively manage common garden pests.
Growing collards is honest work—straightforward, forgiving, and deeply rewarding. With the right soil, steady water, and a little patience, these leafy greens will keep producing, even after frost nips the air.
Remember to harvest from the bottom up for continuous growth, and don’t shy away from sharing your bounty or tossing the leaves into a pot of beans. Collards thrive with a bit of tough love and simple care, much like their cousin, broccoli.
With each harvest, you’ll get more than just food—you’ll get a reminder that good things come from getting your hands in the dirt. Plant them, tend them, and let them surprise you. That’s the beauty of growing collards.