Growing Tiger Nut: How to Plant, Care, and Harvest at Home
Growing Tiger Nut
Growing tiger nut rewards gardeners who savor earthy flavors and low-maintenance planting. Start by soaking these sweet, nutty-flavored tubers overnight, then plant directly into warm, well-drained soil once frost retreats. Consistent watering through summer and patience for about four months yields clusters of crunchy, fiber-rich tiger nuts—a perfect snack or creamy horchata base you'll soon wonder how you gardened without.
Table of Contents
- Growing Tiger Nut: How I Plant, Care, and Harvest at Home
- What to buy: tubers, strains, and sourcing
- Planting: the field-proven method
- Care that pays off
- Harvest, curing, and storage
- Culinary notes worth growing for
- My reliable container setup
- Troubleshooting fast
- Season timing by climate
- Safety and legality
Cheatsheet: Home Tiger Nut Growing Essentials
🌱 Soil & Site
- Loose, sandy, well-drained soil
- pH 5.5–7.5 (neutral to slightly acidic)
- Full sun (6+ hrs)
- Avg. soil temp: 64–77°F / 18–25°C
🛠 Tools and Products You'll Need
- Garden fork or trowel
- Soil thermometer
- Watering can or hose
- Mulch (optional)
- Tiger nut tubers (Cyperus esculentus)
🌾 Planting Steps
- Soak tubers 24 hrs in water
- Direct sow after last frost, 3–4 in (8–10 cm) apart, 1–2 in (2.5–5 cm) deep
- Space rows 12–18 in (30–45 cm) apart
- Firm soil, water thoroughly
💧 Care Tips
- Keep soil consistently moist, avoid soggy ground
- Mulch to hold moisture & suppress weeds
- Fertilize lightly with compost mid-season
- Remove weeds—tiger nuts dislike competition
⏳ Harvest
- Harvest 8–10 months after planting (foliage yellowed, died back)
- Lift with fork, sift soil for tubers
- Yield: up to 1400 tubers per sq yd/m, avg. 20% protein, 30% fiber
🥗 Nutrition & Uses
- Rich in fiber, potassium, magnesium, vitamin E
- Natural sweet, nutty taste—raw, roasted, or in horchata
- Gluten-free, aids digestion, boosts self-sufficiency
Growing Tiger Nut: How I Plant, Care, and Harvest at Home
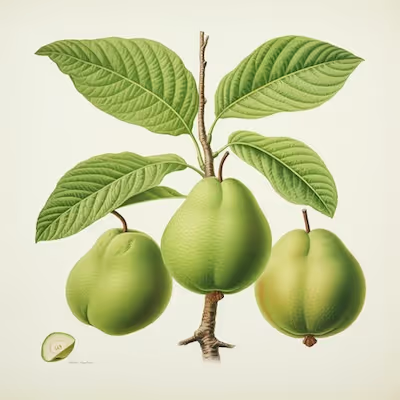
I grow tiger nut (Cyperus esculentus var. sativus) for the crunch, the almond-vanilla aroma, and a glass of cold horchata when the heat hits. It behaves like a sedge with secrets, quietly stitching a web of sweet tubers under warm soil.
Quick profile at a glance
- Type: Warm-season sedge grown for underground tubers; annual in cold regions, short-lived perennial in frost-free zones.
- Days to maturity: 90 to 120, depending on heat and day length.
- Soil: Loose, sandy loam with strong drainage; pH 5.5 to 7.5 works.
- Sun: Full sun for best tuber set.
- Spacing: 6 to 8 inches apart in rows 12 to 18 inches apart (15 to 20 cm in rows 30 to 45 cm).
- Depth: 1 to 1.5 inches deep (2.5 to 4 cm).
- Containers: 10 to 15 gallon fabric pots, 12 inches deep minimum (30 cm).
What to buy: tubers, strains, and sourcing
Ask for chufa or planting-grade tiger nut tubers from reputable seed houses or wildlife plot suppliers, and confirm the cultivated form var. sativus. Culinary tubers can sprout, yet they are sometimes heat-dried or treated, so I use certified planting stock to avoid disappointment and hitchhiking weeds.
Spanish-grown Valencian tubers are famous for horchata and come graded by size and uniformity. For planting, I choose medium tubers the size of chickpeas for even emergence and easier calibration in the row.
UF/IFAS Extension describes chufa as a warm-season crop to plant after soil temperatures exceed 65 F (18 C), at about 1 inch deep with 90 to 120 days to maturity.
Planting: the field-proven method
- Pre-soak to wake them up. I soak tubers 12 to 24 hours in room-temperature water, then drain until just damp; this trims emergence by a week.
- Prep the bed. Fork to 10 inches (25 cm), blend in 1 to 2 inches (2.5 to 5 cm) of compost, and rake smooth for uniform depth.
- Warm soil matters. I wait until the bed hits 65 to 70 F (18 to 21 C) at 2 inches depth; cool soil slows sprouting and invites rot.
- Set the grid. Plant 1 to 1.5 inches deep, 6 to 8 inches apart; in containers, a 10 gallon pot takes 8 to 10 tubers.
- Water gently. Moisten the top 4 inches (10 cm), then keep evenly damp until shoots appear in 10 to 21 days.
- Mulch lightly. A 0.5 inch (1.3 cm) layer of straw reduces crusting; I avoid heavy mulch until plants are 6 inches tall.
Care that pays off
Water
Tiger nut likes steady moisture during bulking, so I aim for about 1 inch (25 mm) of water per week. Drip lines keep foliage dry and tubers clean.
Feeding
Too much nitrogen grows lush leaves with skinny tubers, so I feed lean. A balanced organic fertilizer at planting and a light potassium topdress at 6 to 8 weeks has given me plump, sweet tubers.
Weeds and containment
Keep the bed weed-free until canopy closure since early competition cuts yield. I edge beds with a shallow root barrier and never till beyond the plot line to prevent volunteers next spring.
Pests, critters, and diseases
Wireworms nibble; voles, squirrels, turkeys, and raccoons throw parties, so I use hardware-cloth baskets in vole country and netting near woods. Waterlogged soil invites rot, so I raise beds on heavy ground and avoid overwatering after canopy forms.
Heat and cold
Growth surges in real summer heat, yet frost ends the party fast. In short seasons, I use black ground cover for spring warmth and switch to straw after plants hit knee height.
Harvest, curing, and storage
I lift plants when foliage yellows and tips brown, typically 100 days in warm summers or right before first frost. A digging fork under the clump, a slow pry, and the soil releases a constellation of tubers.
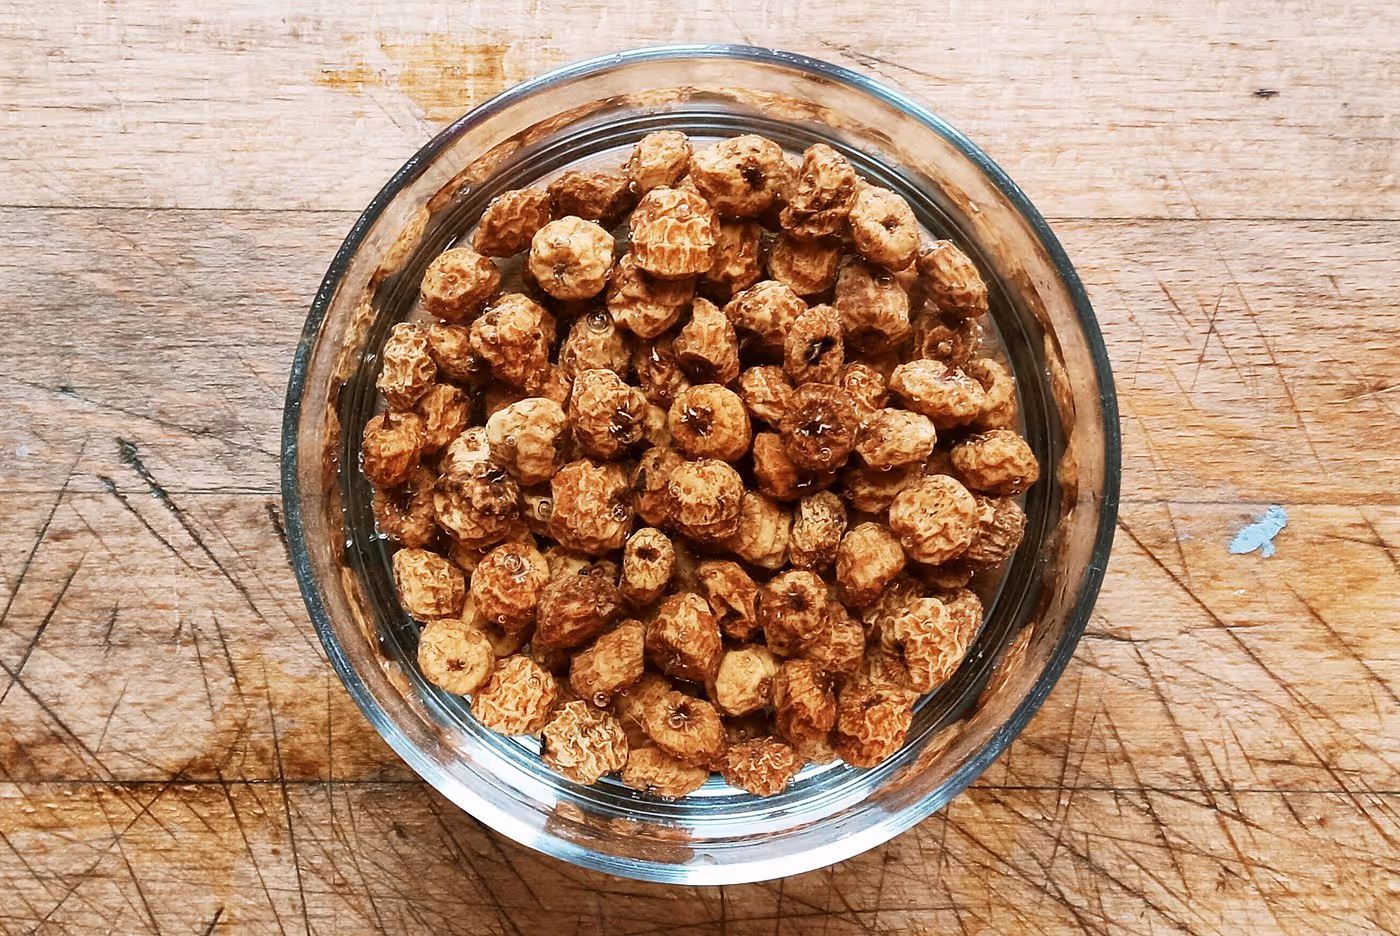
I tumble the roots over a mesh screen to knock soil free, then wash in a tub. For flavor, I cure in the shade with airflow 3 to 7 days, then dry another 2 to 3 weeks until the cut face is glassy and hard.
Store in breathable bags at 50 to 60 F (10 to 16 C) in a dry spot. Any stragglers left in the bed can re-sprout next year, which can be handy or headache depending on your plan.
Peer-reviewed studies report tiger nut oil at roughly 20 to 36 percent, rich in oleic acid, with notable resistant starch and dietary fiber content (Journal of Food Science and Technology; Food Chemistry).
Culinary notes worth growing for
To use, I soak dried tubers 12 to 24 hours, then blend for horchata or toast for a snack that tastes like cereal met almond brittle. Fresh-dug tubers have a green sweetness; cured ones go nutty, which I prefer for drinks and flours.
My reliable container setup
- 15 gallon fabric pot filled with sandy mix: 60 percent screened compost, 30 percent coarse sand, 10 percent perlite.
- Plant 10 tubers in a ring, 1.25 inches deep; keep the center open for airflow and easy watering.
- Drip emitter at 0.5 gallon per hour set to deliver 1 to 1.5 inches per week; reduce in the last two weeks to firm tubers.
Troubleshooting fast
- No sprout after 3 weeks: Soil too cold or compacted; check temperature and replant shallower into warmer, looser soil.
- All leaves, few tubers: Excess nitrogen or shade; ease off N and open the canopy.
- Tubers taste bland: Inadequate curing; extend drying time, then rest a week before tasting.
- Volunteers in spring: Missed tubers; hand-pull early or solarize the bed before replanting something else.
Season timing by climate
Areas with 100 to 120 frost-free days can finish a crop outdoors. In cooler zones, start two weeks earlier in a warm greenhouse or lean on containers against a south-facing wall.
Safety and legality
Tiger nut is a cultivated form of yellow nutsedge, a plant listed as a weed in many places. I advise checking local guidance before planting and keeping crops contained and harvested completely.
Pro tips from repeated harvests
- Pre-sprouting in barely moist sand at 75 F (24 C) speeds emergence dramatically. I transplant tiny sedge seedlings with a butter knife once roots grip.
- A 2 inch straw mulch after canopy closes keeps tubers cleaner and reduces irrigation by a third in my hot summers.
- For super-clean harvests, grow in coarse river sand over a compost base; tubers sift out in minutes.
- Dry tubers until they ping on a steel tray and no longer dent under a thumbnail.
Best uses, gear, and buying guide
- Planting stock: Choose uniform, firm tubers the size of peas to chickpeas; avoid shriveled or musty lots.
- Soil sieve: A 0.25 inch mesh screen saves hours at harvest.
- Drying: A dehydrator at 95 F (35 C) finishes curing cleanly in humid climates.
- For horchata: Valencian-grade culinary tubers grind smoother and taste sweeter after a 24 hour soak with a pinch of salt.
Comparisons and smart alternatives
- Tiger nut vs Jerusalem artichoke: Tiger nut stores dry like a nut and tastes sweet-nutty; sunchokes store wet and taste artichoke-like but can cause gas from inulin.
- Tiger nut vs water chestnut: Tiger nut grows in regular garden soil; water chestnut needs shallow water and muck soil but stays crisp when cooked.
- Tiger nut vs Chinese artichoke: Tiger nut gives larger, starchy tubers; Stachys makes crunchy, small crosnes that shine pickled.
- Companion crop: Short lettuce or basil runs between rows early, then gets harvested before tuber bulking starts.
Field notes and credible references
UF/IFAS Extension materials on chufa align with my planting depths, soil temperature thresholds, and wildlife pressure observations. Purdue’s NewCROP notes match the 90 to 120 day window and the preference for sandy soils that I see in practice.
Food science literature repeatedly reports high oleic oil and substantial fiber, which tracks with the rich mouthfeel in horchata and the slow, steady energy I get from roasted tubers. The Regulatory Council for Chufa de Valencia outlines grading and curing practices that improve sweetness, which mirrors my curing gains at home.
Frequently Asked Questions About Growing Tiger Nut
What Type of Soil is Ideal for Tiger Nut Growth?
Tiger nuts thrive in loamy, well-drained soils rich in organic matter. While they tolerate a range of soil types, maintaining a mildly acidic to neutral pH between 6.0 and 7.5 ensures optimal plant health and tuber development.
How Much Sunlight Do Tiger Nuts Require?
Tiger nuts prefer full sun conditions, requiring at least 6 to 8 hours of direct sunlight daily. Adequate sunlight supports vigorous foliage growth and boosts the production of healthy underground tubers.
How Often Should Tiger Nuts Be Watered?
Consistent moisture is essential; water your tiger nuts regularly to maintain evenly moist soil, especially during warm, dry periods. Ideally, provide about 1 to 2 inches (2.5 to 5 cm) of water per week to avoid waterlogged or overly dry soil.
When is the Best Time to Plant Tiger Nuts?
Plant tiger nut tubers in spring once soil temperatures reach at least 60°F (16°C). Warm soil encourages quick germination and robust early growth, helping the plants establish effectively before hotter temperatures arrive.
How Long Do Tiger Nuts Take to Grow and Mature?
Tiger nut plants typically mature and are ready for harvest approximately 100 to 120 days after planting. Monitor foliage yellowing and drying as clear indicators the tubers beneath are mature and ready to harvest.
What's the Best Method to Harvest Tiger Nuts?
Carefully loosen the soil around the plants with a garden fork or spade, then gently lift the entire plant to expose the tuber clusters. Remove excess soil and wash the harvested tubers promptly to facilitate drying and storage.
Can Tiger Nuts Be Grown in Containers or Pots?
Yes, tiger nuts adapt well to container gardening. Select a container at least 12 inches (30 cm) deep filled with nutrient-rich, fast-draining potting mix. Ensure adequate moisture levels and sunlight exposure to support healthy growth.
Are Tiger Nuts Susceptible to Common Pests or Diseases?
While tiger nuts show resistance to most pests and diseases, they can sometimes attract rodents and birds. Employ preventive measures such as netting or protective barriers, and maintain proper soil drainage to reduce fungal infections and tuber rot.
Growing Tiger Nut rewards the patient gardener with rich, earthy tubers and a taste of ancient history. Give these sun-loving plants a loose, sandy bed, consistent moisture, and a little room to spread.
Weed early, harvest late, and you’ll get a stash of sweet, nutty bites packed with nutrition. Don’t rush—tiger nuts need time in warm soil to bulk up.
A little effort pays off with a unique harvest that’s as satisfying to grow as it is to eat. If you enjoy experimenting with unusual edibles, consider trying crops like duck potato or schisandra vine alongside your tiger nuts.
Plant, tend, and dig deep—your garden will thank you.