Microgreens: A Gardener's Guide to Growing Tiny Greens

Microgreens
Microgreens pack powerful nutrients, mature in under two weeks, and thrive in minimal space—making them the home gardener's jackpot. Plant microgreens on any windowsill, snip at peak freshness, and instantly amp up salads, sandwiches, and dishes. Master growing microgreens at home with this straightforward guide and savor vibrant harvests year-round.
Cheatsheet: Quick Start Microgreens Growing
🧰 Tools and Products You’ll Need
- Seeds: sunflower, radish, pea, broccoli, arugula, mustard
- Growing medium: organic soil or coconut coir
- Tray: flat, shallow, no drainage needed
- Spray bottle for misting
- Sharp scissors for harvest
- Small fan (optional)
- Grow light (if lacking sunlight)
🌱 Popular Varieties & Fastest Growers
- Radish: harvest in 5-7 days
- Broccoli, Kale: 7-10 days, high in vitamins A, C, K
- Pea shoots: 10-14 days, protein-rich
- Sunflower: nutty, 7-12 days
🌞 Light & Temperature
- Light: 12-16 hrs/day; south window or 6500K grow light
- Keep at 65–75°F (18–24°C)
⏳ Steps to Grow (10–14 days)
- Sow: Fill tray with 1–2 in (2–5 cm) moist medium. Scatter seeds densely. Press lightly.
- Cover: Mist. Optionally cover tray with lid or foil for 2 days (speed germination).
- Uncover: Remove cover as soon as seeds sprout. Place in bright light.
- Water: Mist daily. Keep medium damp, never soggy. Small fan helps airflow.
- Harvest: Snip at base when first true leaves appear. 7–14 days from sowing.
- Rinse & Eat: Store dry in fridge, up to 1 week.
🍽️ Nutrition & Self-Sufficiency
- Up to 40x more nutrients per gram than mature greens
- Fresh greens year-round, even in small spaces
- Reduce store dependence, food miles
❗ Pro Tips
- Stagger trays for continuous harvest
- Don’t overwater to prevent mold
- Rotate varieties for flavor and nutrition
Understanding Microgreens: Tiny Plants, Big Flavor
I first discovered microgreens years ago at a bustling farmer's market in Portland. One bite of those peppery radish sprouts atop creamy avocado toast, and I was hooked.
These tender seedlings—harvested shortly after germination—pack astonishing flavor and nutrition into miniature greens. They're fast, delicious, and ridiculously easy to grow.
Why Should You Grow Microgreens?
If flavor alone doesn't convince, consider nutrition. Research from the University of Maryland found some microgreens contain up to 40 times the nutrients per gram than their mature counterparts.
"Microgreens like kale, arugula, and cilantro often provide significantly higher levels of vitamins C, E, and K."
Plus, they're ready for harvest in about 7-21 days, rewarding the impatient gardener in us all. Fast, fresh, fabulous—what's not to love?
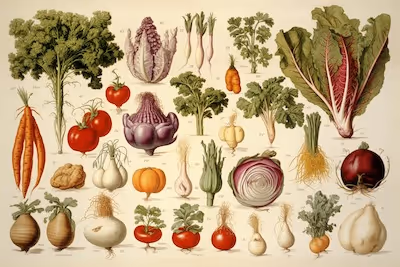
Selecting Your Microgreen Seeds
Pick tasty, easy-to-grow varieties first. My favorites include:
- Radish: Spicy crunch in just 7 days.
- Sunflower: Nutty, hearty sprouts perfect in sandwiches.
- Pea Shoots: Sweet, juicy snaps of green delight.
- Broccoli: Mild, nutritious, and versatile.
Always purchase high-quality, untreated seeds specifically labeled for microgreens to ensure food safety and vigorous growth.
Gathering Your Materials
Forget expensive gear—microgreens flourish with simple supplies.
- Shallow trays with drainage holes (reuse takeout containers or repurpose seedling trays).
- Quality organic potting mix or coconut coir.
- A spray bottle for gentle watering.
- Scissors for easy harvesting.
- A sunny windowsill or grow lights.
This minimal setup keeps costs low and success rates high.
Step-by-Step Growing Guide
1. Prep Your Tray & Soil
Fill trays evenly with about an inch (2.5 cm) of moist potting mix. Gently firm soil without compacting it.
2. Spread Those Seeds
Scatter seeds evenly, dense but not overcrowded. Radish seeds should nearly touch; sunflower or pea seeds need breathing space.
3. Water & Cover
Mist seeds liberally, then cover trays with another tray or plastic wrap to keep humidity high until germination.
4. Let There Be Light!
As soon as shoots emerge (usually within 2-4 days), remove covers and place trays under bright, indirect sunlight or grow lights 12-16 hours daily.
5. Maintain Moisture
Mist daily, avoiding soaking or overwatering to prevent rot. Visual cues guide your watering—dry soil surface means more misting, damp means you're good.
6. Harvest & Enjoy
Once seedlings reach 1-3 inches (2.5-7.5 cm), snip with scissors just above the soil line. Rinse gently, then savor immediately.
Common Issues & Smart Solutions
Mold Concerns?
Mold occasionally visits overly humid trays. If detected, reduce moisture, boost air circulation, and consider sprinkling cinnamon powder—its natural antifungal properties saved many of my trays.
Uneven Germination?
Check your seed freshness, sow more evenly next time, or adjust lighting levels to promote consistent growth.
Storing and Enjoying Your Harvest
Store microgreens refrigerated, loosely wrapped in a damp paper towel inside airtight containers; they'll stay crisp up to a week.
But truthfully, mine rarely linger that long. Toss them fresh on salads, sandwiches, tacos, or garnish soups and stir-frys to savor their fleeting vibrancy.
"Growing microgreens at home reconnects us directly to our food's vibrant energy: short-lived, nutrient-rich, and blissfully abundant."
Want smarter plant choices? 🪴
Frequently Asked Questions About Growing Microgreens
What kind of soil works best for Microgreens?
Microgreens thrive best in a fine-textured, sterile growing medium designed specifically for seed-starting. Look for blends that offer excellent water retention without becoming waterlogged, such as a mix of peat moss, vermiculite, and coconut coir.
How often should Microgreens be watered?
Watering frequency depends on environmental conditions. However, Microgreens typically need watering once or twice daily. Use gentle misting or bottom watering to maintain slightly moist—not saturated—soil.
Which lighting conditions benefit Microgreens most?
Microgreens grow vigorously under bright, indirect sunlight or artificial grow lights. Provide at least 12 to 16 hours of light per day to ensure sturdy growth and vibrant color.
How quickly can Microgreens be harvested?
Microgreens reach a harvestable stage fairly quickly; 7 to 14 days after planting is typical. Harvest when they have formed their first true leaves for optimal flavor and nutritional content.
What temperature range encourages ideal Microgreens growth?
Microgreens prefer steady indoor temperatures between 65°F and 75°F (18°C to 24°C). These conditions encourage prompt germination and healthy, uniform growth.
Can Microgreens regrow after harvesting?
Most Microgreens varieties do not regrow effectively after harvesting due to their short growth cycle and small root systems. For continuous harvests, plant successive cycles every week or two.
Are fertilizers necessary for Microgreens?
Given their brief growing cycle, Microgreens typically don't require supplemental fertilizers. However, if desired, add a mild organic liquid fertilizer diluted to a quarter-strength solution after the seedlings sprout.
What are common issues with Microgreens and how to prevent them?
The primary issues include mold growth, damping-off disease, and uneven germination. Avoid these issues by ensuring adequate air circulation, preventing overwatering, and using sterilized growing trays and medium. Maintain consistent indoor temperatures and humidity levels below 60% to protect seedlings.
Microgreens offer a quick payoff for anyone craving fresh flavor and nutrition. With a handful of seeds, a sunny spot, and a little patience, you can grow a harvest that packs a punch. These tiny greens thrive with simple care—regular moisture, good light, and sharp scissors for harvesting. If you’re short on space or want to grow food indoors year-round, microgreens fit the bill. They’re proof that big results can come from small beginnings.
Pro Tips: Maximizing Microgreen Yields and Nutritional Quality
Perfecting Seed Density for Optimal Growth
- Broccoli & Arugula: Sow 1 oz (28 g) per standard 10"x20" (25x50 cm) tray for ideal aeration and nutrient availability.
- Radish & Sunflower: Increase density slightly to 2 oz (57 g) per tray to encourage uniform stem development.
Fine-Tuning Light Exposure for Nutrient Enhancement
University studies show LED lights with balanced red and blue spectra boost vitamin C and chlorophyll in microgreens by up to 30% compared to natural window light alone. Position lights 2-4 in (5-10 cm) above tray tops for vibrant, nutrient-rich greens.
Optimizing Harvest Time for Peak Nutrition
- Broccoli & Kale: Harvest at 9-12 days post-sowing; peak sulforaphane and antioxidant concentrations occur during this window.
- Cilantro & Basil: Wait 14-20 days; essential oils and flavor compounds fully develop, enhancing culinary benefits.
Improving Self-Sufficiency Through Succession Planting
Maintain steady supply and dietary variety by planting new trays every 3-5 days. Cycle between fast-growing varieties (e.g., radish, mustard, broccoli) and slower crops (e.g., basil, cilantro, amaranth).
Organic Mold Prevention Techniques
- Cinnamon dusting: Apply thin cinnamon layer over seeds post-sowing; antifungal properties help prevent mold outbreaks.
- Chamomile tea spray: Mist trays lightly every 2-3 days to inhibit fungal growth naturally.
Economics of Microgreen Growing
Data shows homegrown microgreens reduce grocery spending significantly, costing growers approximately $0.50 (€0.47) per ounce compared to retail prices from $2.00–$4.00 (€1.88–€3.75) per ounce. One tray yields roughly 8-12 oz (227–340 g) of premium greens.


Find out which plants will thrive in your garden!
Answer a few fun questions and get custom plant recommendations perfect for your space. Let’s grow something amazing together!

start your season